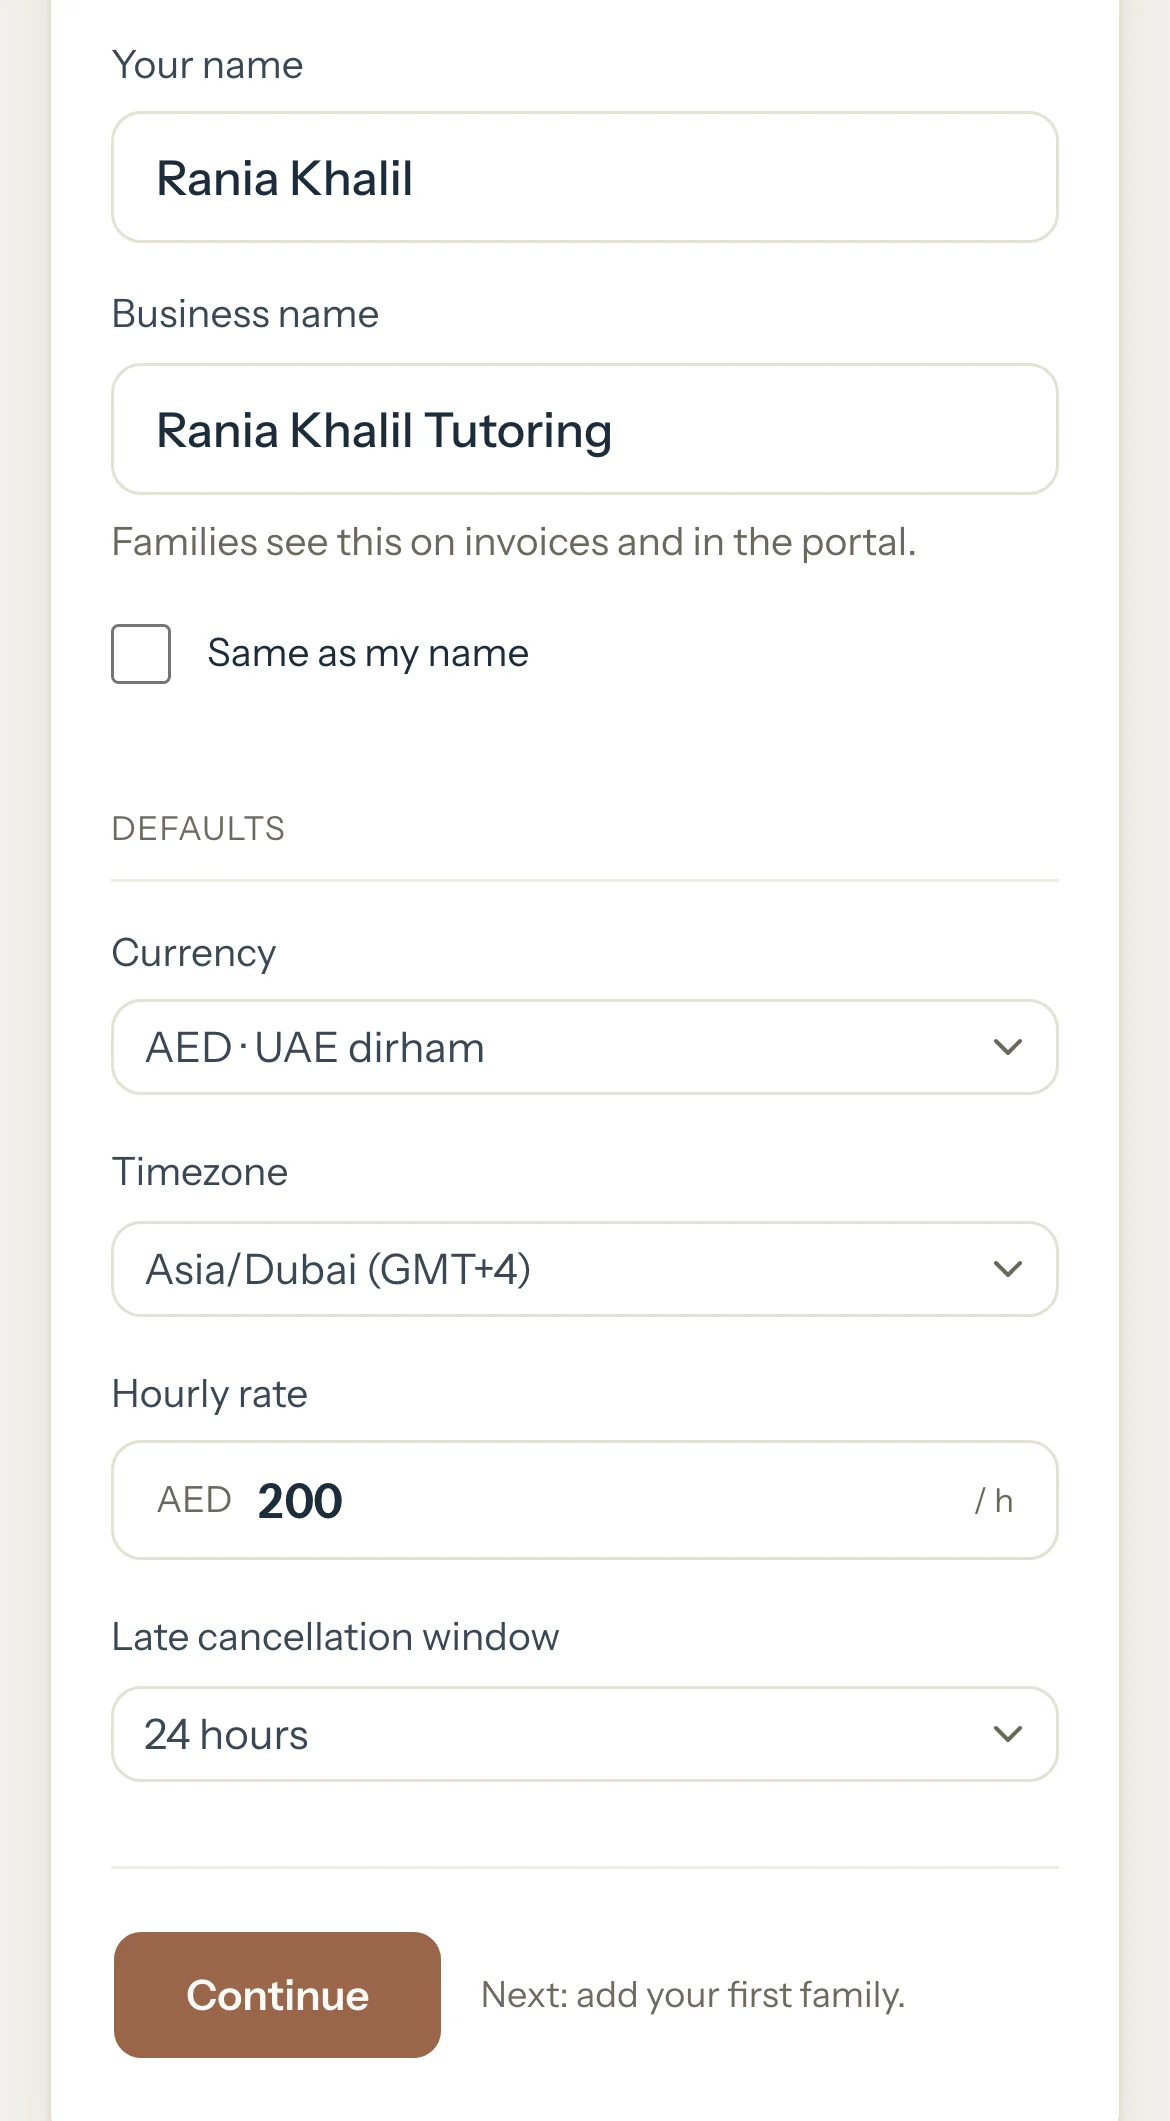
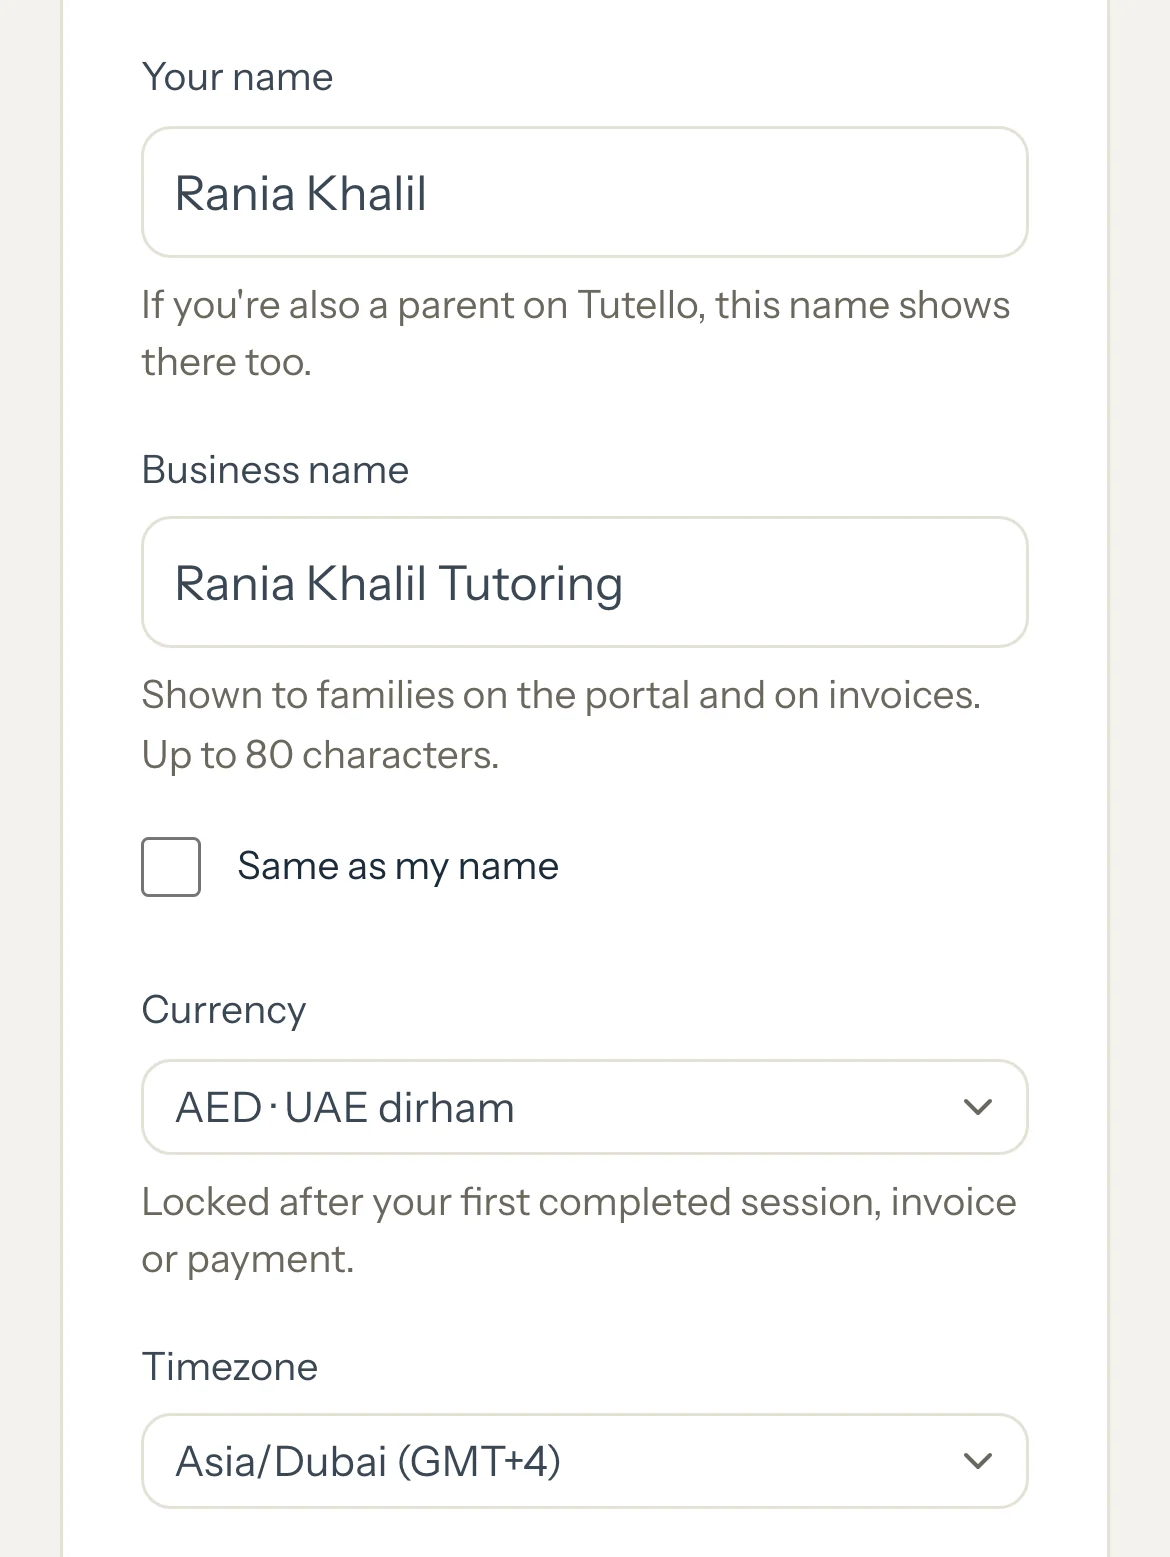
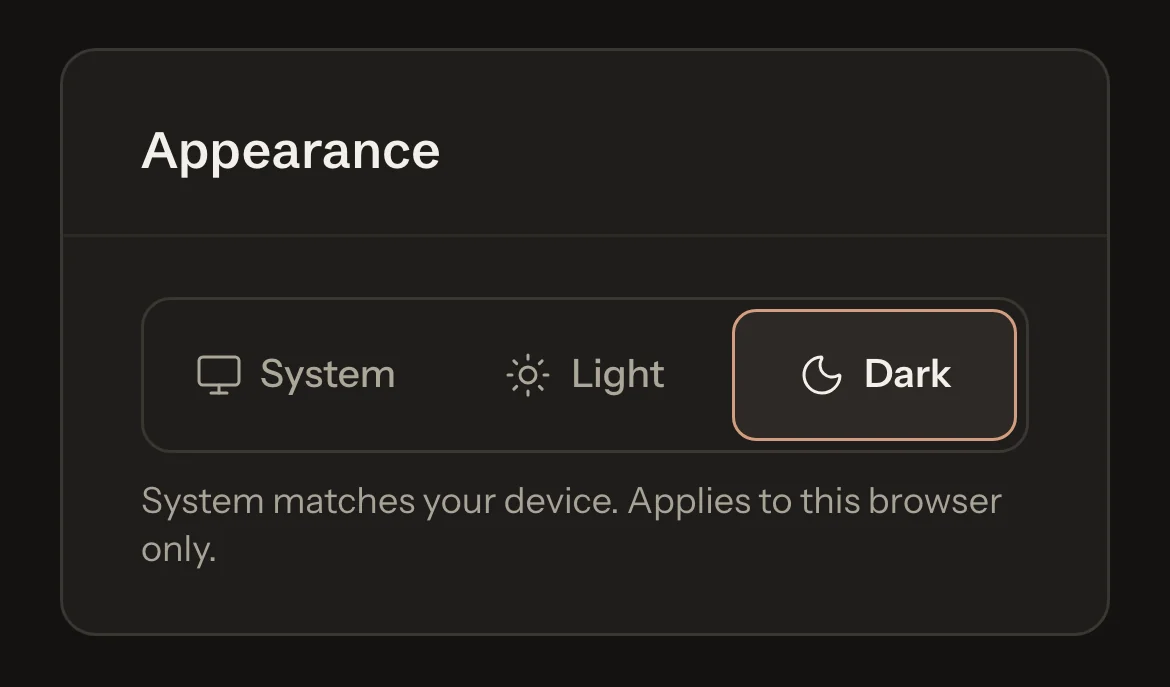
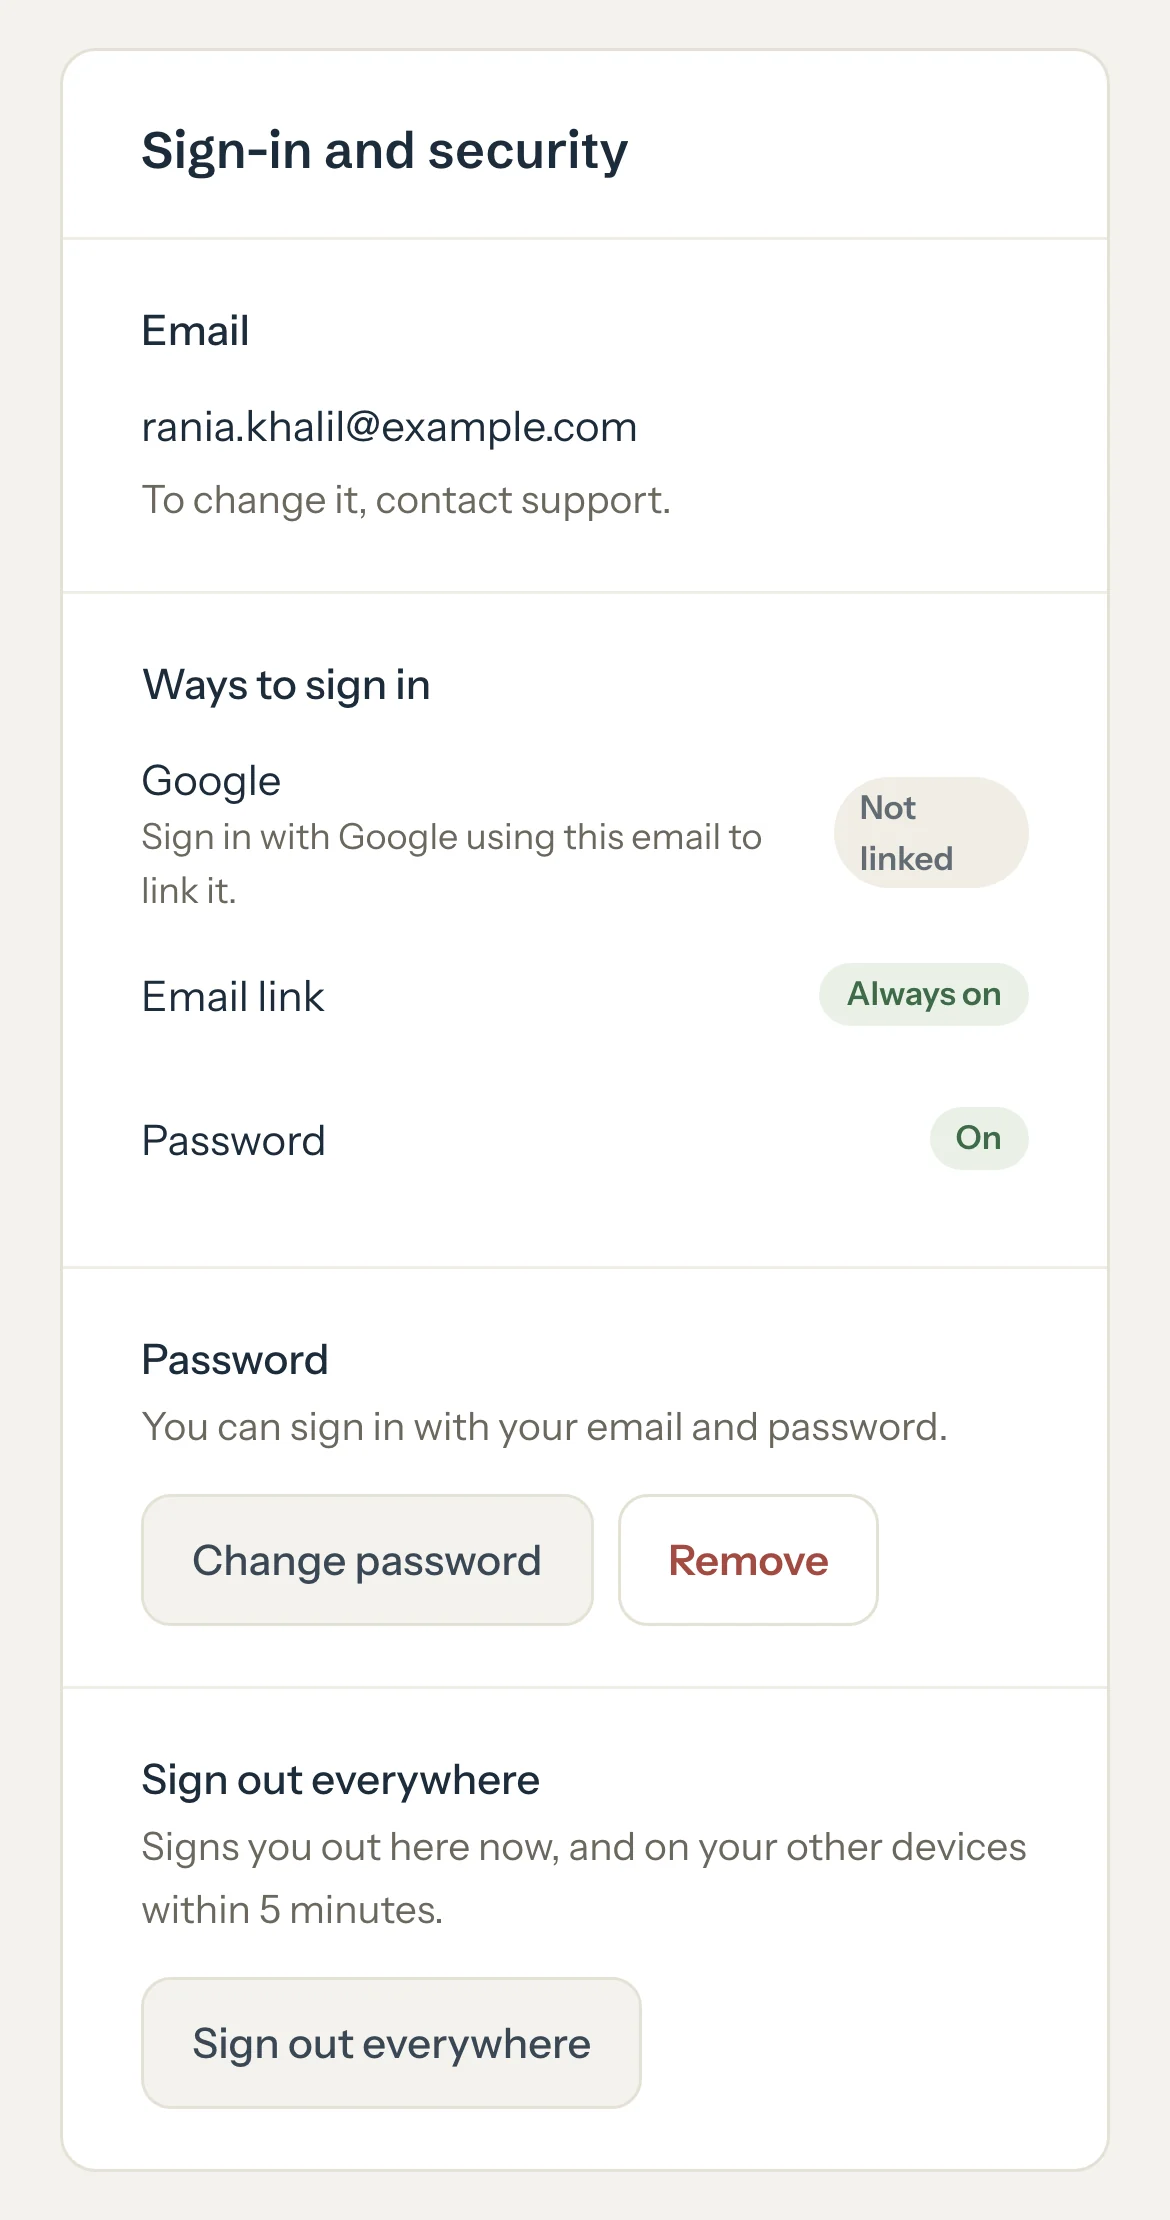
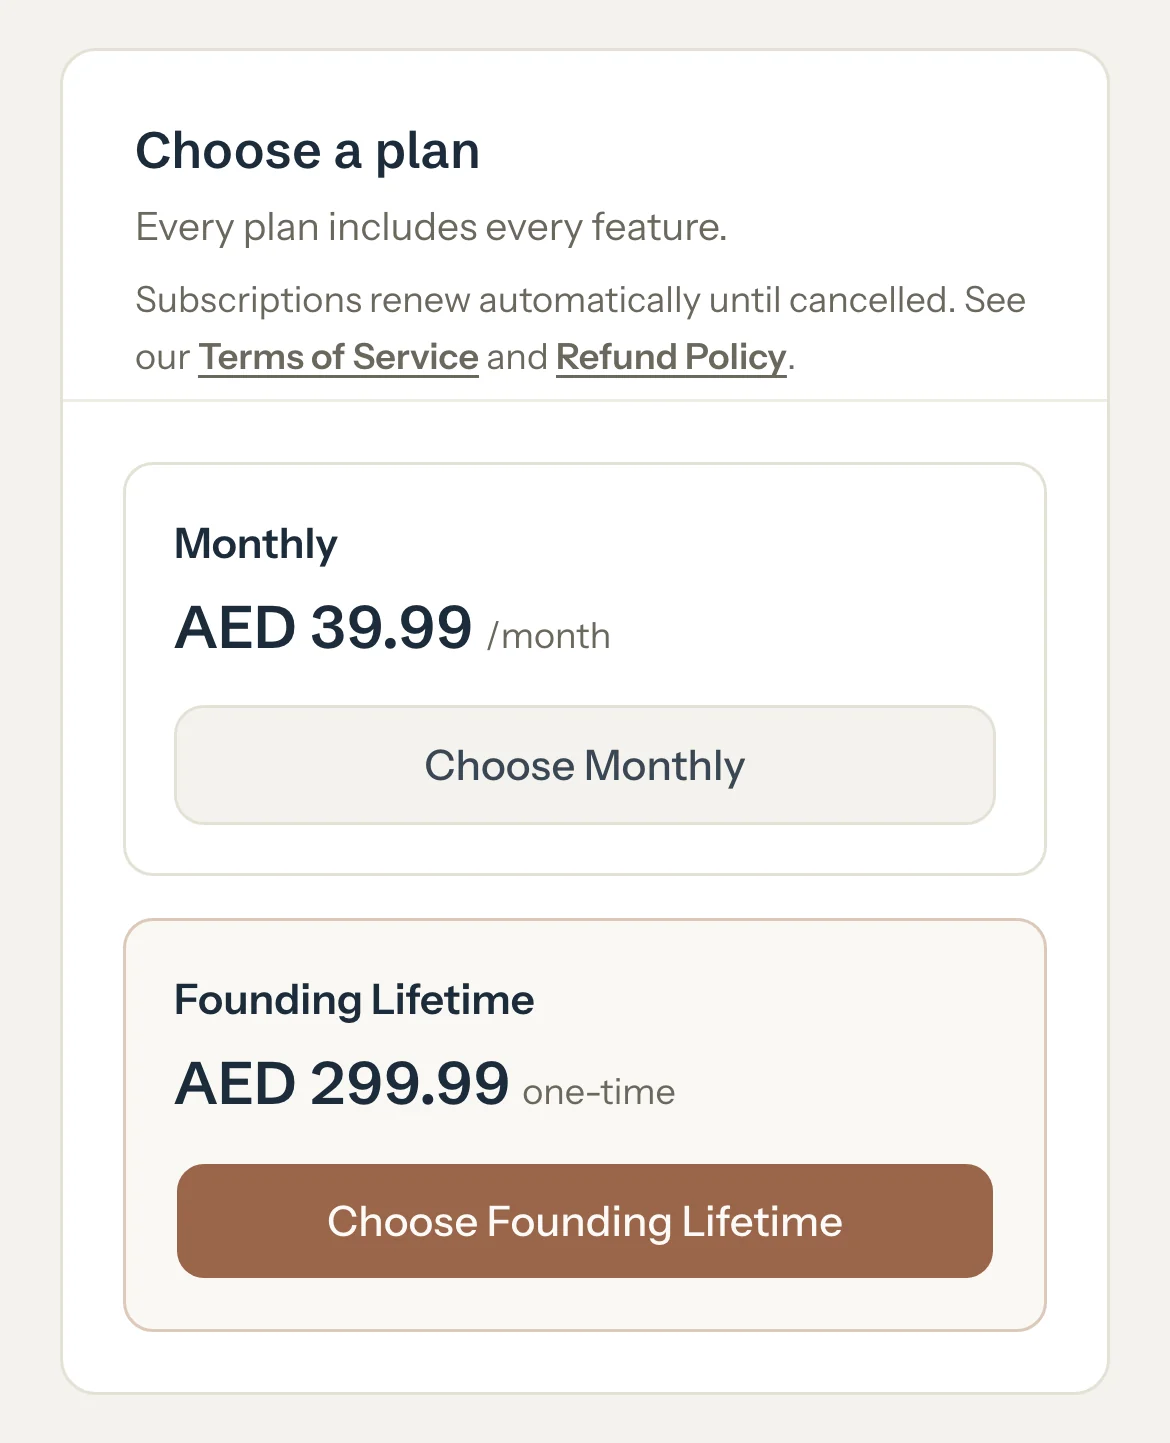
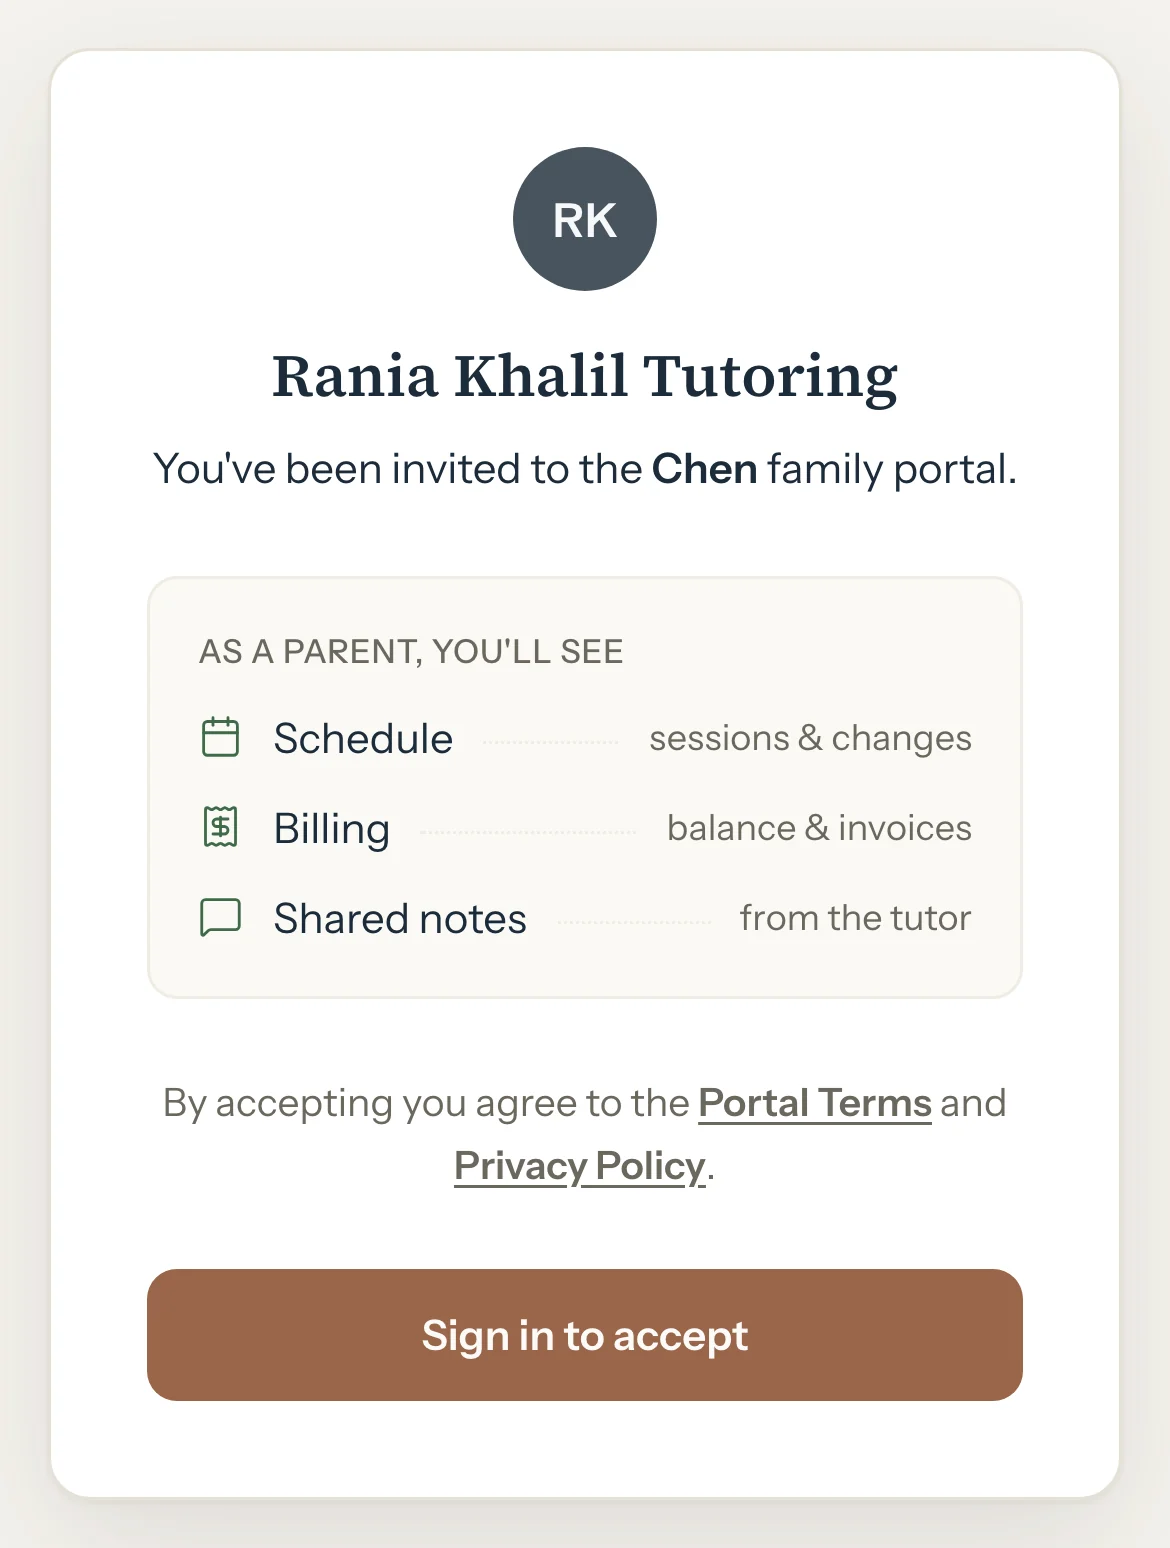
The four set-up steps after you sign up: your business, your first family, their weekly sessions and an invite.
For tutors. Updated October 2026.
Where to find it
It opens by itself after you sign up.
Left it halfway? Press Finish setup on the banner to carry on.
Steps
Check Your name. Leave Same as my name ticked, or untick it and type your Business name.
Families see the business name on invoices and in their portal.
Choose your Currency and Timezone, type your Hourly rate, choose your Late cancellation window, then press Continue.
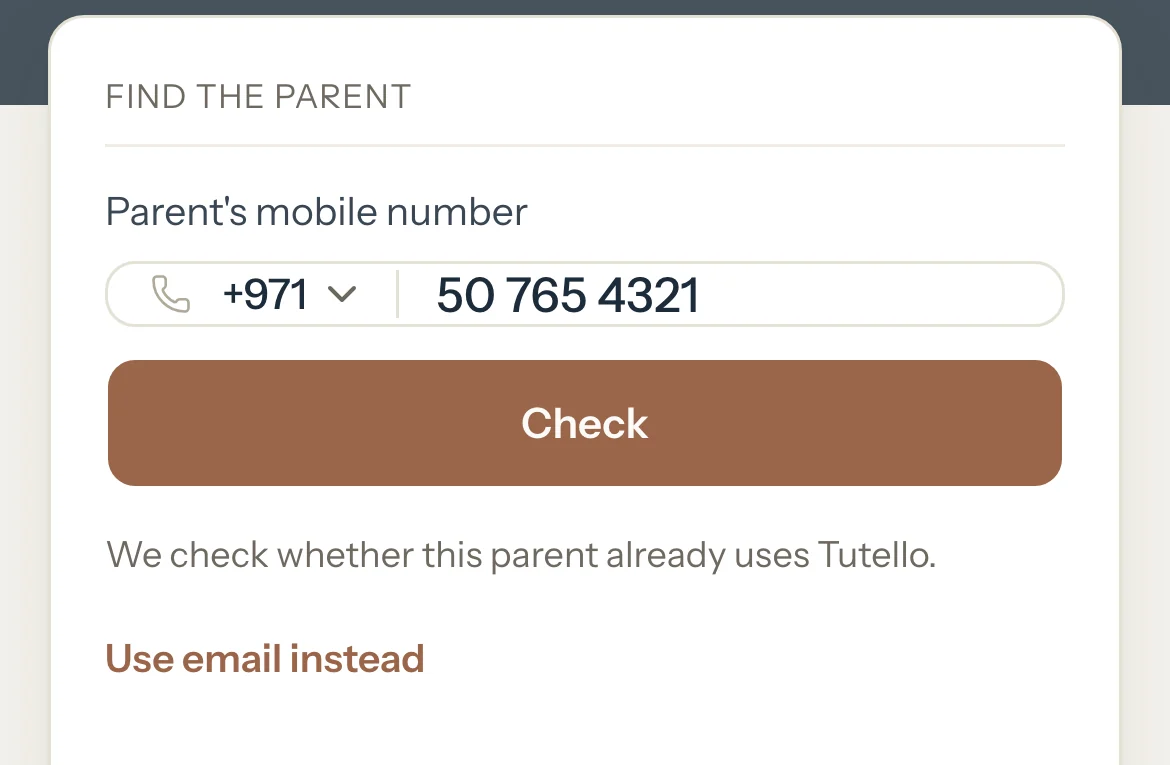
Type the parent's mobile in Parent's mobile number and press Check. To use their email instead, press Use email instead.
When the parent isn't on Tutello yet, the family form opens with the number filled in.
Type the Family name and the Contact name, and the Email if you have it.
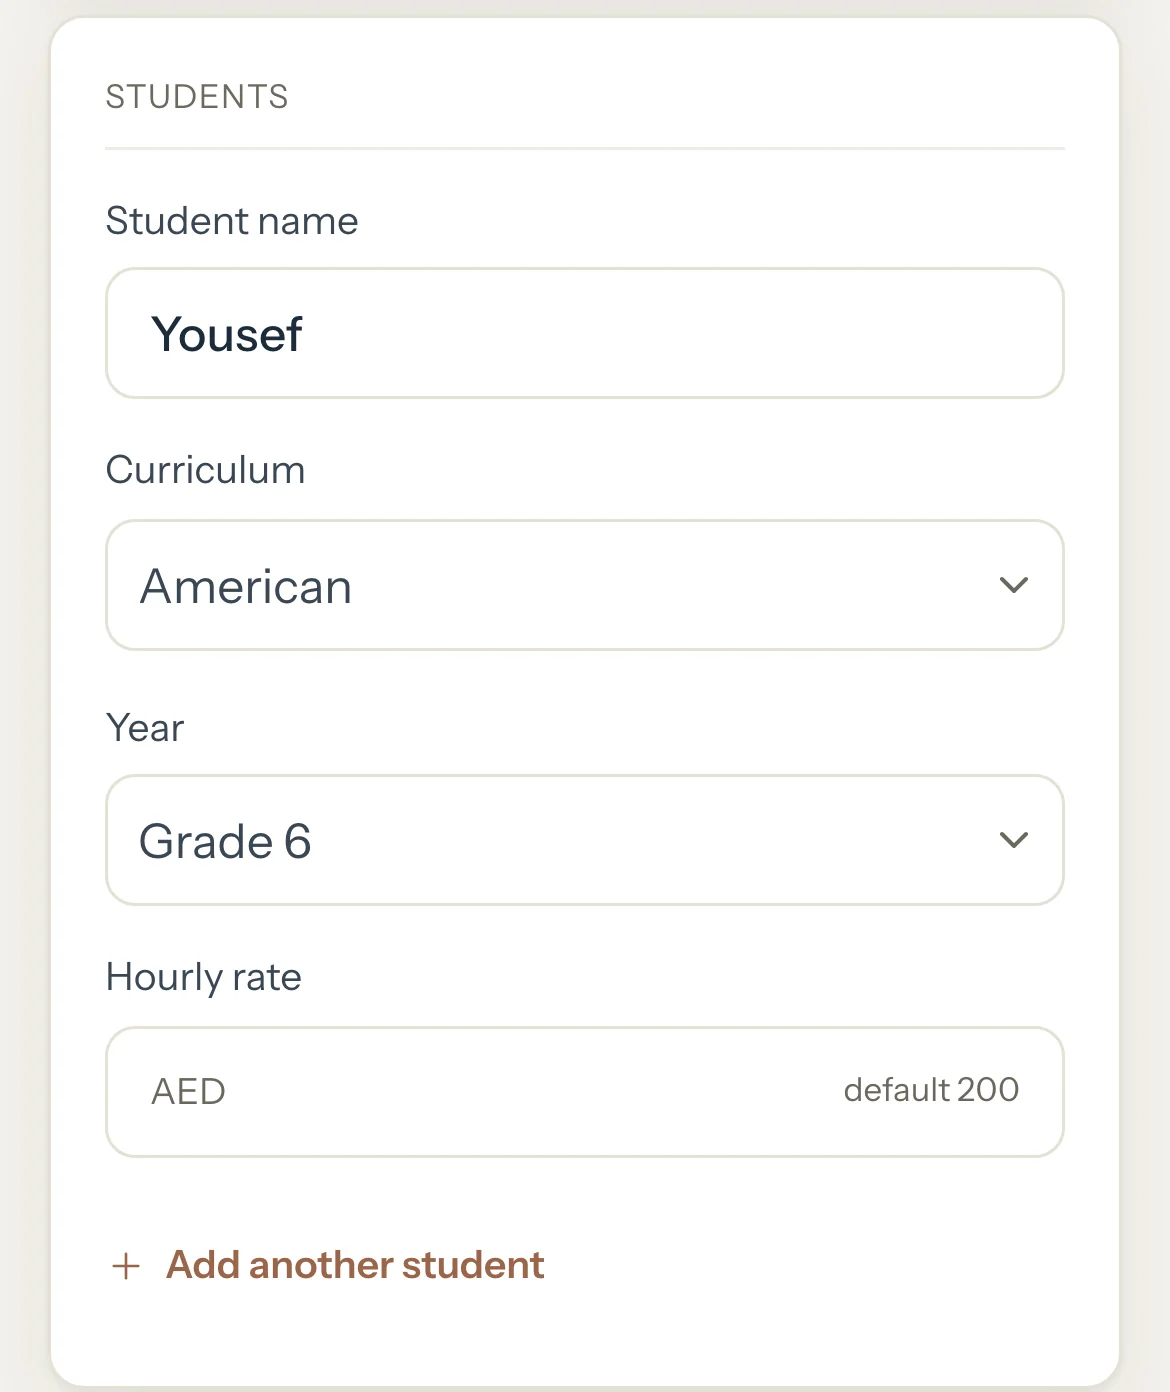
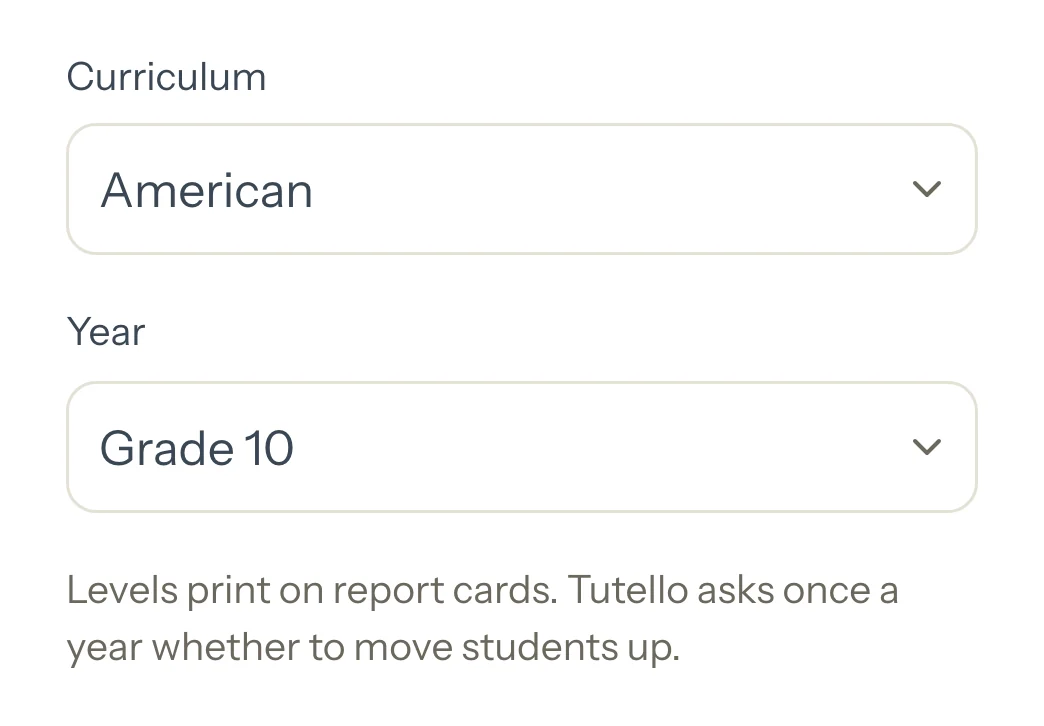
Under Students, type each child's Student name and choose their Curriculum and Year, then press Continue. Leave Hourly rate empty to use your own rate.
For each child, choose the Day, Start time and Duration of their weekly session and press Add to schedule, then Continue.
Each session repeats every week, and the next four weeks fill your calendar.
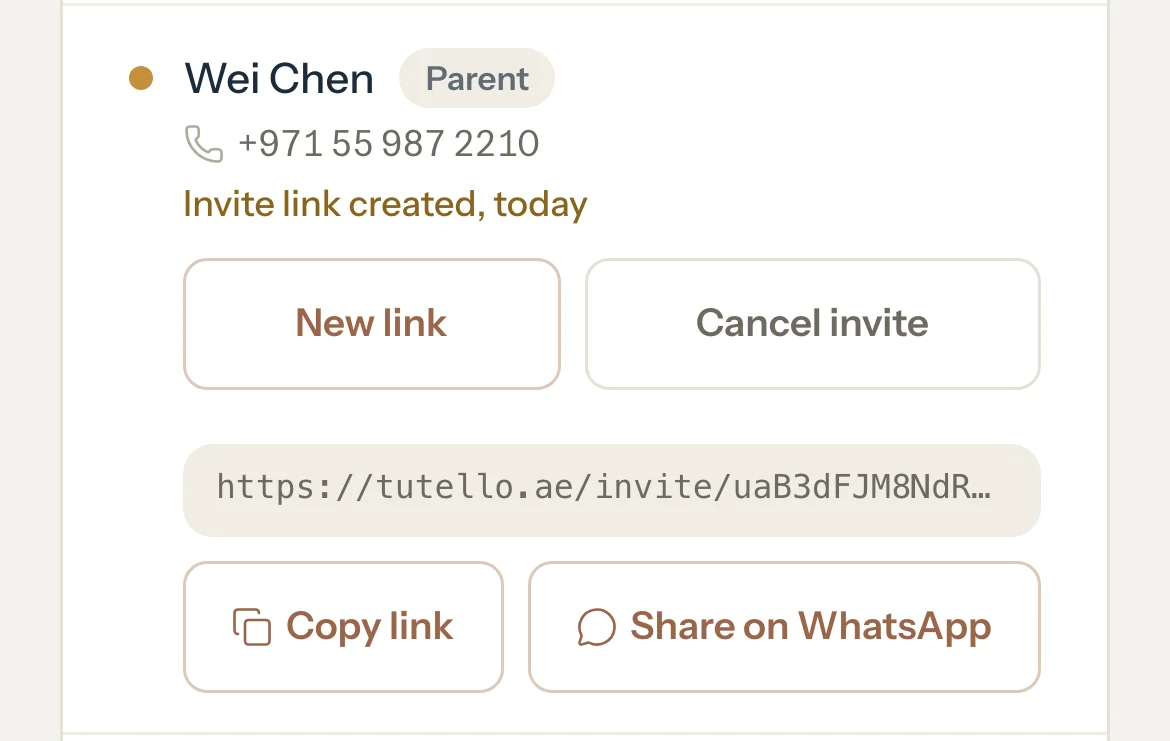
Optional: Invite the parent: check the Parent email and press Send invite, or leave it empty and press Create invite link.
Send the link with Share on WhatsApp, then press Continue.
Press Go to dashboard.
Good to know
Every step after the first has Skip for now or Skip. Skipping the family ends the set-up there; add families later from Families.
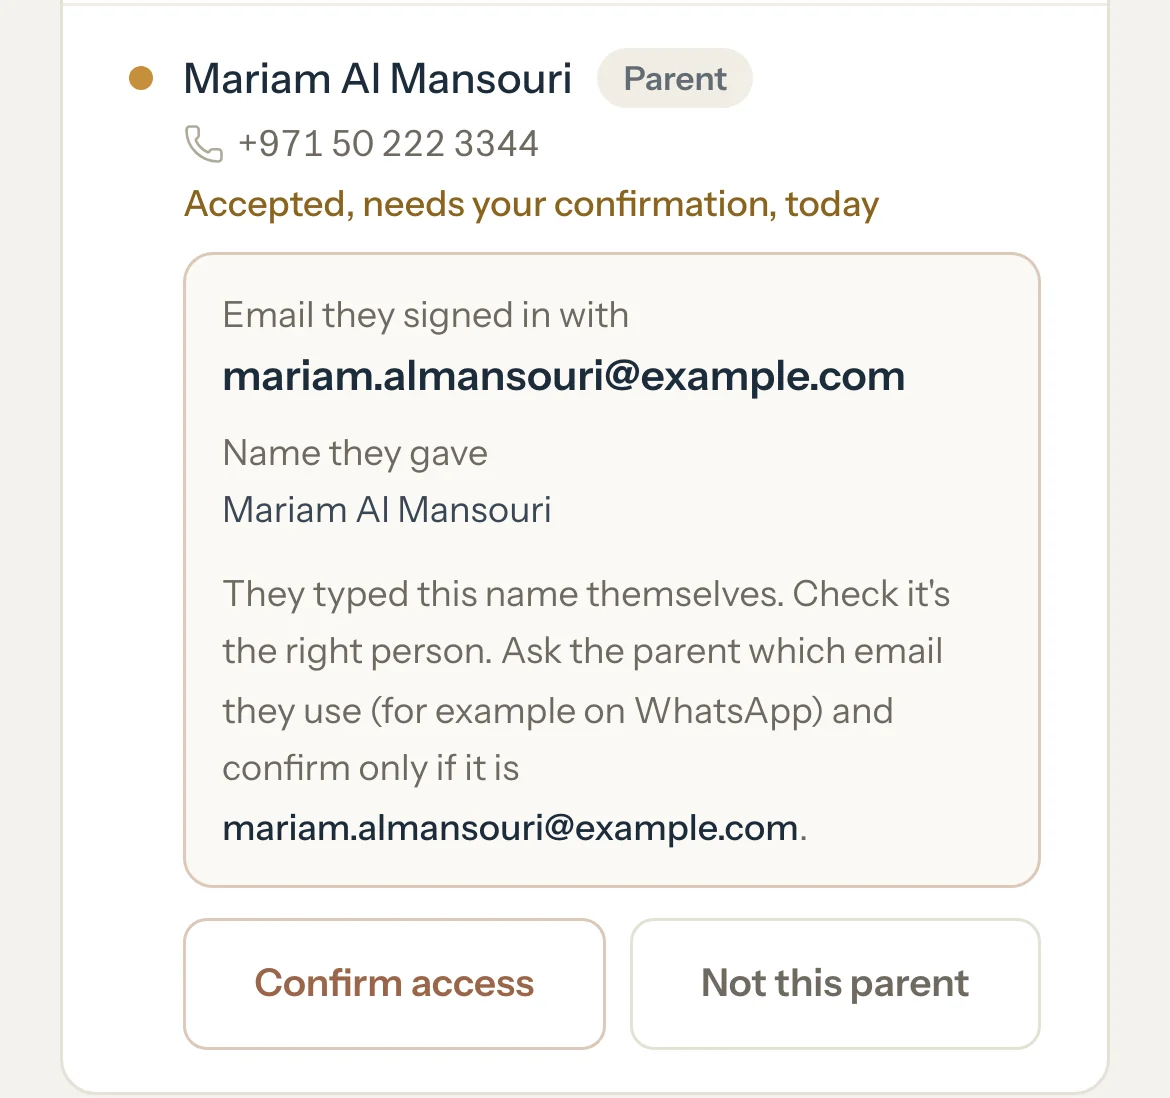
When the parent already uses Tutello, give the family a name and press Add family. Your invite waits in their portal, and the set-up ends there because the family has no children yet: add them from the family's page. A parent found by their mobile waits for you to confirm it's them once they accept.
Nothing to pay here: your free trial started when you signed up.
The set-up runs once. Change the same details later in Settings: Profile for your name, business name, currency and timezone, Preferences for your rate and cancellation window.
If something's not right
"Enter an hourly rate above 0."
Type what you charge for an hour. You can give a student their own rate later: see Set your hourly rates.
"Enter a business name, or tick Same as my name."
Type the name families should see, or tick Same as my name to use yours.
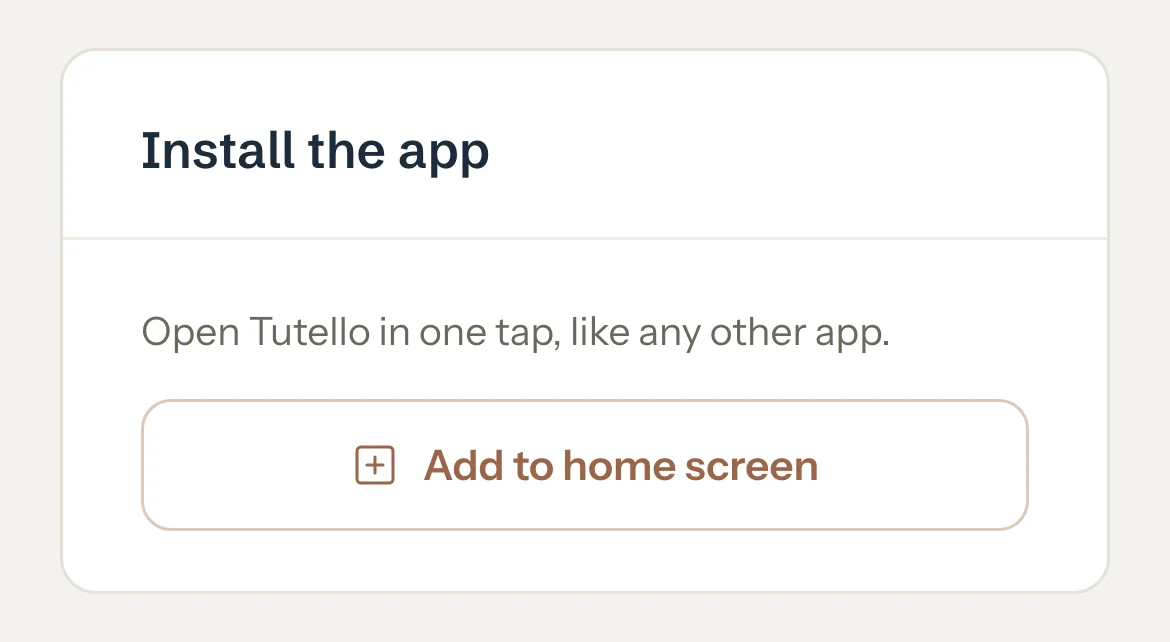
Open Tutello in one tap from your phone's home screen, like any other app, on an iPhone or an Android phone.
For tutors. Updated October 2026.
Where to find it
Settings, then Preferences, then Install the app
On a phone, Settings opens from your initials.
Steps
Open Tutello in your phone's own browser: Safari on an iPhone, Chrome on Android.
Go to Settings, then Preferences, and find Install the app.
Press Add to home screen.
On Android, your browser asks to install Tutello, or the steps for your browser open. On an iPhone, the steps for Safari open.
If the browser asked, confirm it. If the steps opened, follow them: on an iPhone, tap the Share button, choose Add to Home Screen (scroll down if you don't see it), then tap Add. On Android, open the browser menu, tap Add to Home screen or Install app, then confirm.
Open Tutello from its new icon.
It opens on its own, without the browser around it.
Good to know
On an iPhone, if you opened Tutello from a link in WhatsApp or another app, open the page in Safari first.
On a computer, Chrome and Edge can install Tutello too, and Safari on a Mac can add it to the Dock. The same button shows the steps for your browser.
Once it's added, the card says Tutello is installed on this device.
If something's not right
"Your browser does not support installing apps. Try Chrome or Safari."
Open tutello.ae in Safari on an iPhone, or in Chrome on Android, sign in, and press Add to home screen there.
There's no Add to home screen button.
Tutello is already installed on this device, or you opened it from its icon.
Start with the parent's mobile or email, then one form takes the family's details and every child.
For tutors. Updated October 2026.
Where to find it
Families, then Add family
Steps
In Parent's mobile number, type the mobile of the parent you deal with. To look them up by email instead, press Use email instead.
Press Check.
When the parent isn't on Tutello yet, the family form opens with that number already in Parent 1. If the number is on Tutello but can't be invited by it, the same form opens and says the parent is already on Tutello: fill it in, then invite them from the family's page. When they already use Tutello, it says so instead: see Good to know.
In Family name, type the family's name, for example Al Mansouri.
Fill in Parent 1's First name. Last name and Email are optional, and the mobile is already there.
Optional: Add a second parent or guardian. On a phone, press Add a second parent first.
Under Students, type the first child's name and choose their Curriculum and Year. Leave Hourly rate empty to use your default rate.
Optional: Press Add another student for each brother or sister.
Press Add family.
The family's page opens, ready for its first session.
Good to know
When the parent already uses Tutello, the check shows their name and nothing else about their account. Give the family a name or leave it empty, then press Add family. The parent finds your invite in their portal.
A parent found by their mobile is not let in on their own: once they accept, you confirm it's the right parent on the family's page. A parent found by email gets access as soon as they accept.
Saving the family sends nothing to the parents. To give them the portal, invite them from the family's page, under Portal access.
A student row left empty is skipped, so you can add the children later with Add student on the family's page.
Two children with the same name get a warning first. Press Add both anyway if they really are two.
If something's not right
"You already have this family."
That mobile or email is already on one of your families. Open it with the link under the message instead of adding it again.
"Too many checks. Try again later."
You can still add the family now: press Add the family's details and fill in the form.
"Couldn't check this parent. Try again."
Press Check again. If it keeps failing, press Add the family's details to carry on without the check.
Change a family's contact details, add a second parent or guardian, or update their address and your notes.
For tutors. Updated October 2026.
Where to find it
Families, then the family, then Edit
Steps
Open the family's page and press Edit.
Edit family opens with their details.
Optional: Change the Family name, Contact name, Contact email or Contact phone.
Optional: To add a second parent or guardian, fill in Name, Email and Phone under Second parent (optional).
Optional: Change the Address, and add Location notes such as the building or where to park.
Optional: Add Family notes for yourself.
Press Save changes.
The family's page shows the new details.
Good to know
When you leave a phone box, Tutello looks the number up. If the parent already uses Tutello, it says they'll use that same account when they accept your invite. If one of your other families has the number, it names that family, with Open to see it.
Once saved, a second parent has their own row under Portal access on the family's page, so you can invite them too.
Each parent needs their own mobile: the two can't share one number.
To remove the second parent, clear their name, email and phone, then save.
Family notes are only for you. Parents never see them.
If something's not right
"Same mobile as the first parent. Leave it blank or enter the second parent's own mobile."
Type the second parent's own mobile, or leave the box empty.
"Enter the second parent's name, or clear their email and phone."
Type their name, or clear both boxes if there's no second parent.
"Enter a phone number with a country code, e.g. +971 50 123 4567"
Start the number with + and the country code.
"This family changed. Reload and try again."
It was changed on another device or tab. Reload the page and make your change again.
What the family owes, its students and sessions, how it's invoiced and who can open its portal, on one page.
For tutors. Updated October 2026.
Where to find it
Families, then the family's card
Search families finds one by name. A family you've stopped teaching is under Deactivated.
Steps
Open Families and tap the family's card.
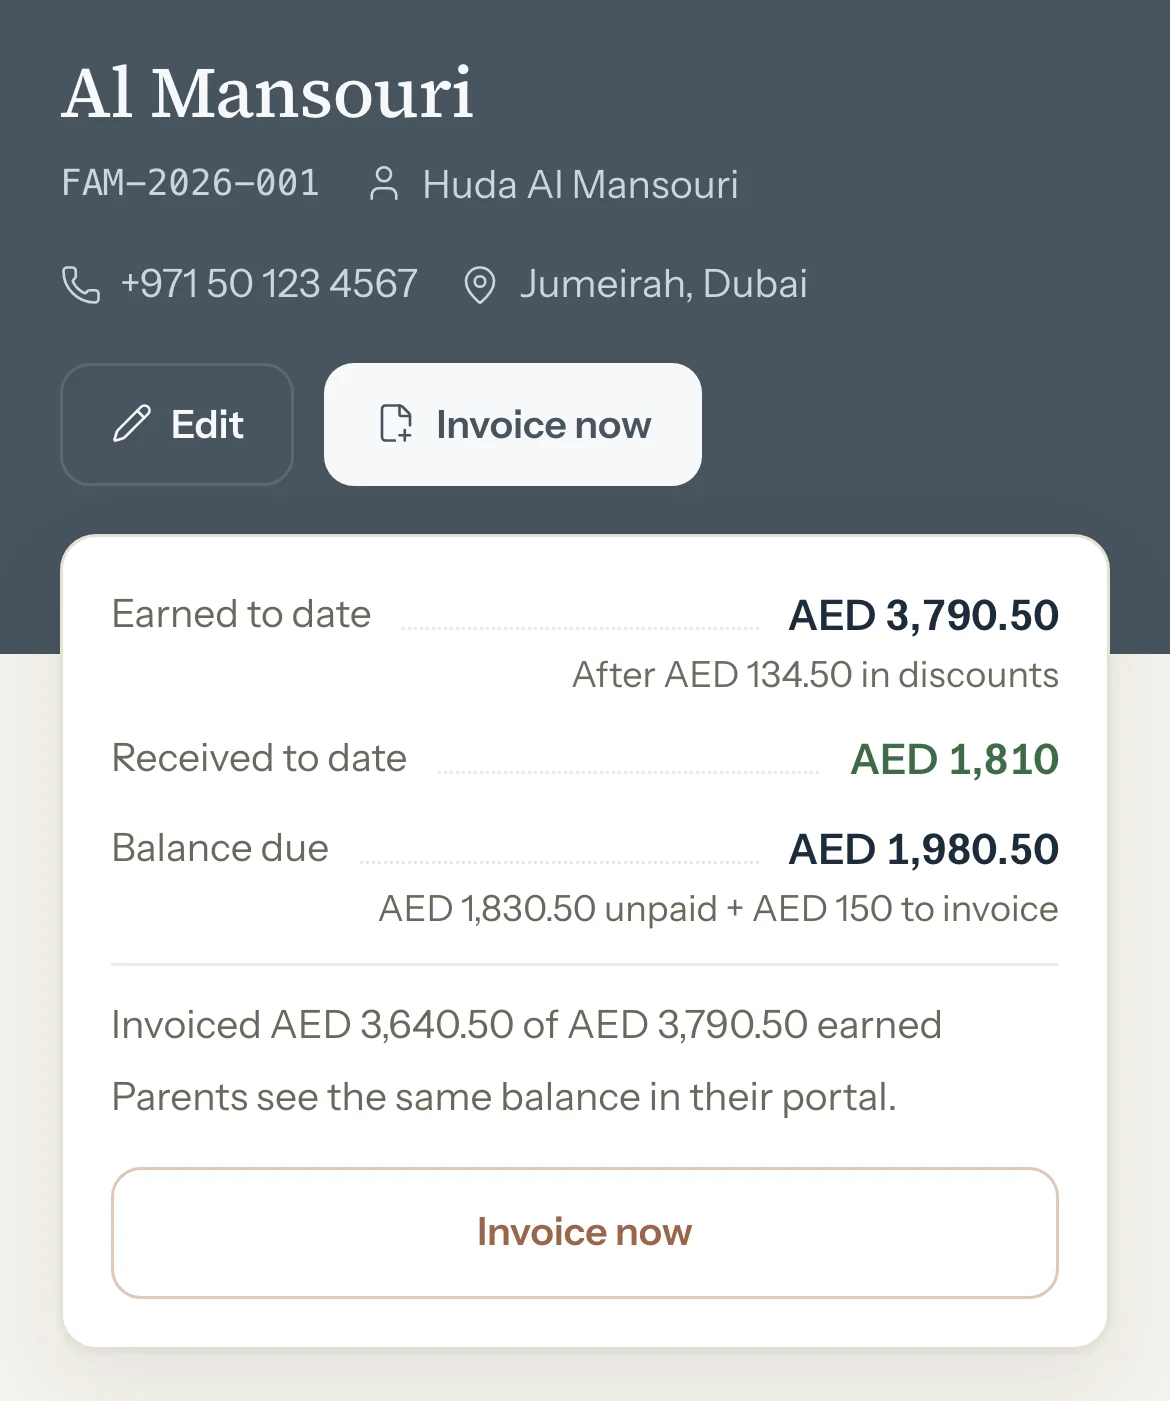
To see what they owe, read Balance due. The line under it splits it into what's unpaid on invoices and what's still to invoice.
To invoice them, press Invoice now.
A new invoice opens with the family chosen and their sessions listed.
To add a child, press Add student. To see every session, press View all beside Recent sessions.
To change how they're invoiced, or who can open their portal, use Invoice settings and Portal access on the same page.
To change contact details, the second parent or your notes, press Edit, then Save changes.
Optional: Press Stats for their figures over 30 days, 3 months or 12 months.
An example
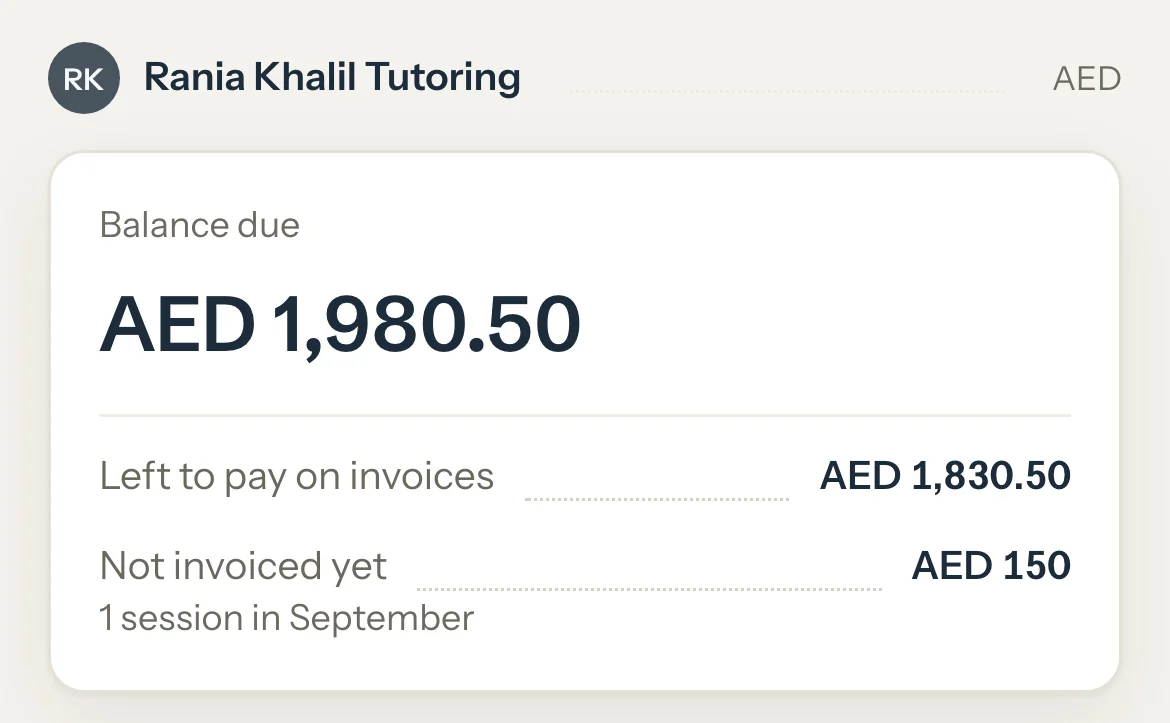
The Al Mansouri family's page on 30 September:
Earned to date, after AED 134.50 in discounts
AED 3,790.50
Received to date
AED 1,810
Balance due
AED 1,980.50
"AED 1,830.50 unpaid + AED 150 to invoice"
What parents see
Parents with portal access see the same Balance due as you, split into Left to pay on invoices and Not invoiced yet. When someone has access, the page says so under the figures.
Good to know
When a family has paid more than it owes, Balance due becomes Credit balance.
Notes are private: they never show in the family's portal.
When you stop teaching a family, deactivate it: open Edit and press Deactivate family. Its students are deactivated too and their weekly schedules stop, so the upcoming sessions those schedules added are removed, unless they're on an invoice. Past sessions, invoices and payments stay. Reactivate family brings it back; then reactivate each student from their own page.
A deactivated family is read-only and has no Invoice now, but what it owes still counts on your dashboard.
Stop a family when its sessions end: its history stays, and you can bring it back later.
For tutors. Updated October 2026.
Where to find it
Families, then the family, then Edit
Steps
Open the family's page and press Edit.
Press Deactivate family.
Deactivate Al Mansouri? says its students are deactivated too, and that history and invoices are kept.
Press Deactivate.
The family moves from Active to Deactivated in your families list.
To bring it back, open it under Deactivated, press Edit, then Reactivate family.
Its students stay deactivated until you reactivate them.
Optional: Open each student who's coming back and press Reactivate student under Details.
Good to know
Each student's weekly schedules stop, and the upcoming sessions those schedules added are removed, unless they're on an invoice. A session you added on its own stays until you delete it.
Past sessions, invoices and payments stay, and what the family still owes counts on your dashboard.
While it's deactivated, the family has no Invoice now and takes no new students.
To record money from a deactivated family, open one of its invoices and press Record payment there. A new payment's From list shows active families only.
A family can't be deleted. Deactivated, its records stay, in the app and in your data download.
Reactivating doesn't restart weekly schedules: add them again with Repeat weekly.
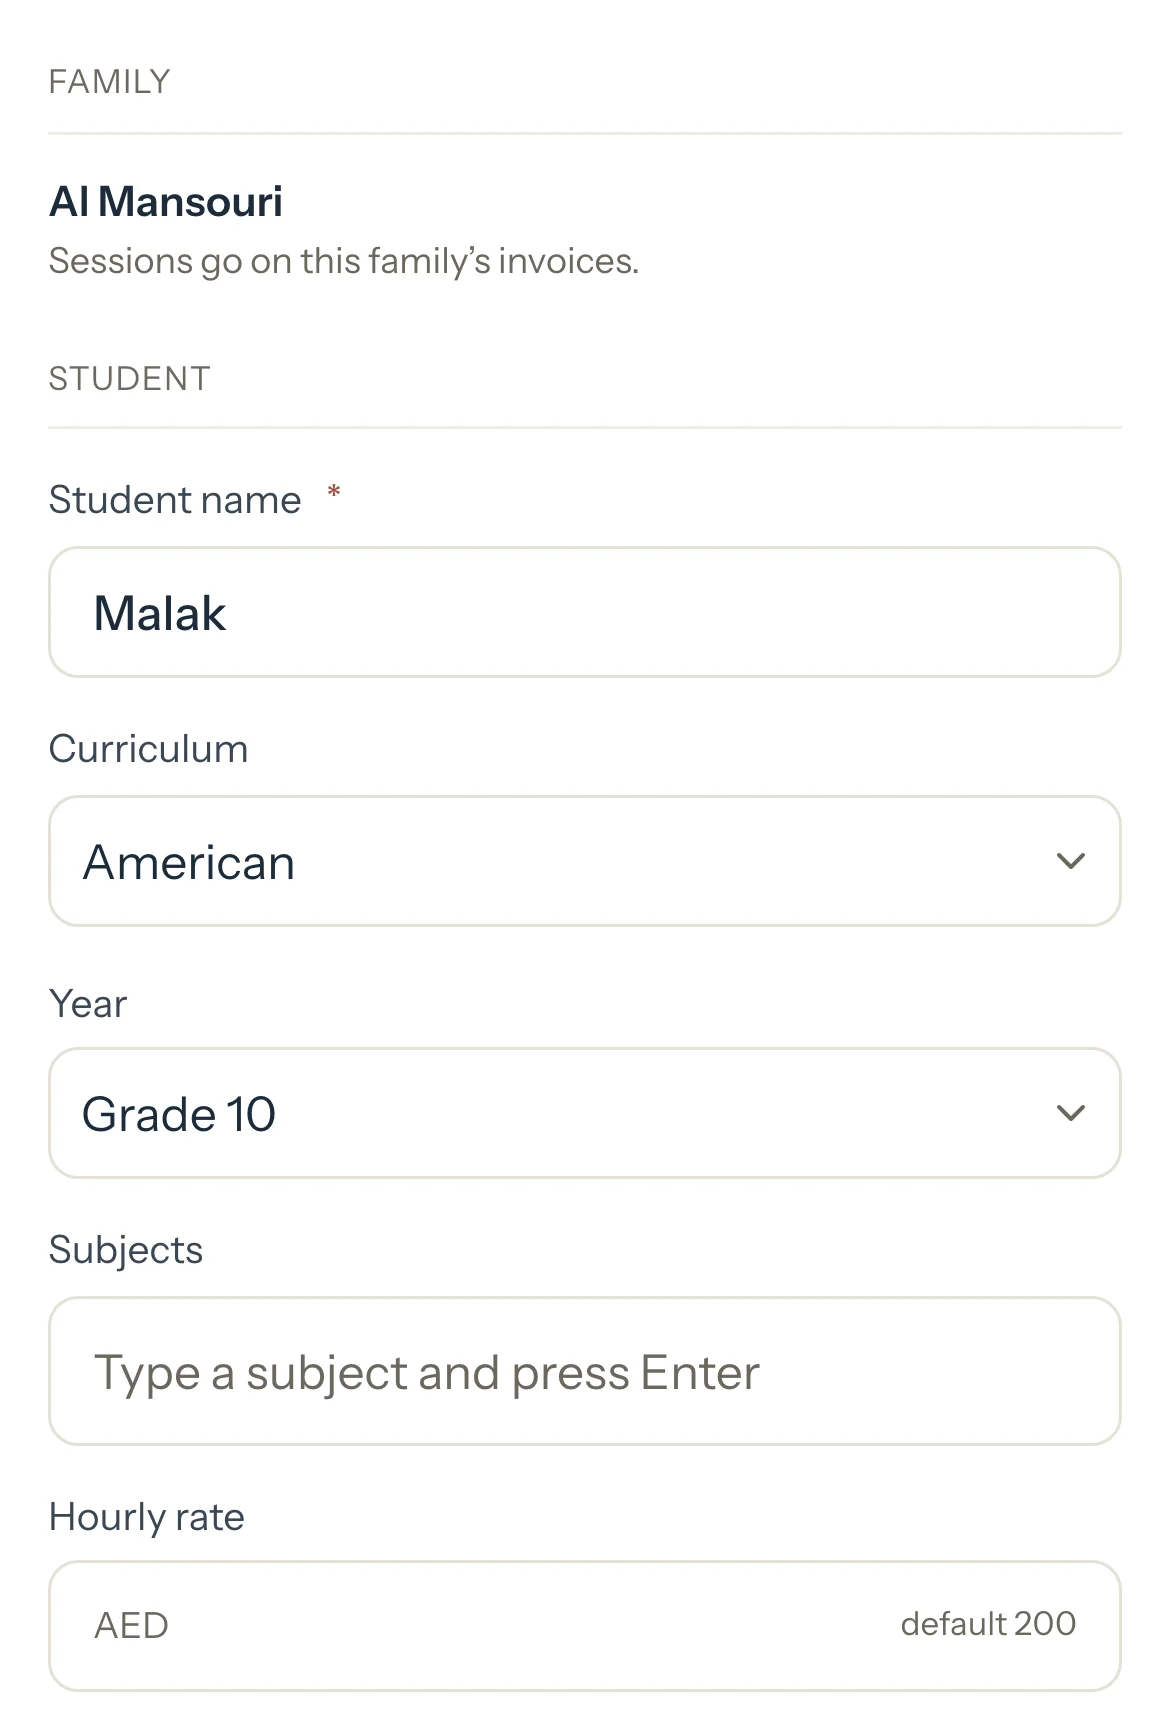
Optional: In Subjects, type a subject and press Enter. Add as many as you need.
Optional: Type an Hourly rate for this student. Left empty, their sessions use your default rate.
Optional: Add Notes for yourself.
Press Add student.
The student is added and the page you were on stays open.
Good to know
Independent is your choice: there's no age or checkbox. Use it for an adult who pays for their own sessions, and they get their own invoices. See Bill an adult learner directly.
Each session copies the student's rate when you add it. Changing the rate later never changes sessions already on your calendar.
If the family already has a student with that name, you're asked first. Press Add anyway if they really are two.
Students lists everyone. Show only Family or Independent students, search by name, or keep one subject.
An independent student has no family: they get their own invoices, their own balance and their own portal access.
For tutors. Updated October 2026.
Where to find it
Students, then Add student, then Independent student
Steps
Add them with Add student and choose Independent student. Their Phone is needed.
On Students they read Billed directly.
Add their sessions on the calendar as you would for any student.
To invoice them, press Invoice now on their page, or choose them under Independent students in a new invoice.
When they pay, press Record payment and choose them in From, under Independent students.
Optional: To let them see their sessions and what they owe, invite them from Portal access on their page.
An example
Dana Haddad takes IELTS English at AED 250 an hour. She paid INV-2026-0005 in cash, and her session of 16 September isn't invoiced yet. Her page shows:
Earned to date
AED 500
Received to date
AED 250
Balance due
AED 250
Good to know
Independent is your choice: there's no age or checkbox. A family's child can be billed directly too.
Their invoices are addressed to them and list each session with its date, length, rate and amount, or just one total.
They can have their own Invoice settings, so their invoices can be made automatically.
In their portal they see their own sessions, the notes you share and their own money, never anyone else's.
To move them into a family later, use Move to a family… on their page once their past sessions are invoiced and no draft invoice is waiting for them. Past invoices stay with them.
Make a student independent so they're invoiced directly, or move an independent student into a family, and why a move can wait.
For tutors. Updated October 2026.
Where to find it
Students, then the student, then Details
Steps
Open the student's page and press Details.
Billing reads On the family's invoices or Billed directly.
For a student in a family, press Make independent….
Type their Phone if you're asked for it, then press Make independent.
From now on they get their own invoices. You make them yourself until you switch them to automatic.
For an independent student, press Move to a family… instead.
Choose the family, then press Move to family.
From now on their sessions go on that family's invoices.
Good to know
Only what comes next moves. Past sessions and invoices stay where they are, so a family still invoices the past sessions of a child who became independent. Upcoming sessions, weekly ones included, go to the student or to the new family.
Making a student independent never has to wait.
Moving an independent student into a family waits until their past sessions are invoiced, and no draft invoice is open for them. The dialog says which before you press anything.
Once a student is independent, their family's portal no longer lists their upcoming sessions. To give them their own access, invite them from Portal access on their page.
Portal access a student had while independent stays for their past invoices after a move into a family. Press Remove access on their page if they shouldn't see those any more.
Report cards published before a move reach nobody after it: neither the old family nor the new one sees them. Make a new card for the student where they are now.
If something's not right
"Dana has 1 past session to invoice, including any not marked yet. Invoice or waive it first."
Invoice those sessions to them first. A past session still marked Scheduled counts too: mark it and invoice it, or if it never happened, cancel it without charge or delete it. For a late cancellation or no-show you won't charge, waive the fee.
"Dana has a draft invoice, INV-2026-0007. Issue or cancel it first."
Open the draft from its number, then issue it or cancel it. Then move the student.
Remove a student added by mistake, or deactivate one who has stopped and keep their history.
For tutors. Updated October 2026.
Where to find it
Students, then the student, then Details
On a family's page, each student's card has its own remove button.
Steps
Open the student's page and press Details.
Press Remove student.
Tutello checks the student's history first.
With nothing recorded for them yet, Remove Malak? asks you to confirm. Press Remove.
The student is deleted, and you go back to their family's page, or to Students for an independent student.
If they have sessions, invoices, payments, portal access or a report card, they can't be deleted. Press Deactivate instead.
They're deactivated and keep their history.
Optional: To deactivate a student without trying to remove them, press Deactivate student, then Deactivate.
Optional: To bring a student back, open them under Deactivated in Students and press Reactivate student.
Good to know
Remove is for a student added by mistake. Once anything is recorded for them, even one cancelled session, deactivate them instead.
Deactivating stops their weekly schedules, so the upcoming sessions those schedules added are removed, unless they're on an invoice. Past sessions, invoices and payments stay.
A deactivated student can't be given new sessions, and their page says they're deactivated.
Reactivating doesn't restart a weekly schedule: add it again with Repeat weekly.
Your default rate, a student's own rate, and why a new rate never changes sessions already on your calendar.
For tutors. Updated October 2026.
Where to find it
Settings, then Preferences, then Default hourly rate
A student's own rate is on their page under Details, and in their family's Invoice settings.
Steps
In Settings, then Preferences, type your Default hourly rate and press Save changes.
Every student without a rate of their own is charged this.
To give one student their own rate, open their page, go to Details, type an Hourly rate and press Save changes.
Or, on a family's page under Invoice settings, tap a student's rate in Hourly rates, type the new one and press Enter.
Students on your default rate are marked default there.
To put a student back on your default rate, clear their Hourly rate and save.
An example
Your default rate is AED 200 an hour. Sara and Omar have their own rates, and Lucas uses the default:
Sara Al Mansouri, her own rate
AED 220 an hour
Omar Al Mansouri, his own rate
AED 150 an hour
Lucas Chen, your default
AED 200 an hour
Good to know
Each session copies the rate when you add it. A new rate is used for sessions you add from then on; sessions already on your calendar, past or upcoming, keep theirs.
A weekly schedule keeps the rate it was made with, for every session it adds. To use a new rate, open one of its sessions, press Stop weekly schedule, and add it again with Repeat weekly.
Week and month on a computer, one day hour by hour on a phone, and what each colour means.
For tutors. Updated October 2026.
Where to find it
Calendar
Steps
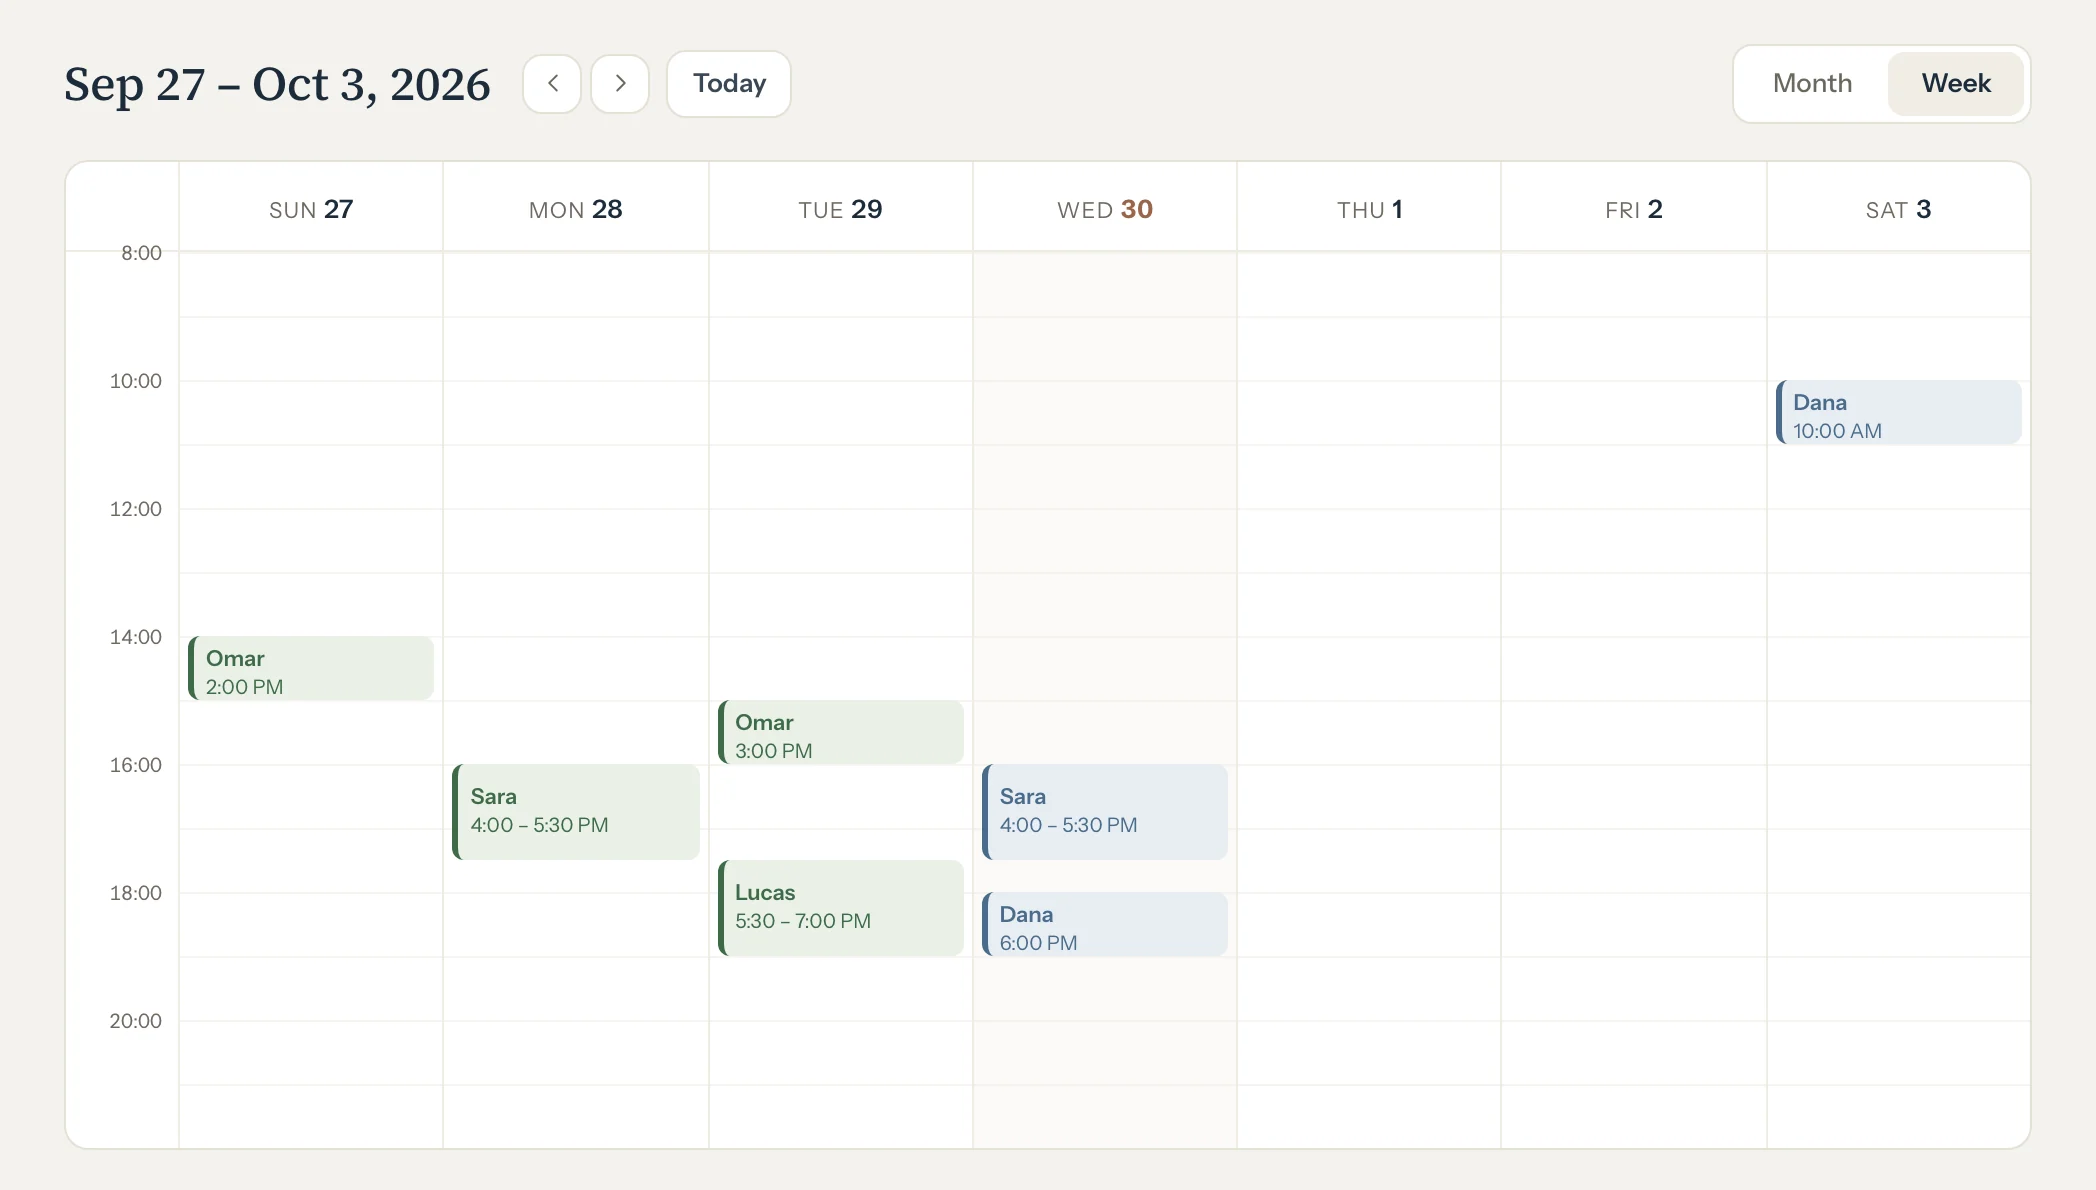
Open Calendar. It opens on Week: on a computer, seven days side by side, hour by hour.
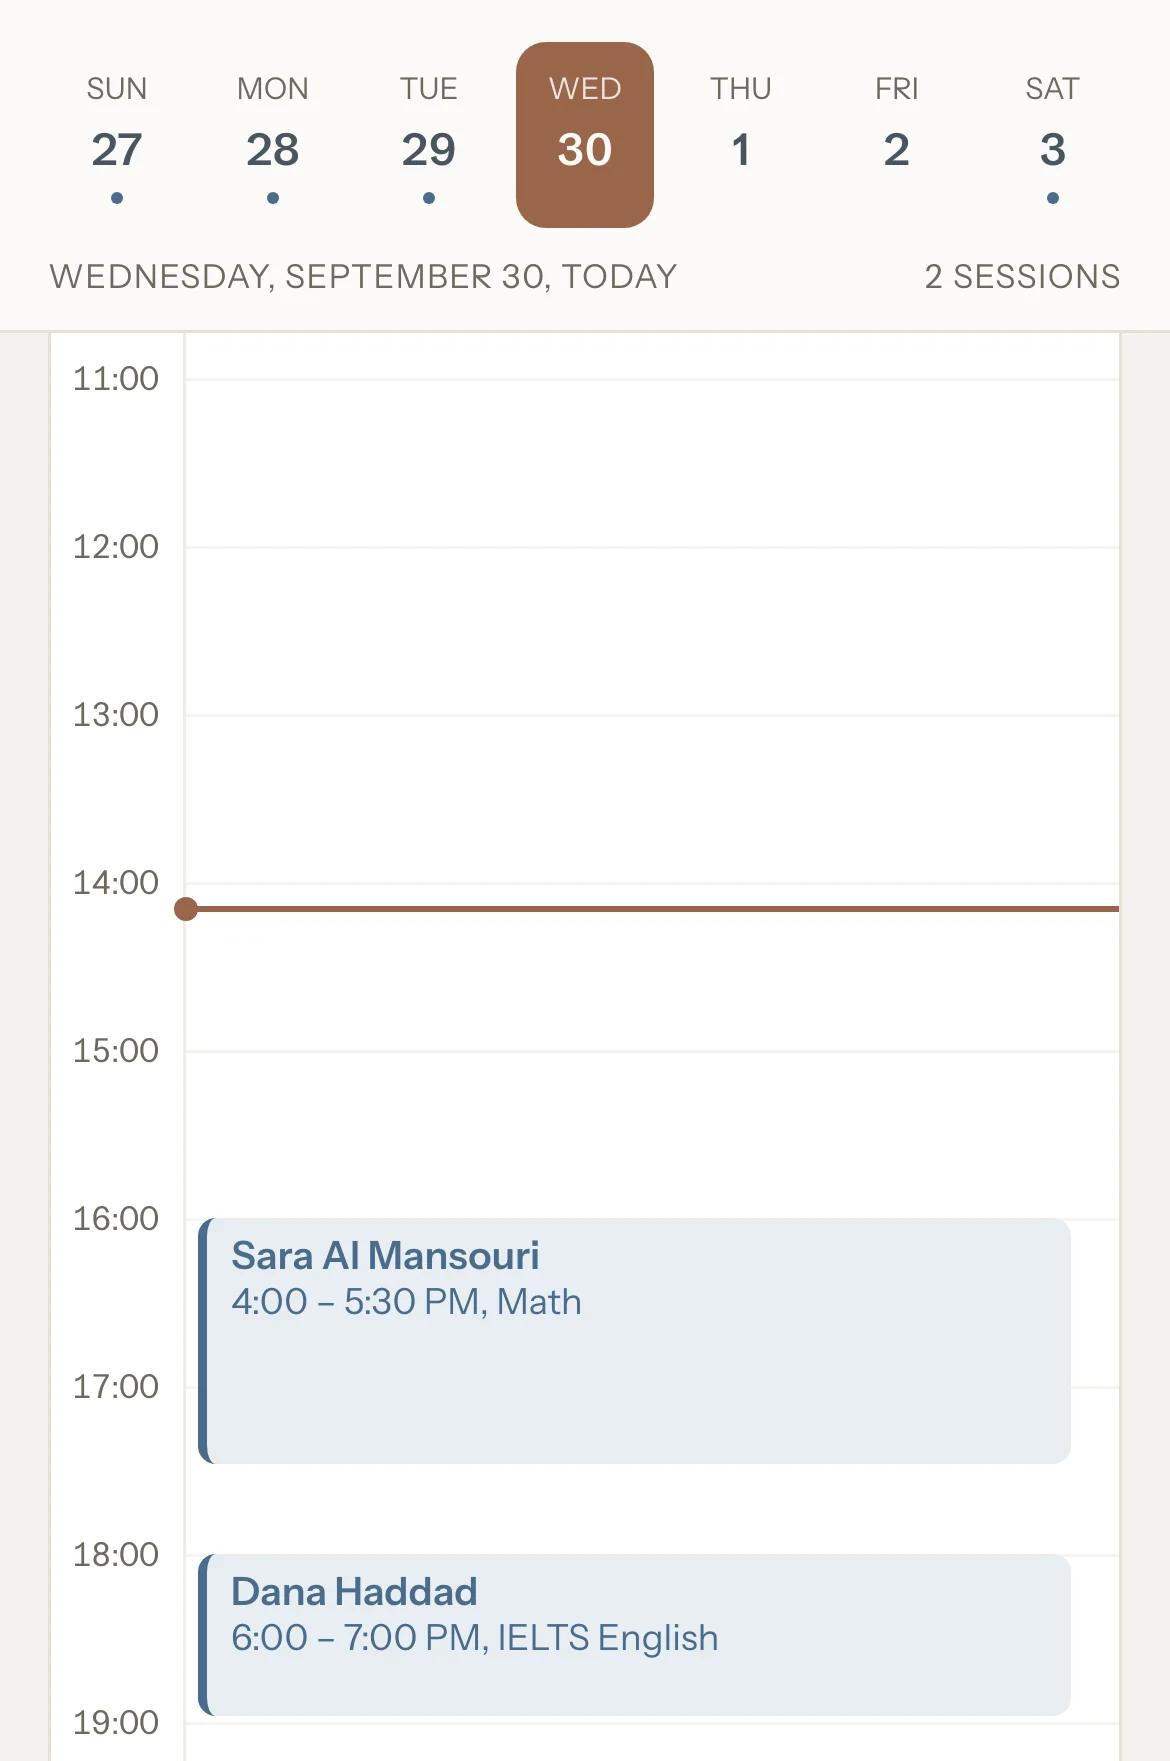
On a phone, Week shows the week's days in a strip and one day under it, hour by hour. Tap a day in the strip, or swipe to the next or previous day.
Press Month to see the whole month. Tap a day to open it in Week.
On a computer each day lists its first two sessions and how many more. On a phone a dot means one session, and a number means more.
Use the arrows to move a week or a month at a time, and Today to come back.
Tap a session to open it.
Its panel opens over the calendar, and fills the screen on a phone.
To add a session at a set time, tap an empty hour.
A new session opens on that day, at that hour.
Good to know
Each session's colour is its status: blue for Scheduled, green for Completed, amber for Cancelled late or No-show, and grey with the name struck through for Cancelled.
Times are in the timezone set in Settings, under Profile.
Weeks start on Sunday.
Opened from a family's or student's sessions, the calendar shows Back to return to that list.
Weekly sessions are added four weeks ahead. A week further out stays empty until then, and says so.
If something's not right
"Weekly sessions are added 4 weeks ahead, so they'll appear here closer to the date."
Switch on Repeat weekly and the next four weeks of sessions stay on your calendar; stop it any time.
For tutors. Updated October 2026.
Where to find it
On a phone
Calendar, then the + button
On a computer
+ New session in the sidebar
On the calendar, tapping an empty hour starts a session at that time.
Steps
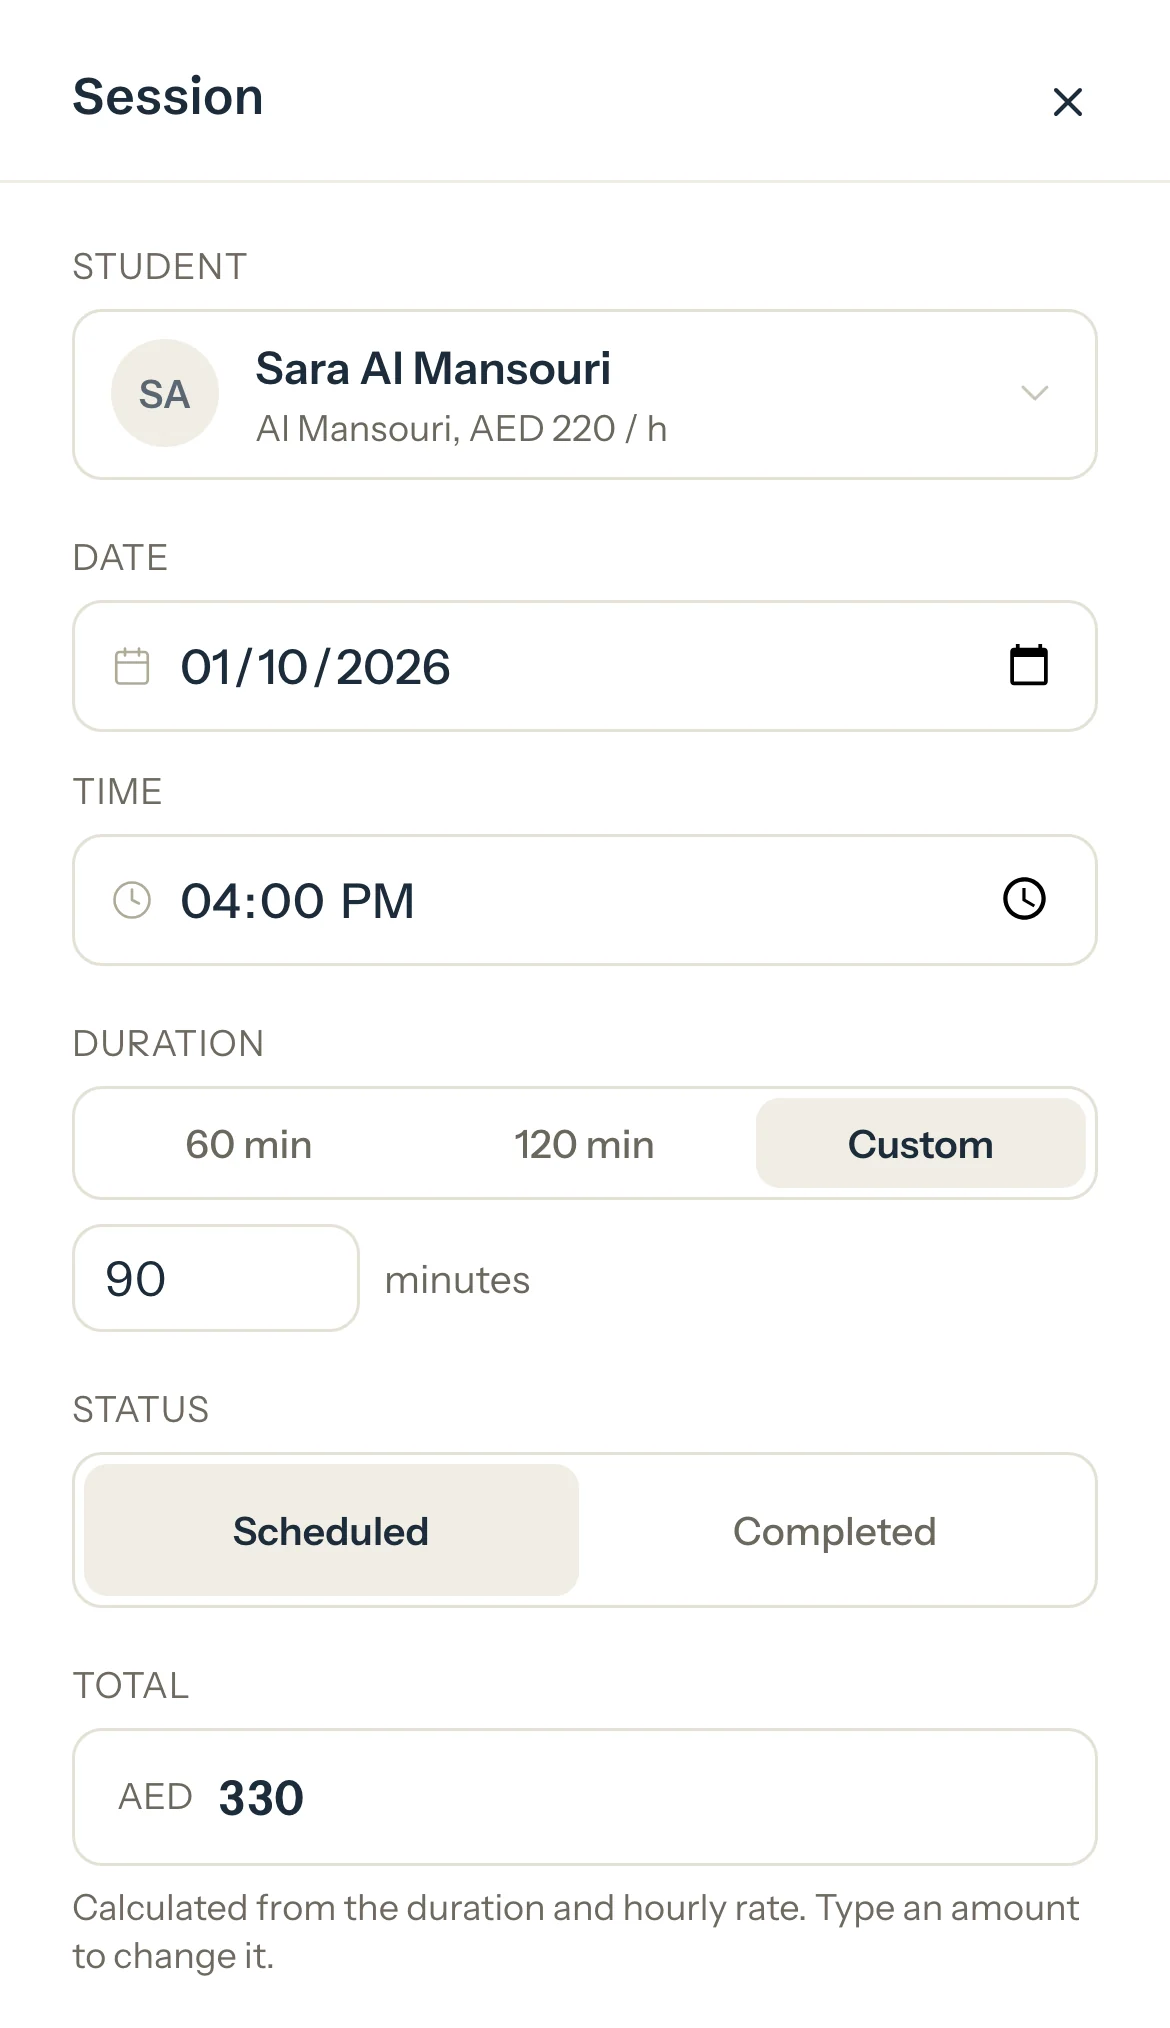
Start a new session and choose the student, the day, the time and the length.
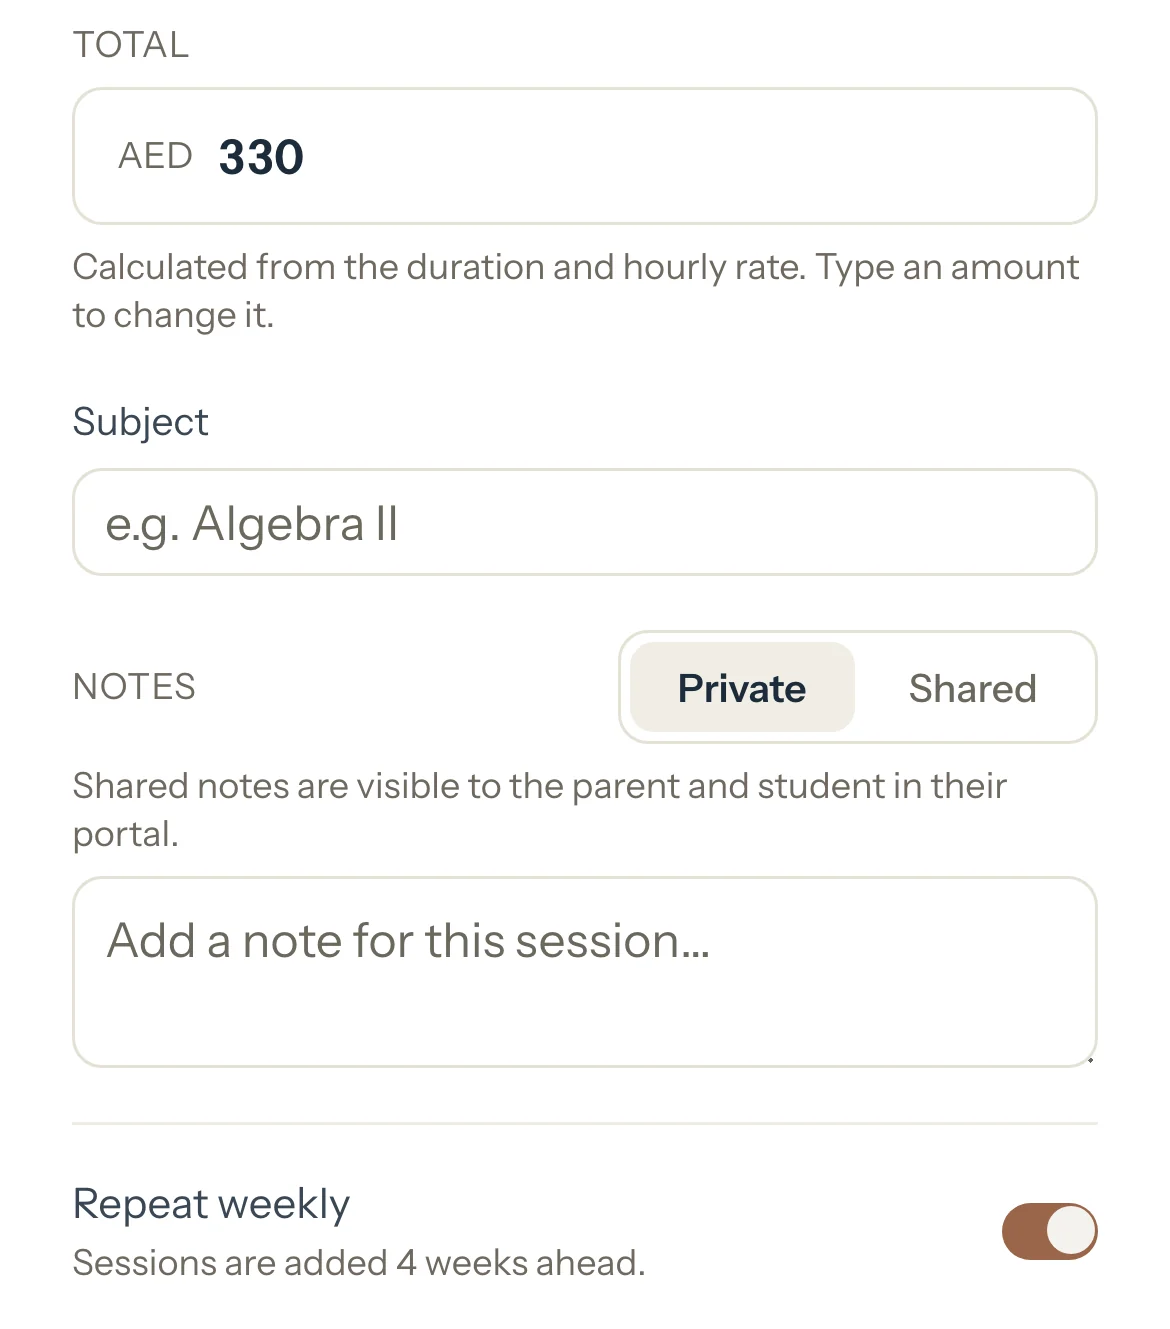
Switch on Repeat weekly.
The line under it says sessions are added four weeks ahead.
Press Add session.
This session and the same day and time for the next weeks appear on your calendar.
To stop it, open any of its upcoming sessions, press Stop weekly schedule, then Stop schedule.
Its upcoming sessions are removed. Past sessions and sessions on an invoice stay.
Good to know
Every day Tutello adds the next session, so four weeks ahead are always on your calendar.
Changing one of these sessions, its time, length or status, changes that one only. The rest of the schedule stays as it was.
Deleting one session from the schedule doesn't bring it back the next day.
A weekly schedule keeps the hourly rate it was made with. After a rate change, stop the schedule and add it again.
Deactivating a student stops their weekly schedules and removes the upcoming sessions those schedules added, unless they're on an invoice. A session you added on its own stays on your calendar until you delete it.
While your account is read-only after the trial, no new weekly sessions are added.
If something's not right
"Sara Al Mansouri already has a weekly session on Wednesdays at 4:00 PM."
That student already has a schedule at that day and time. Change the existing one's sessions instead, or stop it first.
Today's sessions sit on your dashboard: tap one to mark it, change it or cancel it without opening the calendar.
For tutors. Updated October 2026.
Where to find it
Dashboard, then Today
Steps
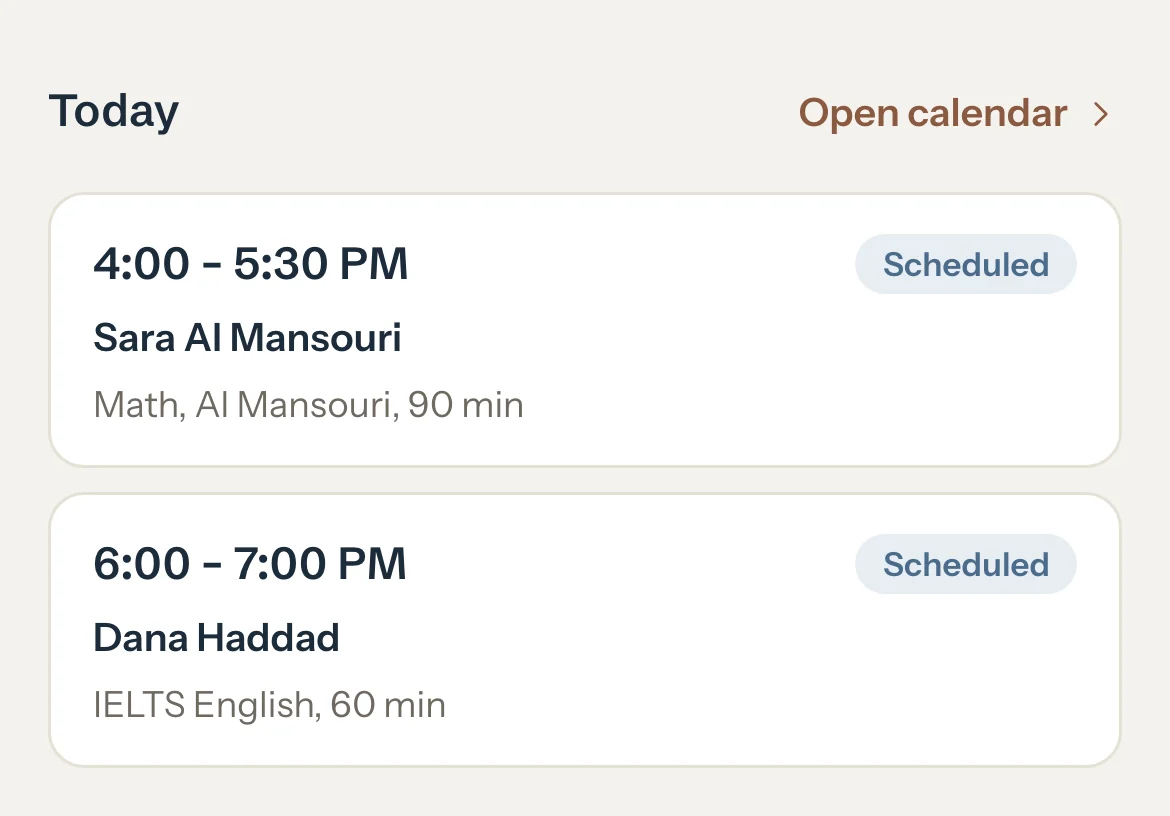
Open Dashboard. Today shows each of today's sessions with its time, student and status.
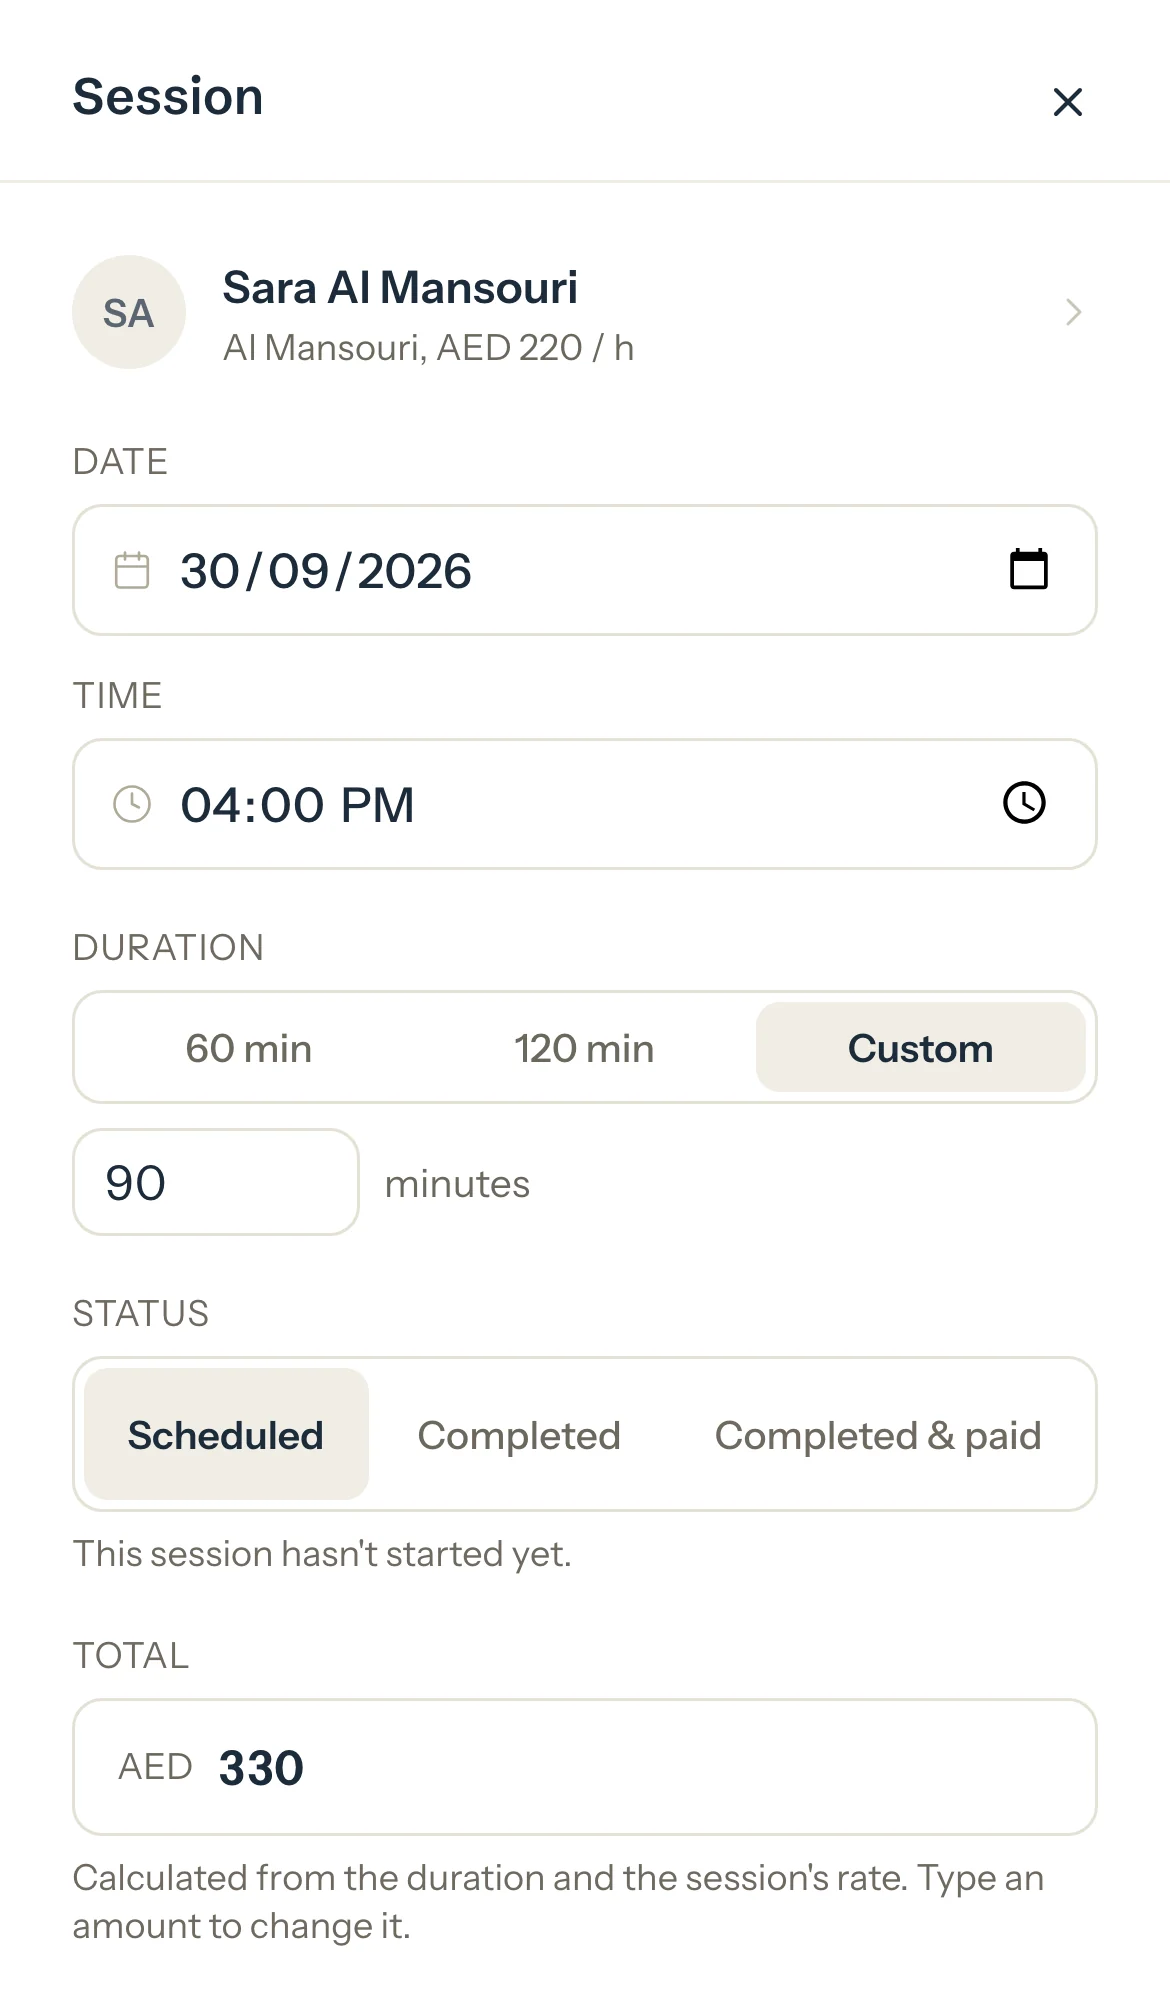
Tap a session.
Its panel opens over the dashboard.
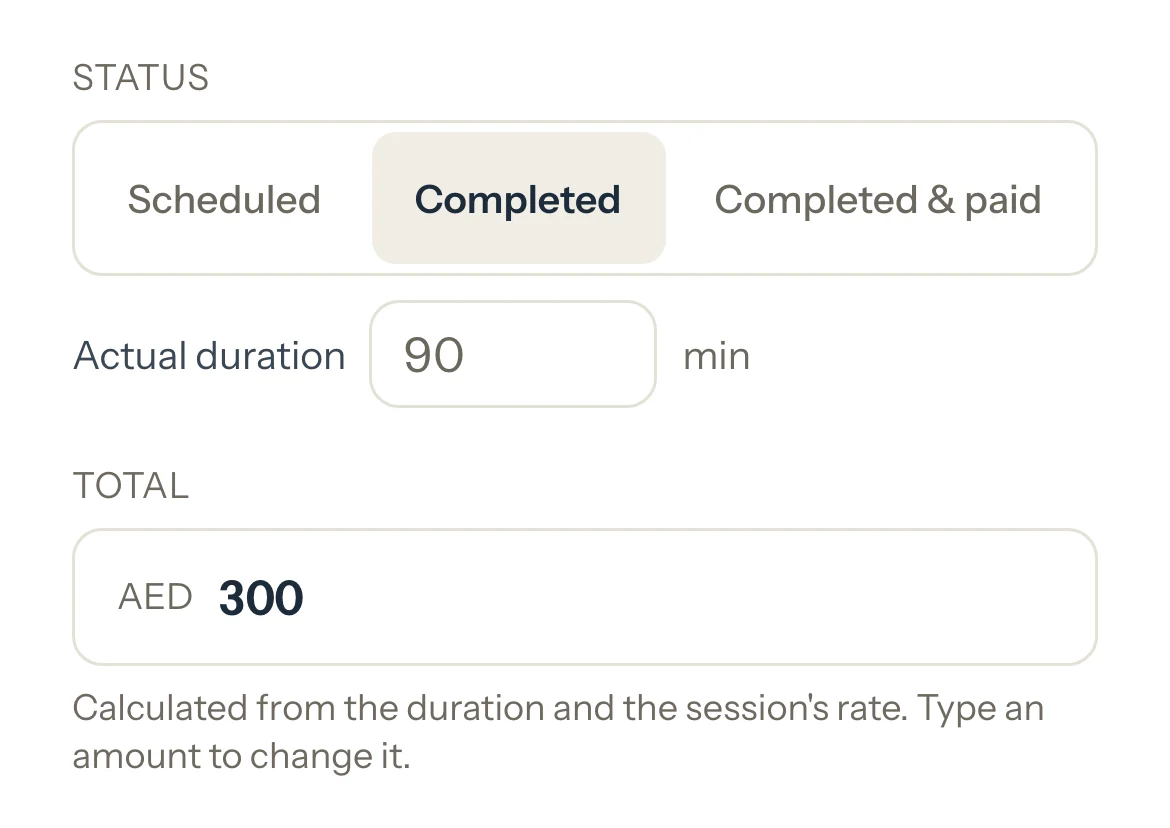
After the session, choose Completed. If it ran shorter or longer, type the Actual duration.
It's charged for the minutes you type, or for the booked length when you leave it empty.
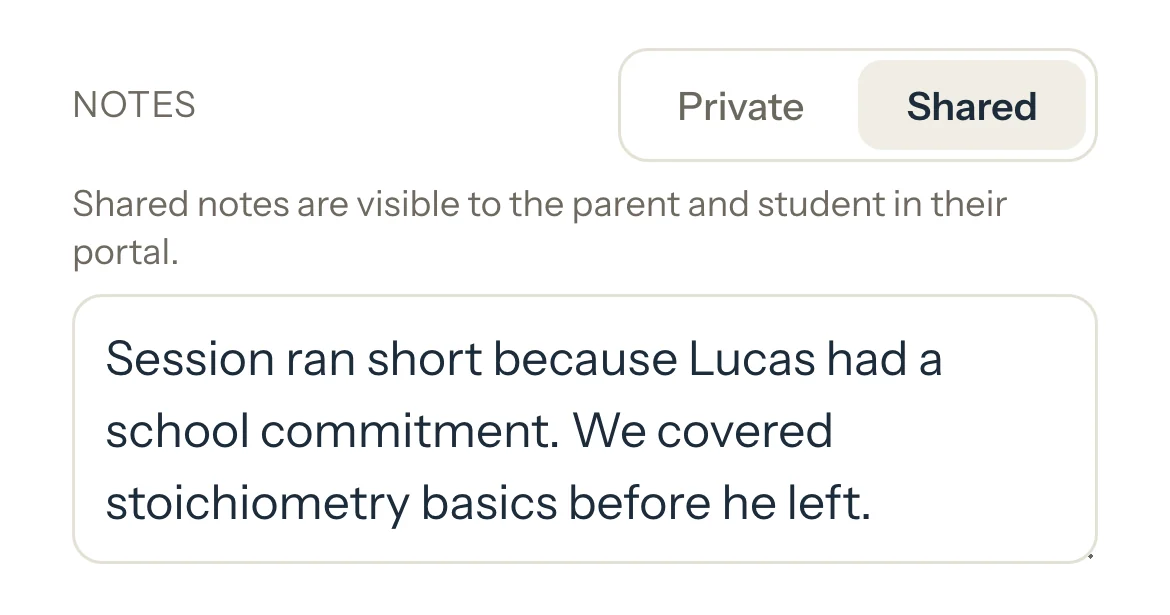
Optional: Add a note, and choose Private to keep it or Shared to show it in the family's portal.
Press Save changes.
The tile shows the new status and the session counts in Earned.
Good to know
If it didn't happen, use Cancel session or Mark no-show in the same panel. Cancel a session and Mark a no-show say when each is charged.
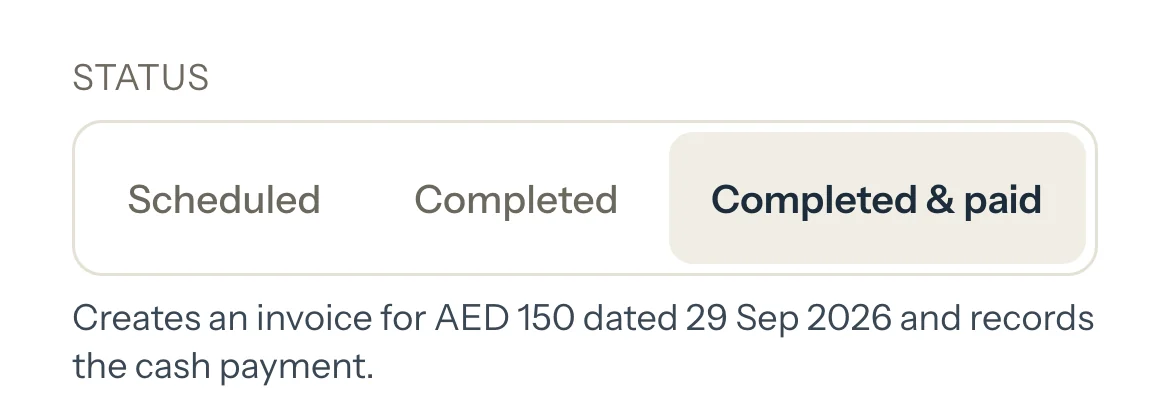
Paid for in cash at the end? Choose Completed & paid instead, and the invoice and the payment are saved with it: see Completed & paid.
A session whose end has passed and that you haven't marked reads Not marked. It isn't earned until you mark it.
One row in the To do card counts the past sessions you haven't marked. Mark opens the calendar on the oldest.
With no sessions today, Today says so and names your next one. Open calendar shows this week.
While you use report cards, a session that has ended asks What did you cover? under its tile. One tap notes the topic: see Note progress after a session.
If something's not right
"This session hasn't started yet. Mark it completed once it starts."
A session can be marked from an hour before it starts. Come back to it then.
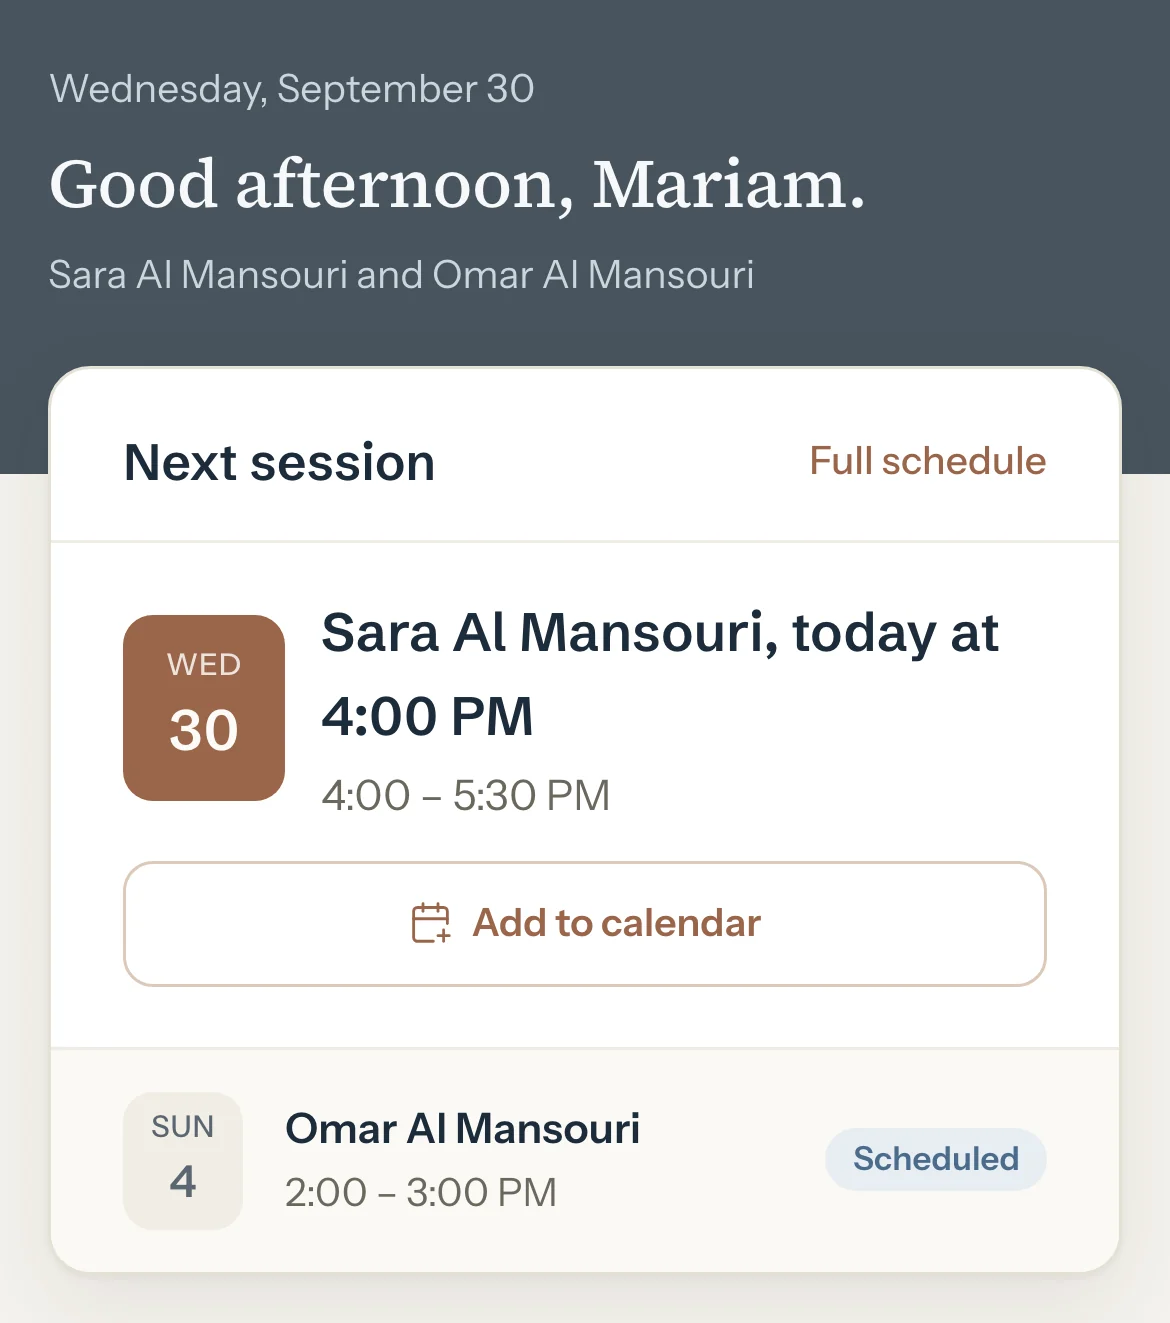
Lucas's Chemistry session was booked for 1 h 30 min at AED 200 an hour, but he left after 75 minutes. Type 75 in Actual duration:
Booked, 1 h 30 min
AED 300
Taught, 1 h 15 min
AED 250
What happens next
The session counts in Earned and To invoice for AED 250.
It's already ticked in the family's next new invoice, and automatic invoices include it.
What parents see
Their portal's schedule shows the session as Completed. On the invoice it reads 1 h 15 min, AED 250.
Good to know
Leave Actual duration empty and the session is charged for the booked length.
Paid for in cash at the end? Choose Completed & paid instead, and the invoice and the payment are saved with it: see Completed & paid.
Marked by mistake? Choose Scheduled and press Save changes.
To turn a completed session into a cancellation or a no-show, set it back to Scheduled and save it first, then use Cancel session or Mark no-show.
A past session you haven't marked isn't earned yet. On the day, Today on your dashboard shows it as Not marked; after that, the To do card counts it.
Adding a session that already happened? Choose Completed before you press Add session.
While you use report cards, the same panel asks what you covered, and on Detailed how it went: see Note progress after a session. It's optional and never changes the price.
If something's not right
"This session hasn't started yet. Mark it completed once it starts."
A session can be marked from an hour before it starts. Come back to it then.
Status can't be changed.
The session is on an invoice, named under Total. Cancel the invoice, change the session, then invoice it again.
Inside your cancellation window a cancelled session can be charged, and you choose before you cancel; earlier, it costs nothing.
For tutors. Updated October 2026.
Where to find it
Calendar, then the session
Today's sessions open from your dashboard too.
Before you start
Set your Late cancellation window once, in Settings, then Preferences. It starts at 24 hours.
Steps
Open the session from the calendar or from Today on your dashboard.
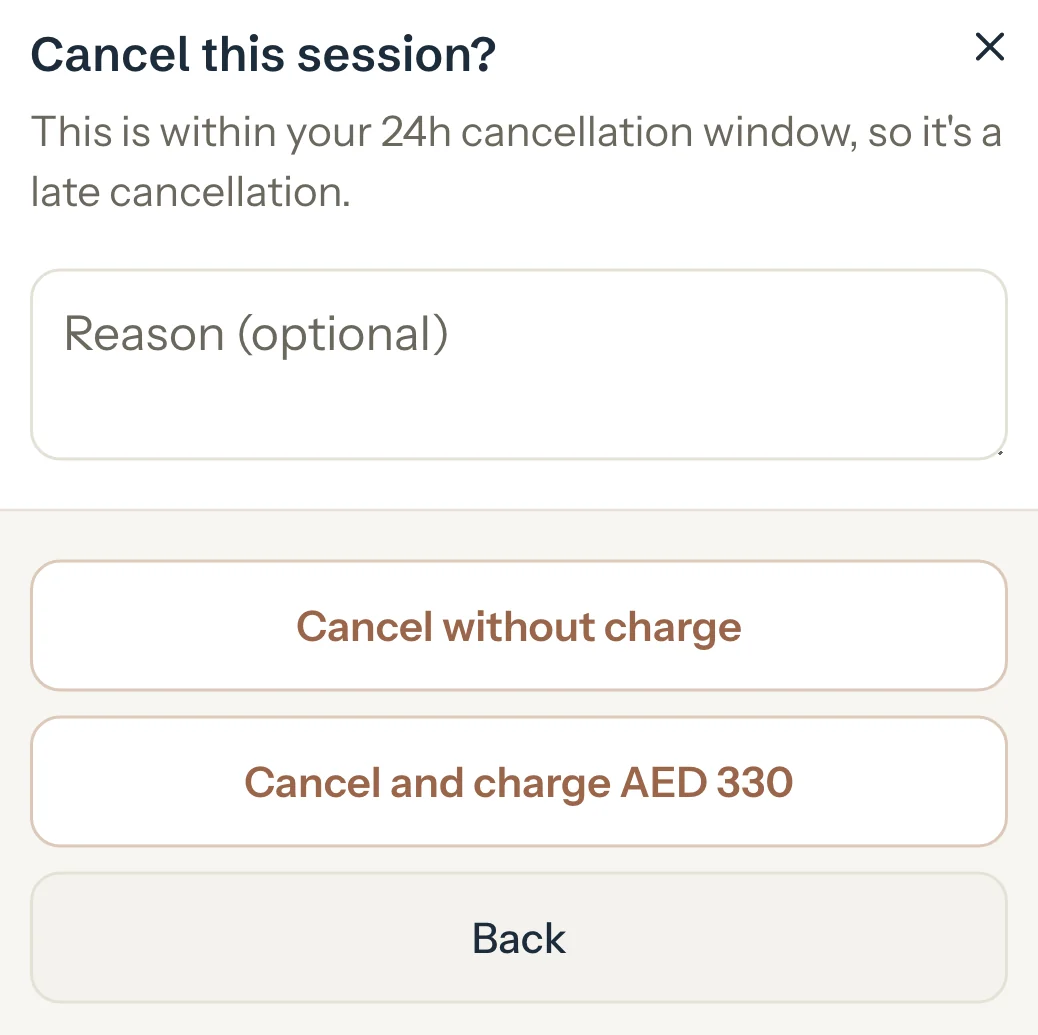
Read the line under Cancel session. It says what cancelling now costs, for example AED 330 or no charge, or No charge.
Press Cancel session.
Cancel this session? says whether this is a late cancellation.
Optional: Type a reason.
For a late cancellation, press Cancel and charge AED 330 to charge it, or Cancel without charge to let it go. Otherwise there's one button: Cancel session.
The session is cancelled and the panel shows its new status.
An example
Sara's Math session is 1 h 30 min at AED 220 an hour, and your window is 24 hours. Her family cancels the evening before, so it's a late cancellation:
Cancel and charge
AED 330
Cancel without charge
AED 0
What happens next
Charged, the session counts in Earned and To invoice for AED 330, like a session that happened.
In a new invoice it starts unticked: tick it to charge it. Invoice from your dashboard's To invoice list and it's already ticked. Automatic invoices include it.
Without charge, it's worth nothing and never goes on an invoice.
Good to know
Cancelling after the session's start time is always a late cancellation.
With No window, cancelling before the start is never charged.
A late cancellation is charged at the booked length and rate, or at the total you typed for that session.
Changed your mind about a fee? Open the session and press Waive fee, as long as it isn't on an invoice yet: see Waive a fee.
Only a session that's still Scheduled and not on an invoice can be cancelled.
If something's not right
There's no Cancel session button.
The session is already marked, or it's on an invoice. Set a completed session back to Scheduled and save it first, or cancel the invoice it's on.
"This session is on an invoice. Cancel the invoice first."
A session on an invoice is locked. Cancel the invoice, then cancel the session and invoice the rest again.
A student who didn't come is charged for the booked length, unless you waive the fee.
For tutors. Updated October 2026.
Where to find it
Calendar, then the session
Today's sessions open from your dashboard too.
Before you start
The session is still Scheduled, isn't on an invoice, and has started or starts within the hour.
Steps
Open the session.
Read the line under Mark no-show. It says what it will charge, for example Charges AED 150.
Press Mark no-show.
Mark as no-show? says what it will be charged.
Press Mark no-show again to confirm.
The session reads No-show and turns amber on your calendar.
An example
Omar's English session is 1 h at AED 150 an hour. He doesn't come:
Charged as a no-show
AED 150
After Waive fee
AED 0
What happens next
The session counts in Earned and To invoice for AED 150, like a session that happened.
In a new invoice it starts unticked: tick it to charge it. Invoice from your dashboard's To invoice list and it's already ticked. Automatic invoices include it.
What parents see
Their portal's schedule shows the session as No-show.
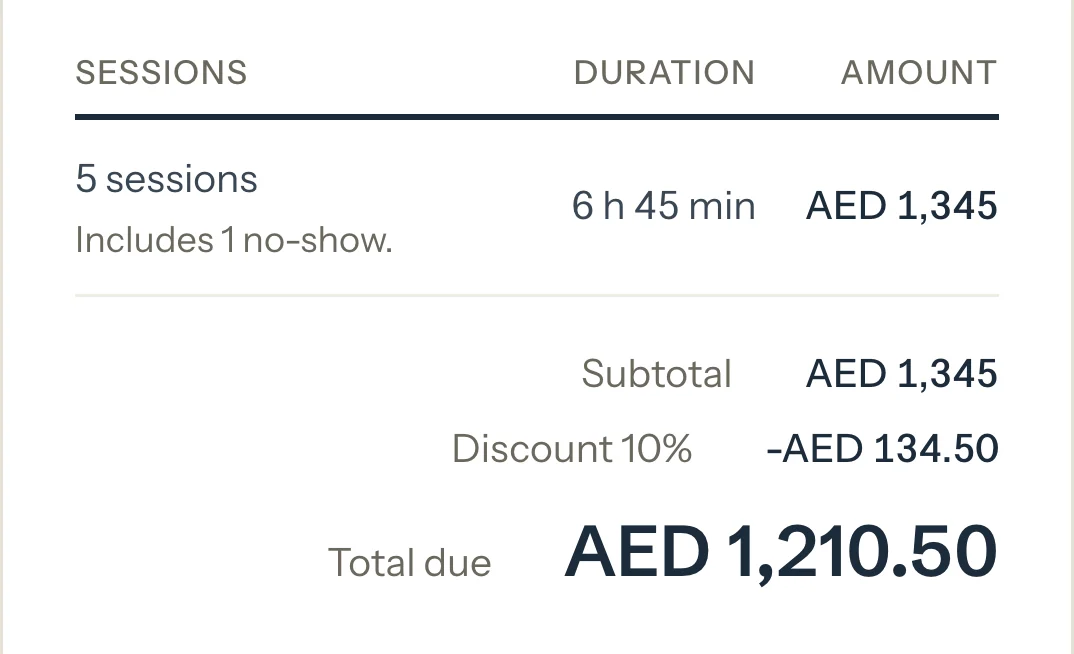
On the invoice it's listed with its date, length and amount like any other session. Listed as One total, the invoice adds a line such as Includes 1 no-show.
Good to know
A no-show is charged at the booked length and rate, or at the total you typed for that session.
Changed your mind? Press Waive fee on the session, as long as it isn't on an invoice yet: see Waive a fee.
Marked the wrong session? Press Reopen to set it back to Scheduled.
A completed session can't become a no-show directly: choose Scheduled, press Save changes, then Mark no-show.
If something's not right
"This session hasn't started yet. Mark it a no-show once it starts."
A session can be marked from an hour before it starts. Come back to it then.
There's no Mark no-show button.
The session is already marked, or it's on an invoice. A completed session goes back to Scheduled first; an invoiced one needs its invoice cancelled.
Keep the record of a late cancellation or a no-show, and charge nothing for it.
For tutors. Updated October 2026.
Where to find it
Calendar, then the session
Before you start
The session is a late cancellation or a no-show, and it isn't on an invoice yet.
Steps
Open the session.
Its status reads Cancelled late or No-show.
Press Waive fee.
Waive this fee? says it will be marked cancelled, with no charge.
Press Waive fee again to confirm.
The session reads Cancelled, turns grey and costs nothing.
An example
Sara's Physics session is 1 h 30 min at AED 220 an hour. Her family cancelled with less than a day's notice, inside your window, so it was a late cancellation:
Cancelled late
AED 330
After Waive fee
AED 0
What happens next
The AED 330 comes off Earned and To invoice.
The session never goes on an invoice.
What parents see
Their portal's schedule shows the session as Cancelled, and nothing is charged for it.
Good to know
Cancelling inside your window? You can skip the fee right there with Cancel without charge: see Cancel a session.
The session stays on your calendar, and your data download keeps that its fee was waived.
A total you typed for the session is cleared, since a cancelled session isn't charged.
To charge it after all, press Reopen, then cancel it again or mark it a no-show.
If something's not right
There's no Waive fee button.
The session isn't a late cancellation or a no-show, or it's on an invoice. Cancel the invoice first, waive the fee, then invoice the other sessions again.
"This session is on an invoice. Cancel the invoice first."
It was invoiced, maybe on another device, after you opened it. Cancel that invoice, then waive the fee.
Private notes stay yours; shared notes appear in the family's portal for parents and the student to read.
For tutors. Updated October 2026.
Where to find it
Calendar, then the session, then Notes
Sessions opened from a family's or student's page have the same Notes.
Steps
Open the session, or start a new one.
Under Notes, type what you want to remember or tell the family.
Choose Private to keep it to yourself, or Shared to show it in the portal.
A new session's note starts as Private.
Press Save changes, or Add session for a new one.
What parents see
Parents and students with portal access see your latest shared notes on their portal's home page, each with the student's name and the session's date.
A private note never leaves your account.
Good to know
A shared note shows in the portal once the session has started, not before.
You can change a note, or switch it between Private and Shared, at any time, even once the session is on an invoice.
Notes never go on an invoice, its PDF or a calendar file.
Notes on a family's or a student's own page are always private.
Deleting a session deletes its note too.
A shared note also shows under Session by session on a Detailed report card, for as long as it stays Shared. The session's panel then says which card it appears in.
If something's not right
A parent can't see a note.
Check it's set to Shared and saved, and that the session has started. Only parents and students with portal access see notes: see What parents and students can see.
Remove a session booked by mistake, and why a session on an invoice can't be deleted.
For tutors. Updated October 2026.
Where to find it
Calendar, then the session
Before you start
The session isn't on an invoice.
Steps
Open the session.
Press Delete session.
Delete this session? says it can't be undone.
Press Delete session again to confirm.
The session is gone from your calendar, your figures and the family's portal.
Good to know
Delete is for mistakes. If the session was called off, cancel it instead: the record stays, and a late cancellation can be charged.
Any session that isn't on an invoice can be deleted, completed ones included.
Deleting one session of a weekly schedule removes that week only. The schedule carries on and won't add it back. To end the whole schedule, press Stop weekly schedule.
Its notes go with it.
If something's not right
There's no Delete session button.
The session is on an invoice, named under Total. Cancel the invoice, delete the session, then invoice the other sessions again.
"This session is on an invoice. Cancel the invoice first."
It was invoiced, maybe on another device, after you opened it. Cancel that invoice first.
Choose the family or student, tick the sessions, check the review and save.
For tutors. Updated October 2026.
Where to find it
On a phone
Billing, then New invoice
On a computer
Invoices, then New invoice
Invoice now on a family's or student's page, and Invoice on your dashboard's To invoice list, start it with the family already chosen.
Steps
Press New invoice and choose the family under Families, or the student under Independent students.
Each one shows how many sessions it has to invoice.
Under Sessions to invoice, tick the sessions to put on it.
Completed sessions start ticked. Late cancellations and no-shows start unticked: tick any you want to charge. From Invoice on your dashboard, they all start ticked.
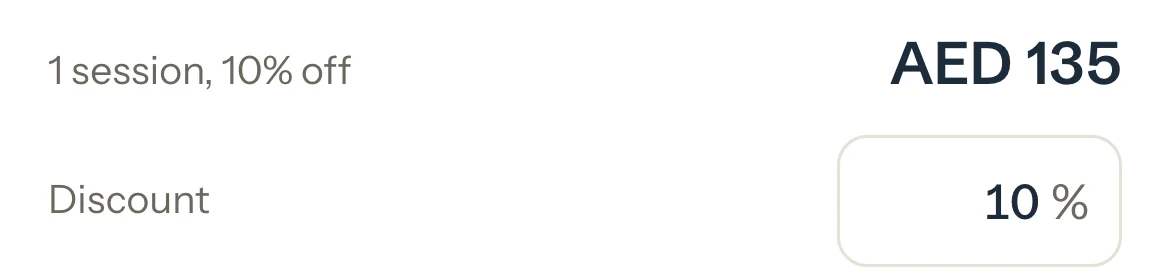
In Discount, type the percentage, for example 10 or 12.5.
On a computer, the Summary shows the Subtotal, the discount and the new Total. On a phone, the bar at the foot shows the new total and how much is off; Review invoice shows the Subtotal.
Press Save, check Review invoice, and press Save again.
Optional: To add or change it on a draft, open the draft, press Discount, type the percentage and press Save discount. Leave it empty to take it off.
An example
The Al Mansouri family has two children, so you take 10% off their invoice:
Subtotal
AED 1,345
Discount 10%
-AED 134.50
Total
AED 1,210.50
What happens next
Each session stays at its full value on the invoice; the discount is its own line above the total.
Once the invoice is saved, Earned counts the discount: AED 134.50 less here. A draft changes nothing yet.
What parents see
The invoice and its PDF show the Subtotal, Discount 10% and the total. Their balance counts the discounted total.
Good to know
Any percentage up to 100, with up to two decimals, for example 12.5. The amount is rounded to the nearest fils or cent.
Once an invoice is saved, its discount can't change. To change it, cancel the invoice and make it again.
Cancelling an invoice drops its discount, and its sessions go back to To invoice at full value.
Automatic invoices and Completed & paid never add a discount. Keep an automatic invoice as a draft to add one before you save it.
By student, Each session or One total on each invoice, and a default for each family.
For tutors. Updated October 2026.
Where to find it
On a phone
Billing, then New invoice
On a computer
Invoices, then New invoice
Each family's default is in its Invoice settings.
Steps
Make a new invoice as usual, then press Save or Save as draft.
Review invoice opens. For a draft the same box is titled Save as draft.
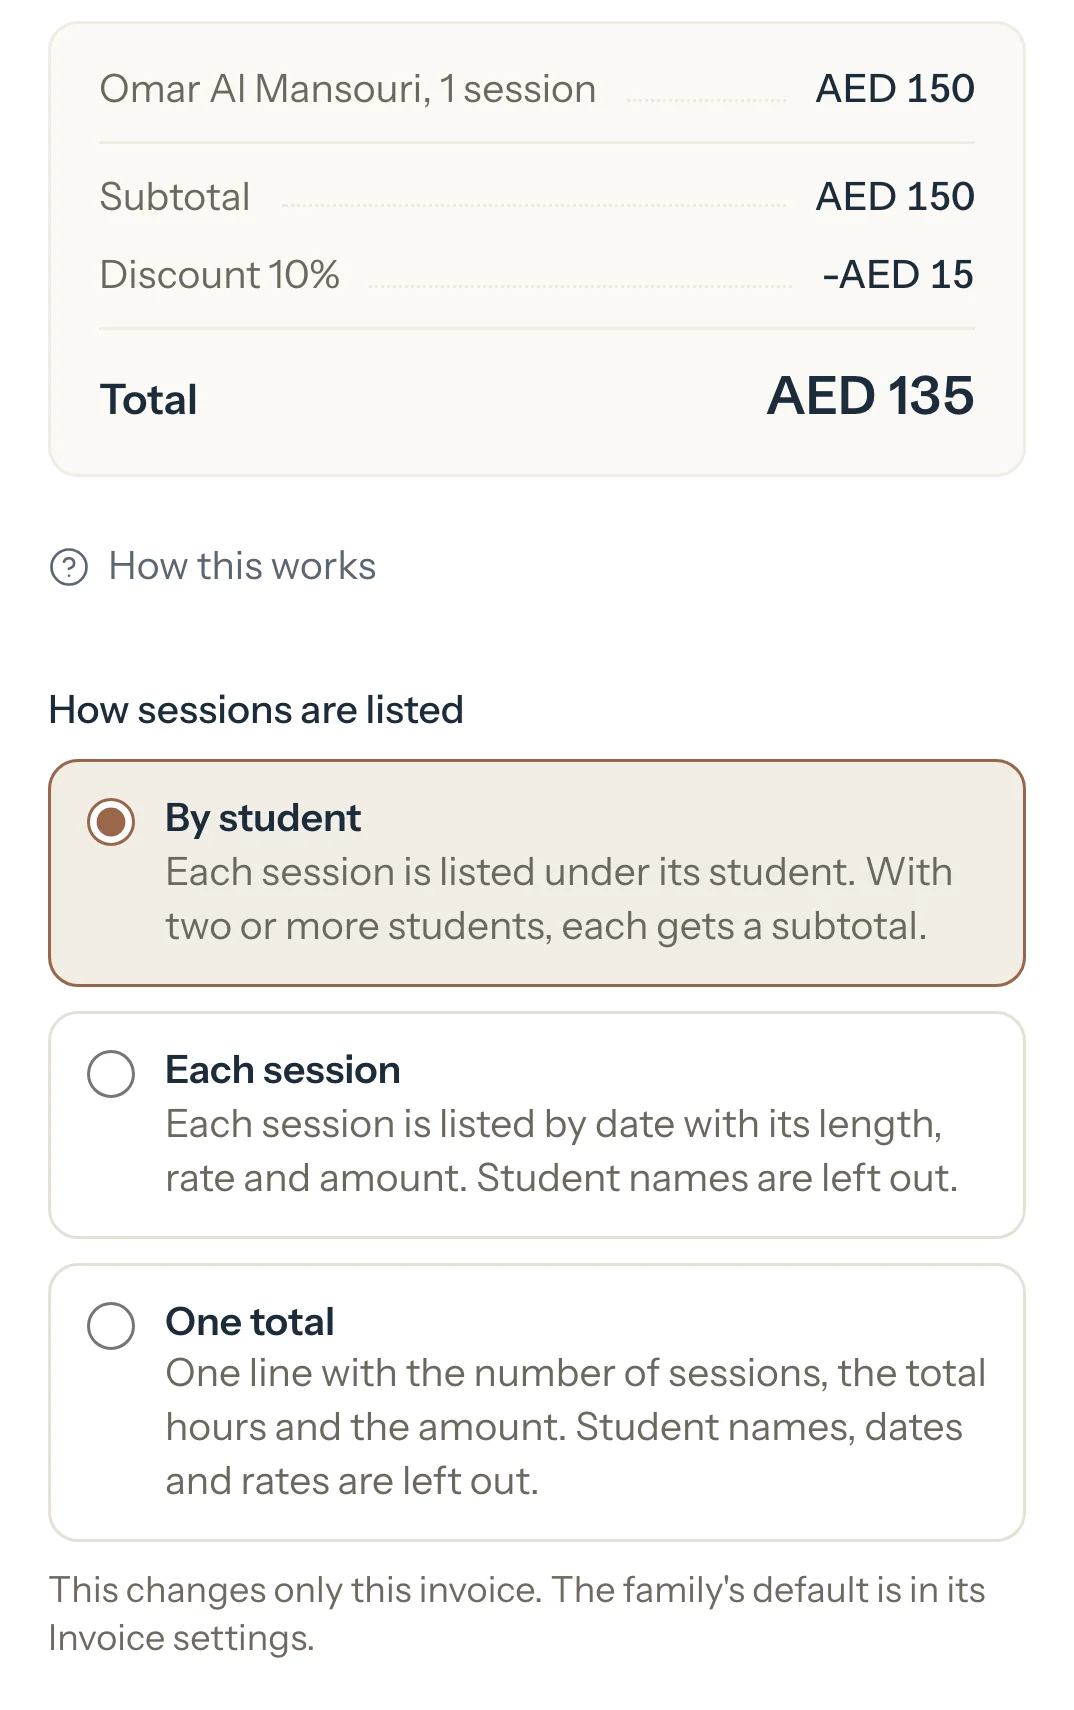
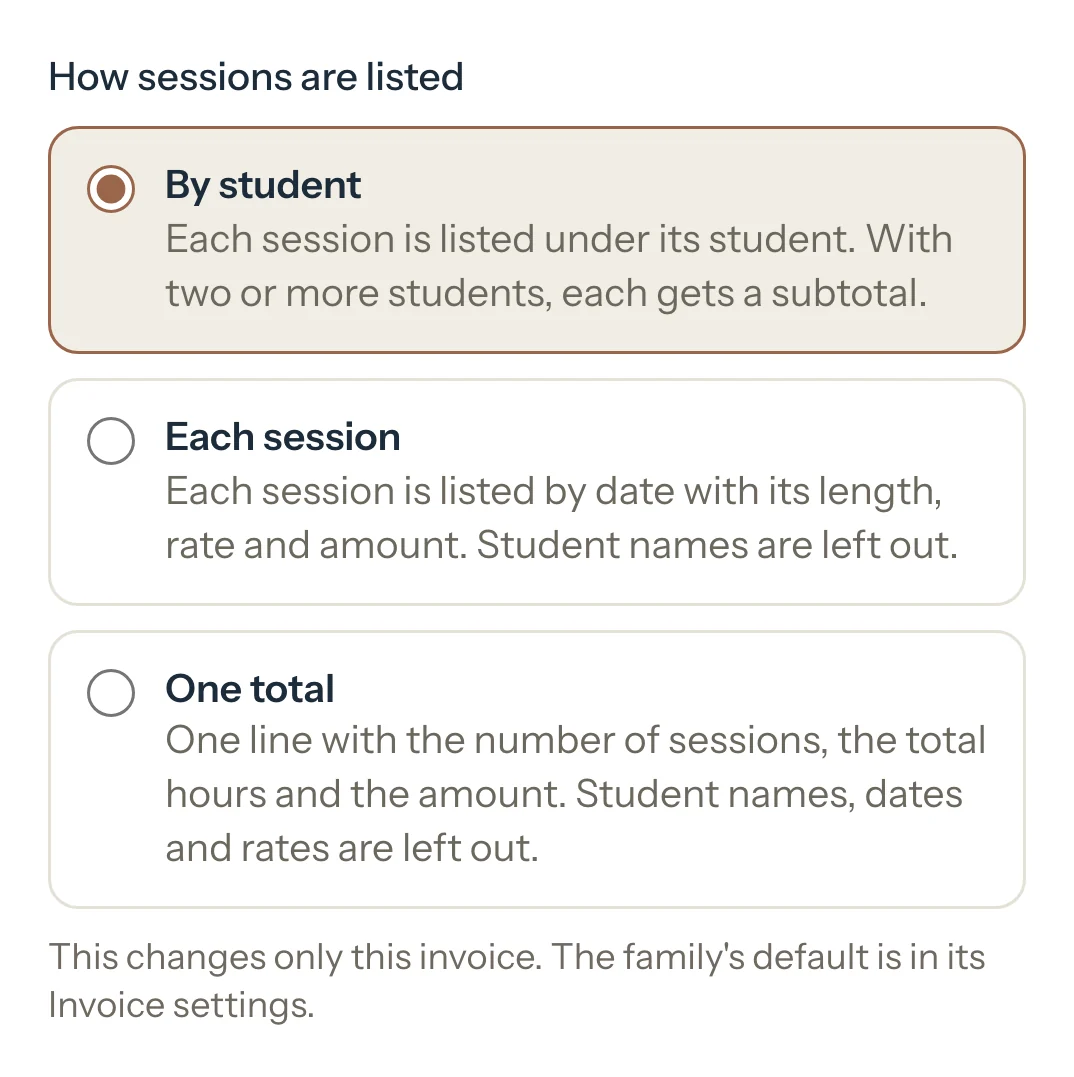
In Review invoice, under How sessions are listed, choose By student, Each session or One total.
It changes only this invoice.
Press Save, or Save as draft for a draft.
The invoice opens, listed the way you chose.
Optional: To change a family's default, open its page and choose under How sessions are listed in Invoice settings.
New invoices for the family start with it, automatic ones too. Drafts you already have keep their own choice.
An example
INV-2026-0003 has Sara's 3 sessions and Omar's 2. The same invoice, listed three ways:
By student
Sara's sessions, then Omar's, each with a subtotal
Each session
5 rows by date, no names
One total
5 sessions, 6 h 45 min, AED 1,345
What parents see
Their invoice page, its PDF and their portal show the same lines you chose.
One total adds a short note when it includes a late cancellation or a no-show.
Good to know
It never changes the amounts, the discount or what's left to pay, only how the invoice reads.
By student lists each session under its student, with a subtotal for each when there are two or more. Each session lists them by date with no names. One total is one line: the number of sessions, the hours and the amount.
Every length reads in hours and minutes, for example 1 h 30 min, on earlier invoices too.
Once an invoice is saved, its choice is fixed. A draft shows the choice on its page, so it can still change.
An independent student's invoice lists Each session or One total: there's only one student.
If something's not right
"You can change how sessions are listed only while the invoice is a draft."
The invoice is saved. To list it another way, cancel it and make it again.
Give an invoice for past sessions an earlier date, as long as it's on or after the day of its last session.
For tutors. Updated October 2026.
Where to find it
On a phone
Billing, then New invoice
On a computer
Invoices, then New invoice
Steps
Start the invoice as usual: choose the family or student, then tick the sessions.
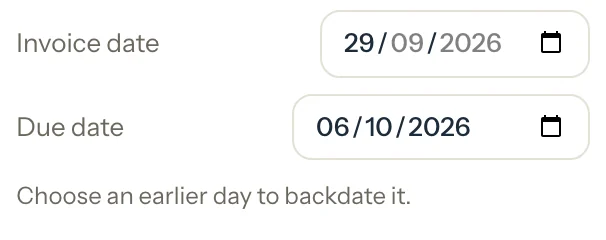
In Invoice date, choose the day the invoice should carry. It starts on today.
Due date moves with it and stays 7 days later, until you change it yourself.
Optional: Change the Due date if you want. It can't be before the invoice date.
Press Save, or Save as draft.
Review invoice shows both dates again. For a draft the box is titled Save as draft and shows only the Invoice date: a draft gets its due date when you save it.
Check the dates and press Save, or Save as draft for a draft.
An example
On 30 September, the Al Mansouri family has one session to invoice: Omar's of 29 September. You date the invoice the day of the session:
Earliest invoice date
29 Sep 2026
Invoice date chosen
29 Sep 2026
Due date, 7 days later
6 Oct 2026
Good to know
The invoice date can't be later than today, or earlier than the day of the last session you ticked.
A backdated invoice takes its date's year in its number: an invoice dated in December 2025 gets an INV-2025 number.
If the due date has already passed, Review says so, and the invoice shows as overdue as soon as you save it.
A draft keeps the date you chose. When you save it later, it's still dated that day, and it's due 7 days after the day you save it.
When money received without an invoice was paying a later invoice, a backdated invoice comes first and takes that money. Review names the invoice that may then have money left to pay.
Completed & paid dates its invoice on the session's day by itself.
If something's not right
It asks for a later day, the day of its last session.
One of the ticked sessions is later than the date you chose. Press the Use 29 Sep button beside the message (it names that day), or untick the session.
"Choose today or an earlier day."
An invoice can't be dated in the future. Choose today, and give the family more time with the Due date instead.
When the family or student has already paid, save the invoice and its payment together in one step.
For tutors. Updated October 2026.
Where to find it
On a phone
Billing, then New invoice
On a computer
Invoices, then New invoice
Invoice now on a family's or student's page starts the same invoice.
Before you start
They paid the whole total. If they paid part of it, save the invoice without Paid and record the part payment afterwards.
Steps
Choose the family or student and tick the sessions, as for any new invoice.
Press Save.
Review invoice opens with the total.
Switch on Paid.
Its line, such as Record the full AED 250 as received, says what it records: always the whole total.
Under Method, choose Cash, Bank transfer, Card, Cheque or Other.
Cash is chosen to start with.
Check Date received: the day you were paid. It starts on the invoice date and can't be later than today.
Optional: In Reference, add the transfer or receipt number.
Press Save.
The invoice gets its number and reads Paid, and its payment is in Payments. Both are saved together, or neither is.
An example
Dana Haddad, an adult learner, paid AED 250 in cash for her session of 16 September. You invoice that session and switch on Paid with Cash. Review invoice shows:
Dana Haddad, 1 session
AED 250
Total
AED 250
"Record the full AED 250 as received"
What happens next
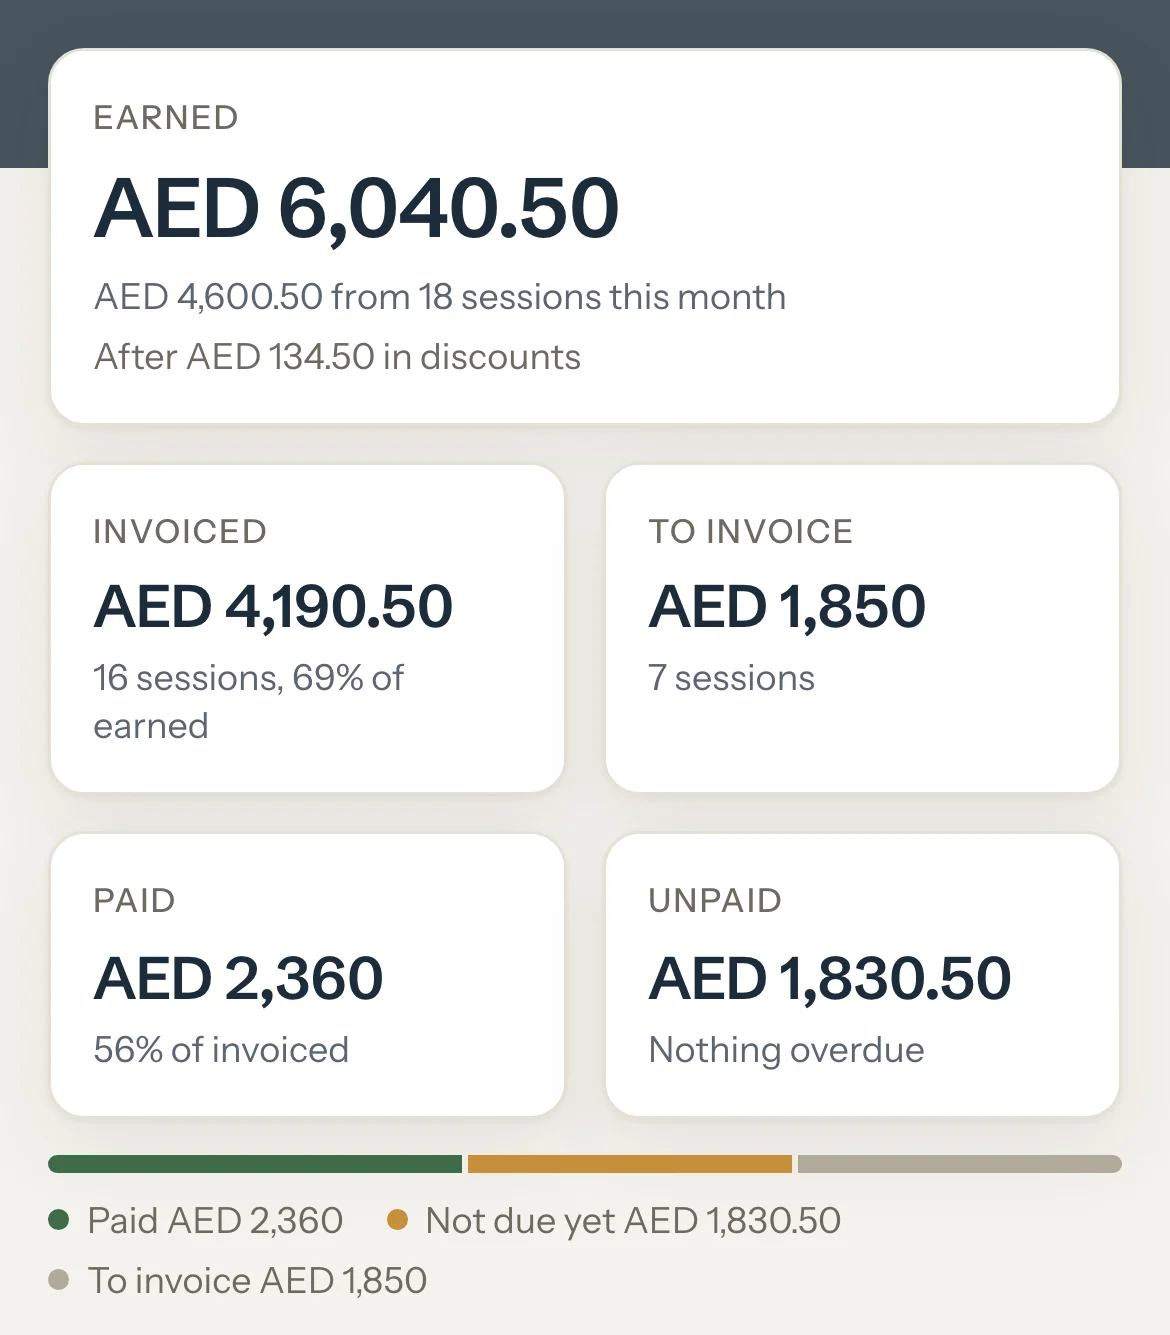
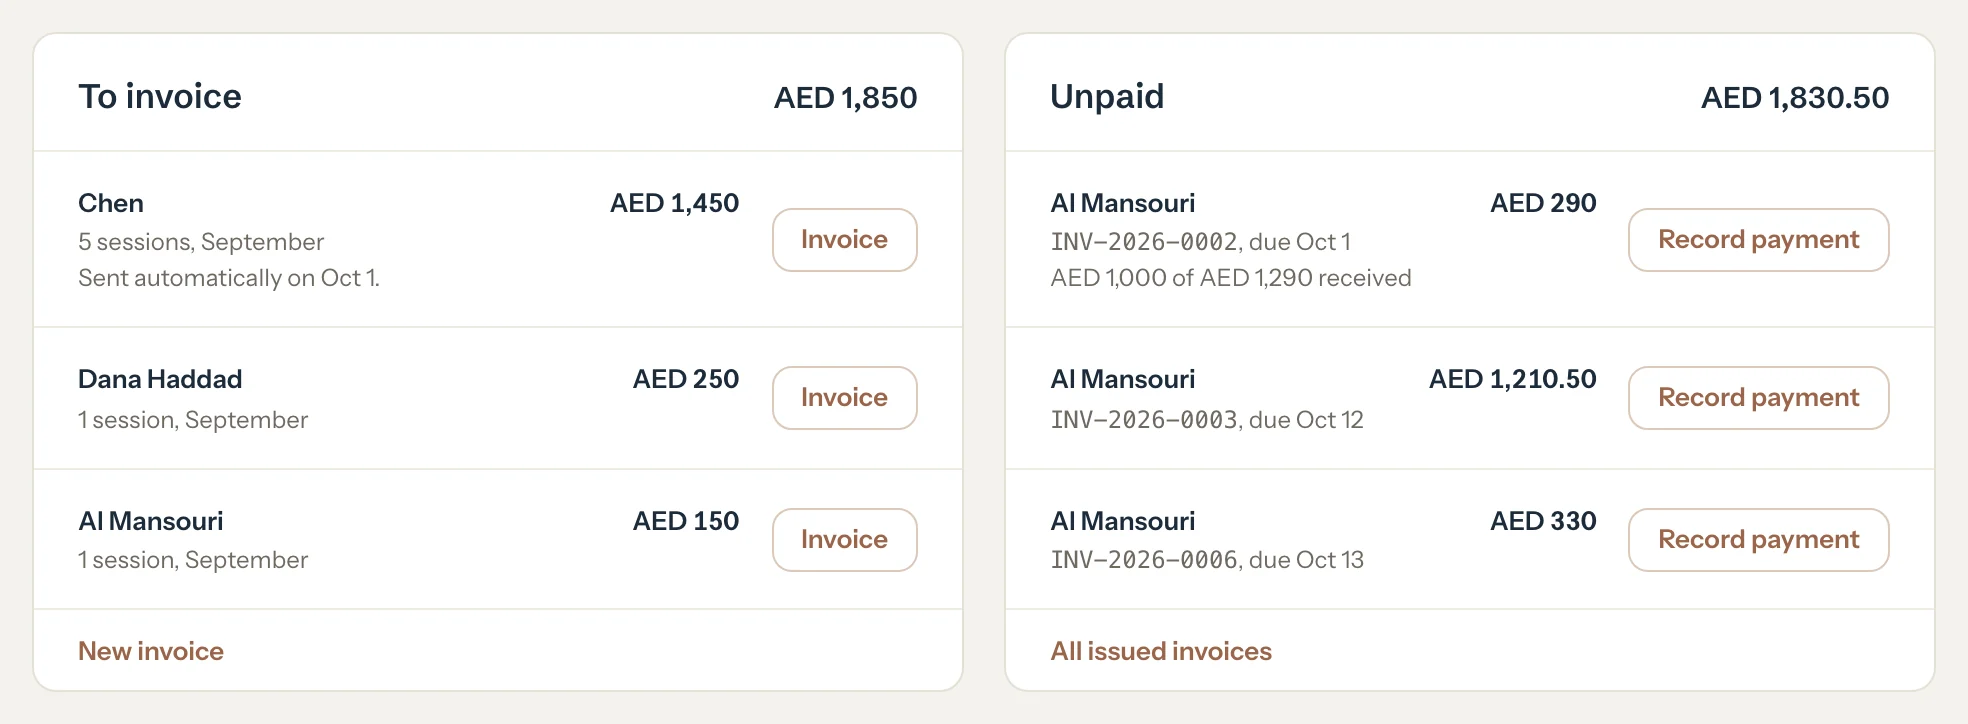
On your dashboard, To invoice goes from AED 1,850 to AED 1,600, Invoiced from AED 4,190.50 to AED 4,440.50 and Paid from AED 2,360 to AED 2,610. Earned and Unpaid stay the same.
On the Simple dashboard, Paid goes up by AED 250 and Unpaid goes down by the same.
Dana's Balance due goes from AED 250 to AED 0.
What parents see
In Billing, the invoice shows Paid, and the payment is in their payment history.
The invoice and its PDF show Total, Paid as of the day and Left to pay, AED 0.
Nothing is sent to them. If you share it, the message is a receipt: Receipt for invoice INV-2026-0007 from Rania Khalil Tutoring: AED 250, paid 30 Sep 2026.
Good to know
Paid is only on Save. A draft can't carry a payment.
If they already have money received without an invoice, a note under Paid says so: Paid records a new payment. To count that money toward this invoice instead, switch Paid off and save.
An invoice with a total of 0 has nothing to pay, so Paid isn't offered. It's saved as Paid by itself.
For one session paid for in cash on the day, Completed & paid does the same from the calendar.
A payment can't be edited. If the method or date is wrong, delete it and record it again. Until you do, the invoice reads Issued.
If something's not right
"Choose today or an earlier day."
Date received is later than today. Choose the day the money reached you.
"Totals changed. Refresh and try again."
A session's total changed while the page was open, so nothing was saved: no invoice and no payment. Refresh, check the total, and save again.
Keep an invoice as a draft only you can see, change its discount or layout, and save it when it's ready.
For tutors. Updated October 2026.
Where to find it
On a phone
Billing, then Draft
On a computer
Invoices, then Draft
On your dashboard, Open draft on the To invoice list opens a family's oldest draft.
Steps
Make the invoice as usual, then press Save as draft instead of Save.
A box titled Save as draft shows the total, student by student.
Optional: Choose How sessions are listed.
Press Save as draft.
The draft gets its number and opens. Only you can see it.
Optional: To change it later, open it from Draft. Press Discount to add, change or remove a percentage, or change How sessions are listed.
When it's ready, press Save.
It's issued and shows in the family's portal. Nothing is emailed until you send it.
An example
On 30 September the Al Mansouri family has one session to invoice, Omar's of 29 September at AED 150. You save it as draft INV-2026-0007. Your figures don't move:
To invoice
AED 1,850
Invoiced
AED 4,190.50
"AED 150 in draft INV-2026-0007."
What happens next
The family's row in the To invoice list says how much is in the draft, as above, and its button reads Open draft.
When you press Save, its sessions leave To invoice and Invoiced goes up by its total. So does Unpaid, unless money paid ahead covers some of it.
A discount on a draft counts only once you save it: then Earned goes down by the discount.
What parents see
Nothing. A draft never shows in their portal and is never emailed.
Once you press Save, the invoice shows in their Billing.
Good to know
A draft gets its number when you make it, and keeps it when you save it.
It's dated the day you press Save. If you chose an earlier Invoice date when you made it, it keeps that date, and its page says which day it will carry.
It's due 7 days after the day you press Save, whatever due date it had as a draft, so saving an old draft never makes it overdue at once. Until then its sheet shows no due date, and the line beside Save says which day it will be.
You can change a draft's discount and how its sessions are listed, never its sessions. To change those, cancel it and make a new invoice.
A draft can't take a payment, and money paid ahead doesn't count toward it until you save it.
With Auto-send off, automatic invoices arrive as drafts and work the same way.
If something's not right
"The total changed while you were saving. Check it and save again."
Something on the draft changed on another device while you were saving. The page now shows the stored total: check it and press Save again.
"You can change how sessions are listed only while the invoice is a draft."
It has been saved already, maybe on another device. Once issued, its layout stays as it is.
Per session, weekly, every 2 weeks or monthly, Tutello makes the invoice for you.
For tutors. Updated October 2026.
Where to find it
Families, the family, then Invoice settings
An independent student's page has the same Invoice settings.
Steps
Open the family's page and find Invoice settings.
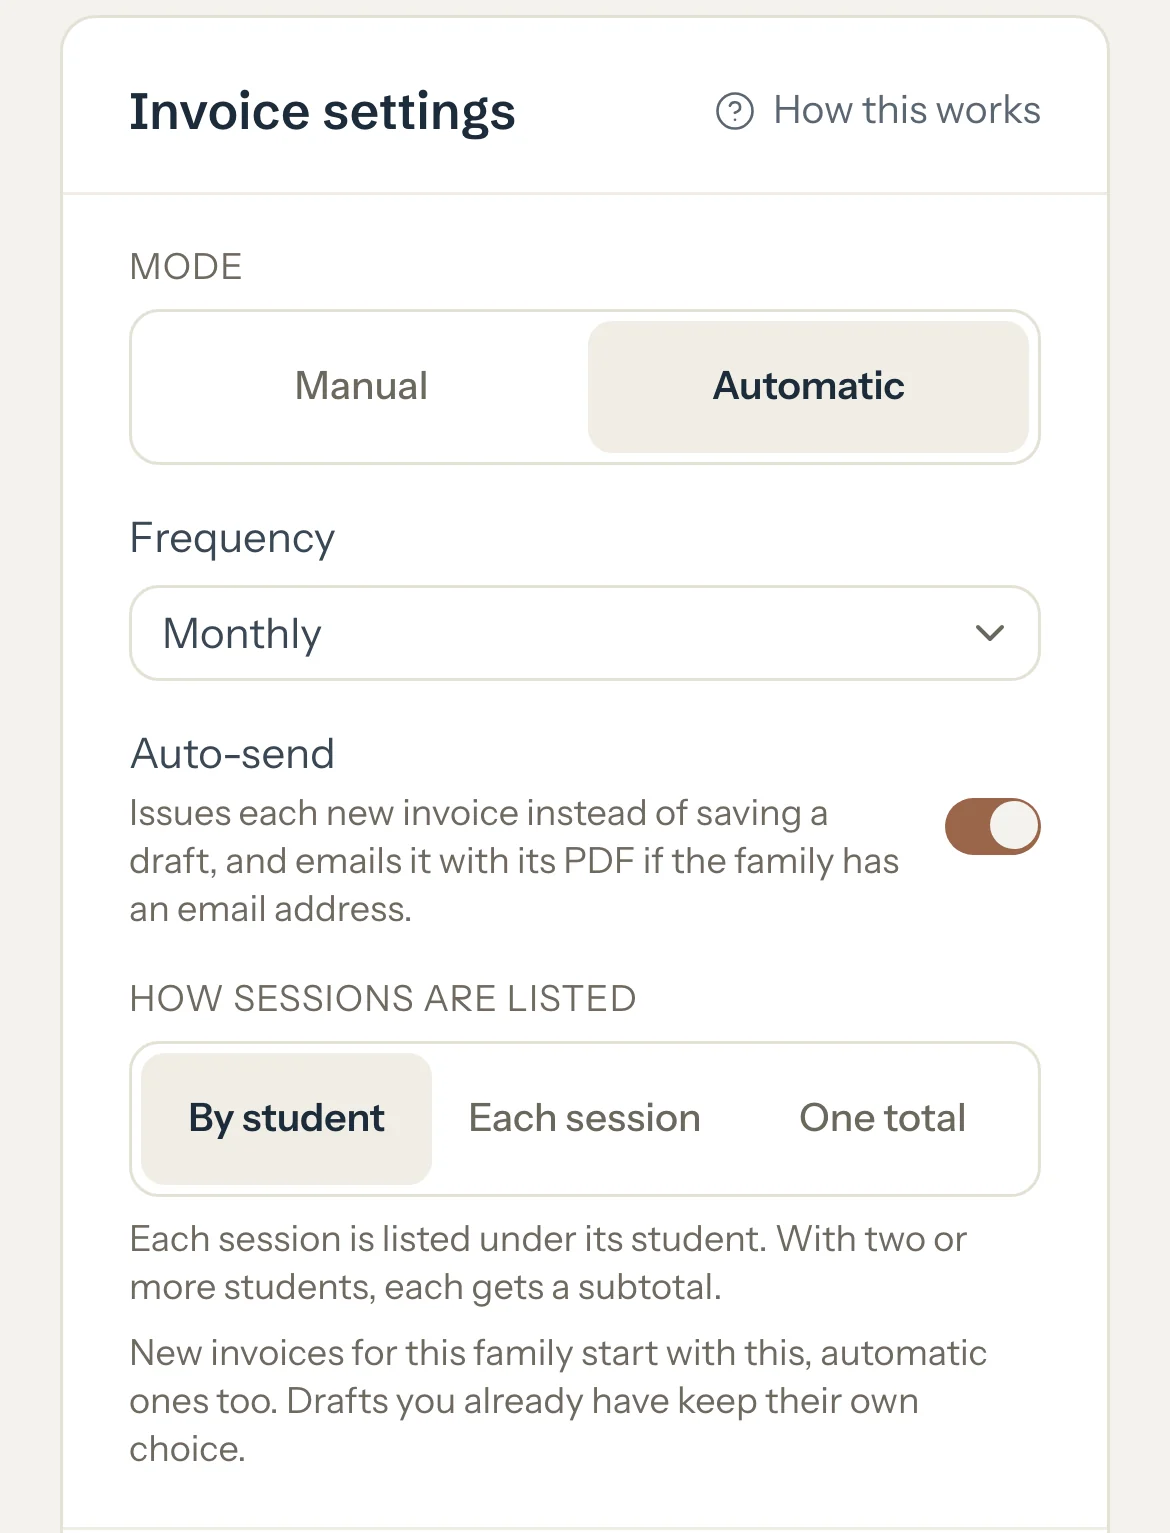
Under Mode, choose Automatic.
In Frequency, choose Per session, Weekly, Every 2 weeks or Monthly.
Optional: Switch on Auto-send to issue and email each invoice as it's made. Leave it off to get a draft you check first.
Optional: Choose How sessions are listed on this family's invoices.
Each change is saved as you make it.
An example
The Chen family is on Automatic, Monthly, with Auto-send on. On 1 October, Tutello issues one invoice for Lucas's September sessions and emails it with its PDF to Wei:
1 Sep, 1 h 30 min
AED 300
8 Sep, 1 h 30 min
AED 300
15 Sep, 1 h 15 min
AED 250
22 Sep, 1 h 30 min
AED 300
29 Sep, 1 h 30 min
AED 300
Total
AED 1,450
Good to know
Once a day, Tutello takes the family's completed sessions, late cancellations and no-shows that aren't on an invoice yet, from before the current period, and puts them on one invoice.
Monthly invoices the month before on the 1st. Weekly weeks start on Sunday. Every 2 weeks uses fixed two-week periods. Per session makes one invoice for each session at the next daily run after you mark it.
Without Auto-send, each invoice is a draft: only you see it until you open it and press Save.
With Auto-send, the invoice is issued straight away and emailed to the family's email addresses. A family with no email address gets no email, and the invoice still shows in their portal.
Sessions still marked Scheduled wait until you mark them. A session is never invoiced twice.
Automatic invoices never take a discount. To give one, keep the draft (Auto-send off) and add it before you press Save.
If you cancel an automatic invoice, its sessions go on the next automatic invoice unless you invoice them yourself first.
If something's not right
No automatic invoice was made.
The sessions may still be marked Scheduled, already be on an invoice, or belong to the current period: a Monthly family's September sessions are invoiced on 1 October.
An automatic invoice wasn't emailed.
Auto-send was off, so it's a draft waiting for you, or the family has no email address. Send it yourself from the invoice with Share. See If an automatic invoice wasn't emailed.
With Auto-send on, each automatic invoice is issued and emailed to the family with its PDF as soon as it's made.
For tutors. Updated October 2026.
Where to find it
Families, the family, then Invoice settings
An independent student's page has the same Invoice settings.
Before you start
The family is on automatic invoices: Mode is Automatic. In Manual mode, Auto-send does nothing.
Steps
Open the family's page and find Invoice settings.
Check that Mode is Automatic and the Frequency is the one you want.
Switch on Auto-send.
It's saved at once. From the next daily run, each new invoice is issued instead of saved as a draft, then emailed.
Optional: To see what happened to an email, open the invoice and read Automatic email.
It reads Emailed with the address and when it went, or says why it wasn't.
An example
The Chen family is on Automatic and Monthly, with Auto-send on and Wei Chen's email on file. Early on 1 October, Tutello issues one invoice for Lucas's September sessions and emails it to Wei with its PDF:
INV-2026-0007, 5 sessions
AED 1,450
Due date
8 Oct 2026
What happens next
Its sessions leave To invoice, and Invoiced and Unpaid go up by AED 1,450, as when you press Save yourself.
Without Auto-send, the same invoice would be a draft, and your figures wouldn't move until you saved it.
What parents see
An email from Rania Khalil Tutoring via Tutello, with the subject Invoice INV-2026-0007 from Rania Khalil Tutoring and the PDF attached.
It says: Rania Khalil Tutoring has sent you invoice INV-2026-0007 for AED 1,450, due 8 Oct 2026. When money already counts toward it, a second line says what's left to pay.
When they reply, it goes to your own email.
The invoice is in their portal's Billing too, emailed or not.
Good to know
Each automatic invoice is emailed once. Invoices you make yourself are never emailed by themselves: email one from Share when you want to.
A family's email goes to Parent 1's and Parent 2's email addresses on the family. It never goes to a student in the family.
An adult learner's goes to the email they signed in with, once they've joined the portal. Until then, it isn't emailed.
An invoice that's paid or cancelled before its email goes out isn't emailed.
Switching on Auto-send doesn't email drafts made before. Save them and send them with Share.
While your account is read-only after the trial, no automatic invoices are made or emailed.
If something's not right
"This family has no email address on file."
Add Parent 1's or Parent 2's email with Edit on the family's page, then send this invoice with Share. The next automatic invoice is emailed.
"This student hasn't joined the portal, so there was no email address."
Give them access, and send this invoice with Share in the meantime.
Automatic email reads Email failed.
The next daily run tries again. If it still can't go through, the box says so: send it with Share.
Automatic email reads Email not confirmed.
Tutello couldn't confirm the email went out, so it won't send it again. Ask the family, and send it with Share if it didn't arrive.
Cancelling sends its sessions back to To invoice, and a payment on it stays unless you choose to delete it.
For tutors. Updated October 2026.
Where to find it
On a phone
Billing, then the invoice
On a computer
Invoices, then the invoice
On a phone, Cancel invoice is at the end of the invoice's page.
Steps
Open the invoice.
Press Cancel invoice.
Cancel this invoice? opens.
If a payment is on it, choose what happens to it: keep it, and it goes to their other invoices first, then counts as paid ahead; or delete it too, if the money never came in.
Press Cancel invoice, or Keep invoice to leave it as it is.
The invoice reads Cancelled and its sessions are back in To invoice.
To invoice them again, press Invoice these sessions again on the cancelled invoice.
A new invoice opens with the family or student they belong to now.
An example
INV-2026-0006 covers one of Sara's sessions, AED 330, and nothing is paid on it yet. After you cancel it, your dashboard reads:
Earned, unchanged
AED 6,040.50
Invoiced, was AED 4,190.50
AED 3,860.50
To invoice, was AED 1,850
AED 2,180
Unpaid, was AED 1,830.50
AED 1,500.50
What happens next
Its sessions move back to To invoice at full value. A discount on an issued invoice stops counting, so Earned goes up by it.
On the Detailed dashboard, cancelling an issued invoice takes its total off Invoiced and what was left to pay on it off Unpaid. A payment you kept then pays their other invoices first, which lowers Unpaid again, and anything over counts as paid ahead.
On the Simple dashboard, cancelling alone changes none of your figures, unless the invoice had a discount: Earned then goes up by it.
What parents see
The invoice leaves their Billing, and its sessions count in Not invoiced yet until you invoice them again.
Nothing is sent to them.
Good to know
The number is kept and never used again. Once cancelled, you can delete the invoice to take it off your lists.
A payment that also paid other invoices is never deleted here. Its part goes to their other invoices first, then counts as paid ahead.
For a family or student invoiced automatically, the next automatic invoice picks these sessions up if you don't invoice them first.
To change a session on an invoice, for example its length or total, cancel the invoice, change the session, then invoice it again.
A draft can be cancelled too. To change only its discount or how sessions are listed, there's no need: a draft can still change.
If something's not right
There's no Invoice these sessions again button.
None of its sessions is left to invoice: they're on another invoice already, or were deleted or cancelled since. Or the family or student is deactivated: reactivate them first.
"Couldn't cancel this invoice. Try again."
The connection dropped or the invoice changed on another device. Refresh the page and press Cancel invoice again.
What Received, Left to pay and each status mean on an invoice's page, and what to do next from there.
For tutors. Updated October 2026.
Where to find it
On a phone
Billing, then Invoices, then the invoice
On a computer
Invoices, then the invoice
Each row of the dashboard's Unpaid list opens the same page.
Steps
Read the chip beside the invoice number: Draft, Issued, Partly paid, Paid, Cancelled, or how many days it's overdue.
Read the sheet. It's the invoice as the family gets it. It ends with Total due, or with Total, Paid as of and Left to pay once money counts toward it.
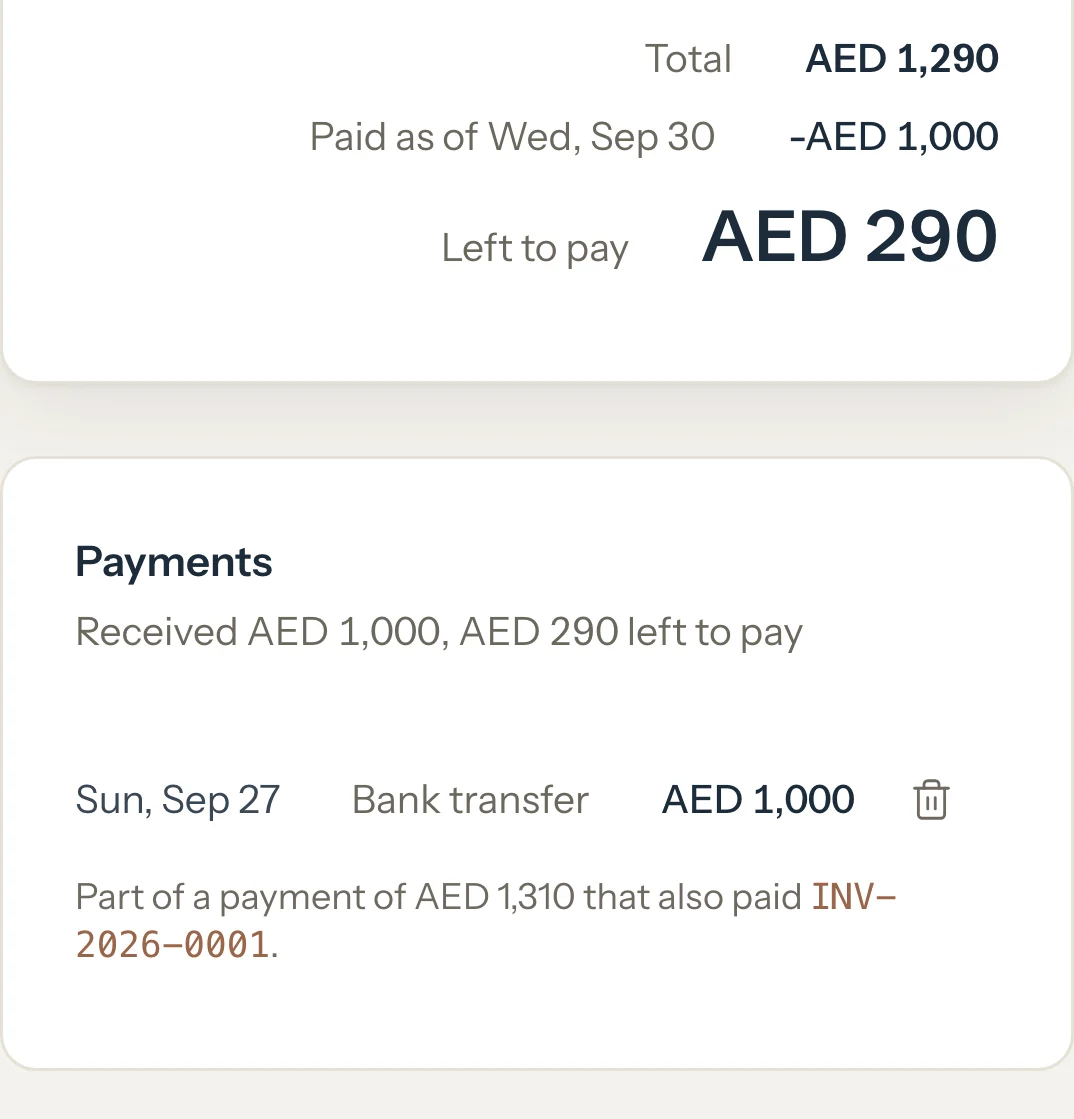
Under the sheet, read the Payments card: what's been received and what's left to pay, then each payment on the invoice.
To record more money, press Record payment.
Record payment opens with this invoice ticked and what's left to pay filled in.
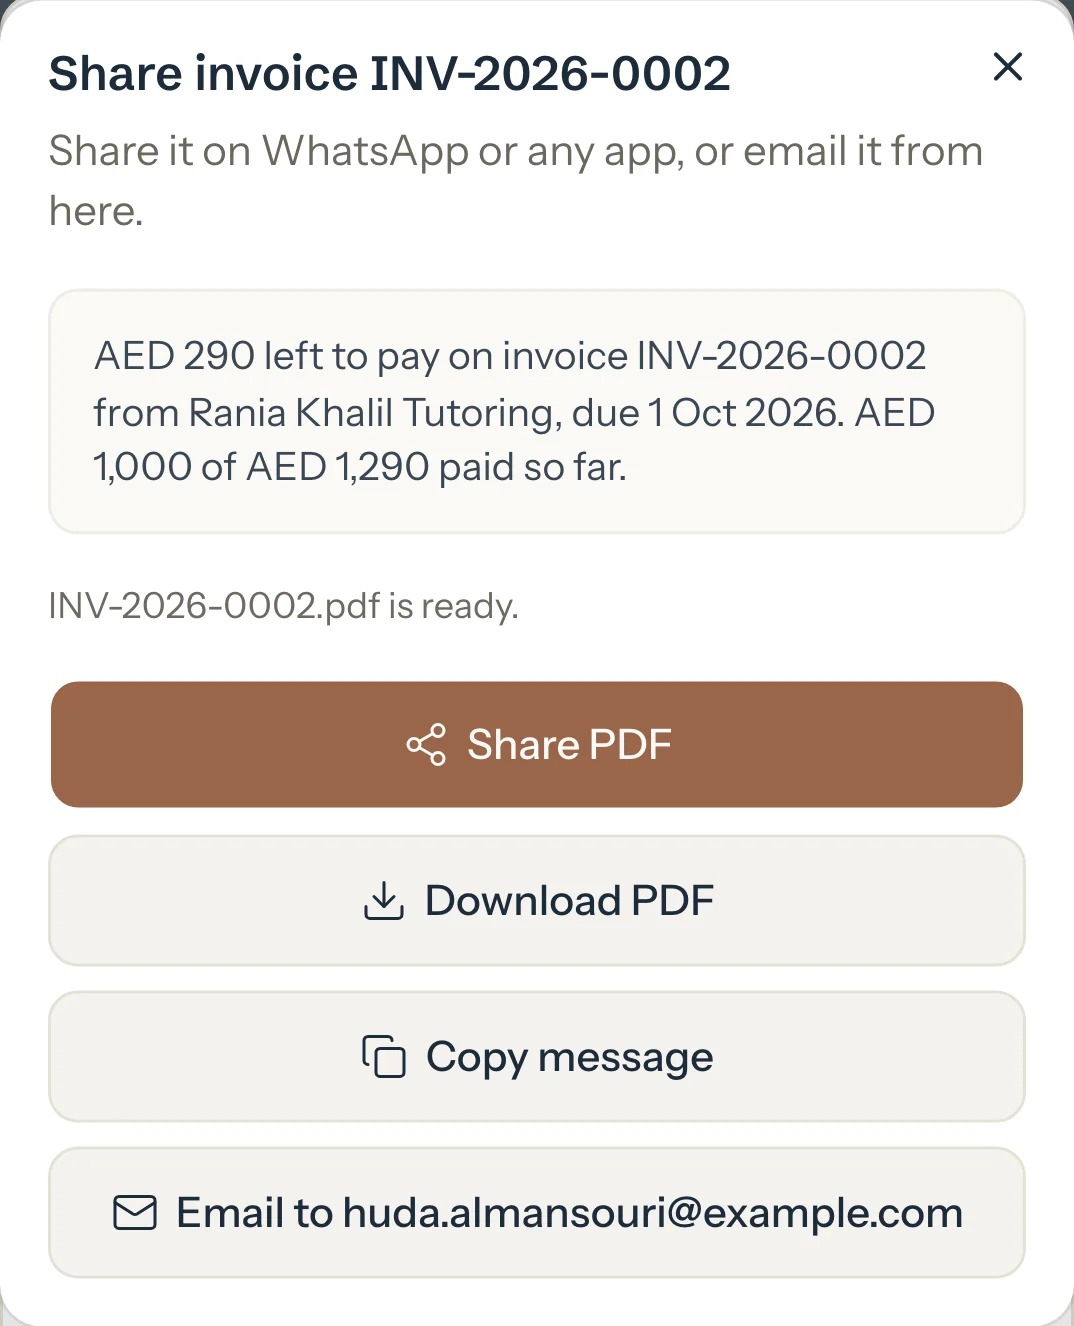
Optional: Press Share to send it on WhatsApp, as a PDF or by email, or Copy link to copy the link to it in the family's portal.
An example
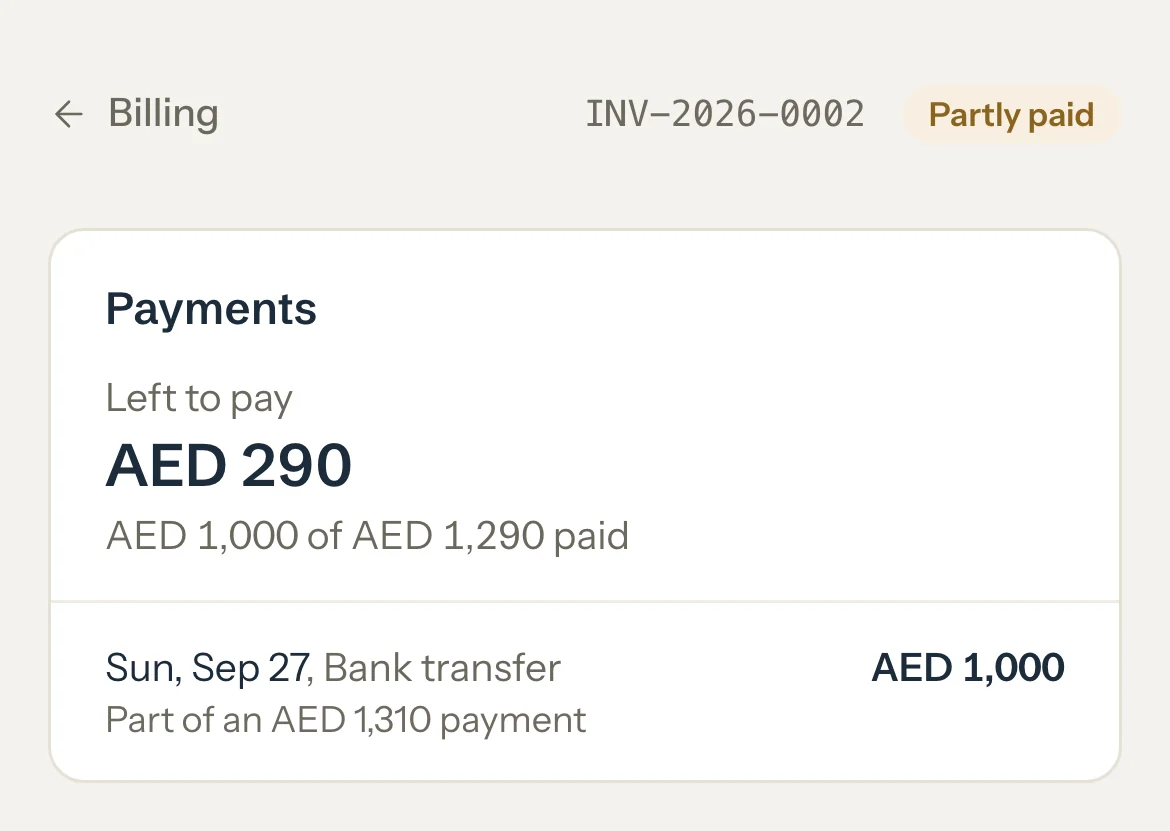
INV-2026-0002 for the Al Mansouri family reads Partly paid:
Total
AED 1,290
Received
AED 1,000
Left to pay
AED 290
"Part of a payment of AED 1,310 that also paid INV-2026-0001."
What happens next
When a payment covers what's left, the chip turns to Paid by itself. You never have to mark it.
Once nothing is left to pay, the page stops offering Record payment. Recording more would only add money paid ahead.
What parents see
In Billing, the same invoice reads Unpaid, Partly paid, Paid or Overdue, with what's left to pay.
The invoice and its PDF show the same sheet you see.
Good to know
Issued means saved and visible in the family's portal, with nothing received yet.
Partly paid means some money came in and some is left. It changes by itself as payments are recorded.
An invoice is overdue from the day after its due date, in your timezone, while something is left to pay. The due date is 7 days after the invoice date unless you change it. A draft is due 7 days after the day you save it.
Paid shows once the money counting toward the invoice covers its total, including money received without an invoice.
An invoice that totals AED 0 is saved as Paid: there's nothing to collect.
If something's not right
"Paid in full by its payments. Delete a payment to reopen it."
The payments on the invoice cover its total. If one of them was a mistake, delete that payment and the invoice reopens.
It says the invoice was marked paid, but some money isn't recorded.
It was marked paid before the payment was recorded. Press Mark unpaid, then record the payment.
The family says they paid, but the invoice isn't Paid.
Tutello counts money only once you record it. Record the payment, and the invoice updates.
How invoice numbers are given, why one can be missing, and how the due date and Overdue are set.
For tutors. Updated October 2026.
Where to find it
On a phone
Billing, then open an invoice
On a computer
Invoices, then open an invoice
Steps
Open an invoice. Its number is at the top of the sheet: INV, the year, then a number that counts up, such as INV-2026-0003.
Read the two dates under it: the day it was issued, and the day it's due.
Optional: When you make an invoice, change its Due date if the family needs more or less time.
It starts 7 days after the Invoice date and can't be before it.
Watch the status. While money is left to pay after the due day, the invoice reads Overdue and its due date turns red.
An example
The Al Mansouri family's issued invoices on 30 September. You gave this family 14 days to pay each one:
INV-2026-0002, dated 17 Sep
due 1 Oct
INV-2026-0003, dated 28 Sep
due 12 Oct
INV-2026-0006, dated 29 Sep
due 13 Oct
What happens next
INV-2026-0002 has AED 290 left to pay. If it isn't paid by the end of 1 October, it reads Overdue from 2 October, and the line under Unpaid on your dashboard reads AED 290 overdue.
What parents see
The same number, date and due date on their invoice and its PDF.
Once it's overdue, their portal marks the invoice Overdue, and their balance shows how much is overdue.
Good to know
Numbers count up across all your invoices, families and students together, and start again at 0001 each year.
An invoice is numbered when you make it, drafts included, and keeps its number for good, even once cancelled.
A number is never used twice. If you delete a cancelled invoice, its number stays taken, so your numbering has a gap.
Numbers follow the order you make invoices, not their dates. An invoice you date in the past takes the next number of its date's year: dated in December 2025, it gets an INV-2025 number.
You can't choose or change a number.
Once an invoice is saved, its due date can't be changed. To change it, cancel the invoice and invoice the sessions again.
A draft gets its due date when you save it: 7 days after that day, whatever due date it had as a draft.
With Auto-send on, an automatic invoice is due 7 days after it's issued. Without it, the invoice is a draft, due 7 days after you save it.
Overdue starts the day after the due date, in your timezone. An invoice with nothing left to pay is never overdue.
If something's not right
A number is missing from your list.
Look under Cancelled: a cancelled invoice keeps its number. If it isn't there, it was deleted, and its number is never used again.
An invoice dated earlier has a later number.
It was made later and dated in the past. Numbers follow the order invoices are made.
Record money as it arrives: who paid, how much, when and how.
For tutors. Updated October 2026.
Where to find it
On a phone
Billing, then Payments, then Record payment
On a computer
Payments, then Record payment
Record payment also opens from an invoice's page and from a row of your dashboard's Unpaid list, with that invoice ticked. On the Simple dashboard, a row opens it with that family or student chosen and its Unpaid filled in.
Steps
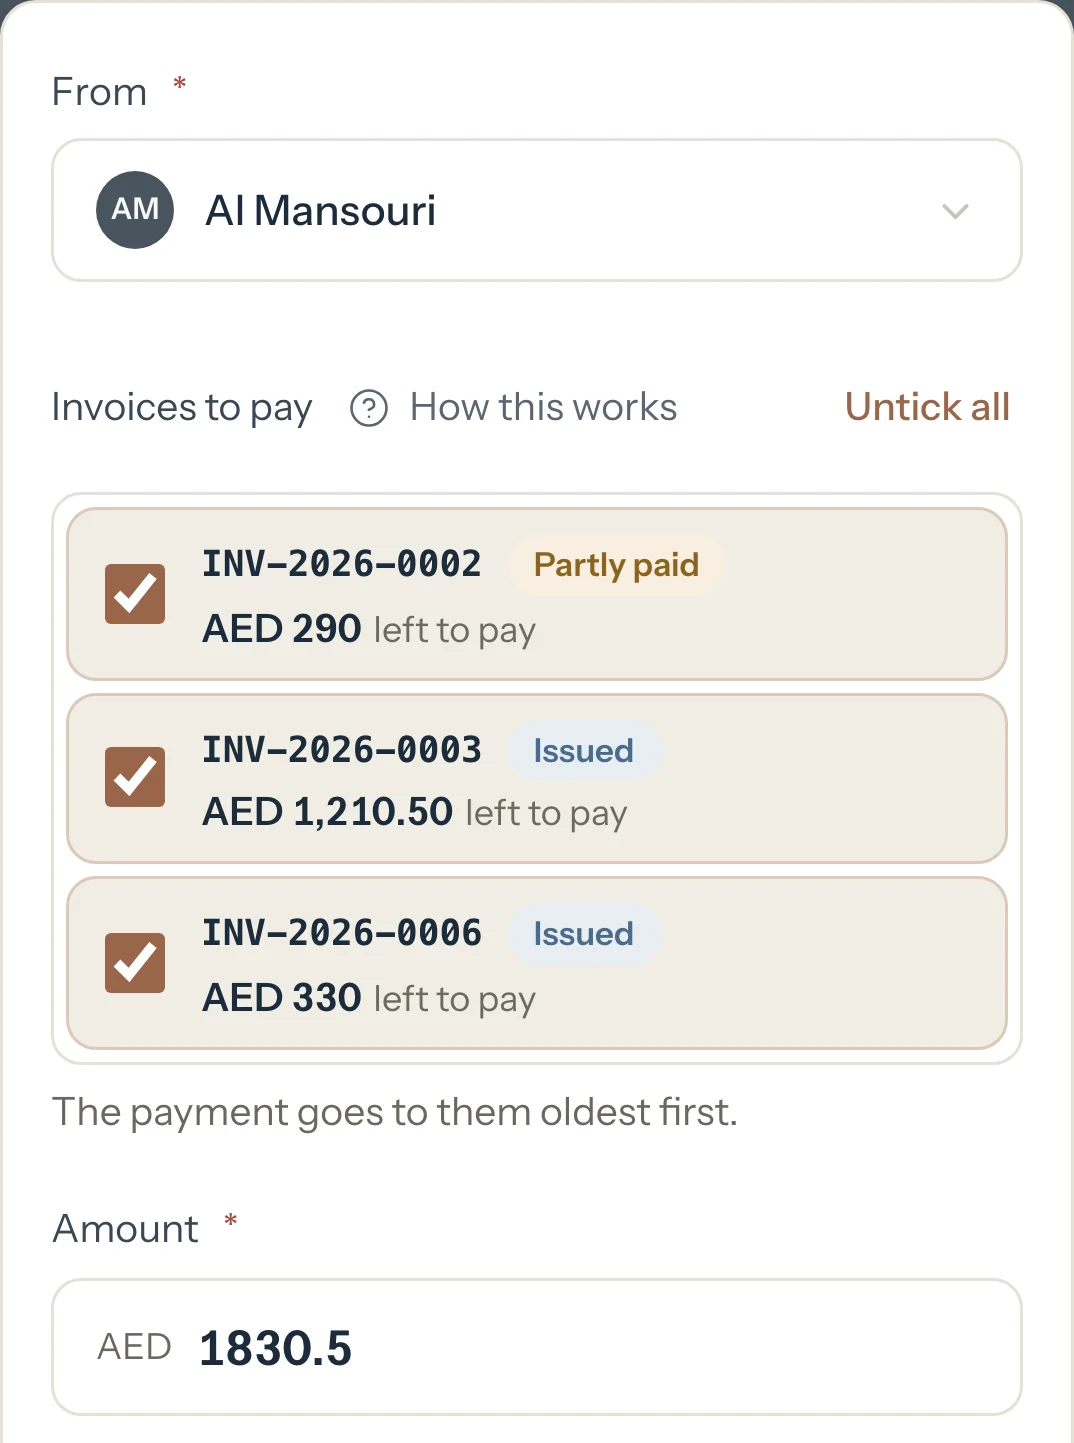
In From, choose the family, or the student who pays for their own sessions.
Invoices to pay lists their invoices with money left to pay, all ticked, and Amount fills in with what's left on them.
In Amount, type what you received if it's a different figure.
In Date received, choose the day the money reached you. It starts on today and can't be later.
Choose the Method: Cash, Bank transfer, Card, Cheque or Other.
Optional: In Notes, add who paid or the transfer reference.
Press Record payment.
The payment shows in Payments, and on the page of every invoice it paid.
An example
The Al Mansouri family has three invoices with money left to pay. Choose them in From and all three are ticked:
INV-2026-0002
AED 290
INV-2026-0003
AED 1,210.50
INV-2026-0006
AED 330
Amount
AED 1,830.50
What happens next
Payments lists it with its date, method and the invoices it paid.
Each invoice it paid shows it under Payments on its page, with what's been received and what's left to pay.
On the Detailed dashboard, Paid goes up and Unpaid goes down by what went to invoices. On the Simple dashboard they move by the whole amount, less any of it that's paid ahead. The family's Balance due goes down by the whole amount.
What parents see
Their Balance due in Billing goes down by the amount, and each invoice shows what's paid and what's left.
Tutello sends them nothing when you record a payment.
Good to know
Families pay you directly, in cash, by transfer, card or cheque. Tutello only records it, and takes no cut.
With nothing left to pay on the family's invoices, the payment counts as paid ahead, toward their next invoice. On the Simple dashboard it first counts toward sessions you haven't invoiced.
A payment that paid several invoices is still one line in Payments.
From lists active families and the students who pay for their own sessions. For a deactivated family, open one of its invoices and press Record payment there.
It says the family has nothing left to pay.
Every invoice of theirs is paid. Record the money anyway and it counts as paid ahead, or invoice their sessions first.
When a family pays two or more invoices with one transfer, record it once and Tutello splits it over them, oldest first.
For tutors. Updated October 2026.
Where to find it
On a phone
Billing, then Payments, then Record payment
On a computer
Payments, then Record payment
Opened from an invoice's page, Record payment ticks only that invoice. Tick the others this payment covers.
Before you start
The invoices must be saved. A draft can't be paid: open it and press Save first.
Steps
In From, choose the family, or the student who pays for their own sessions.
Invoices to pay lists each of their saved invoices with money left to pay, oldest first, and all of them are ticked.
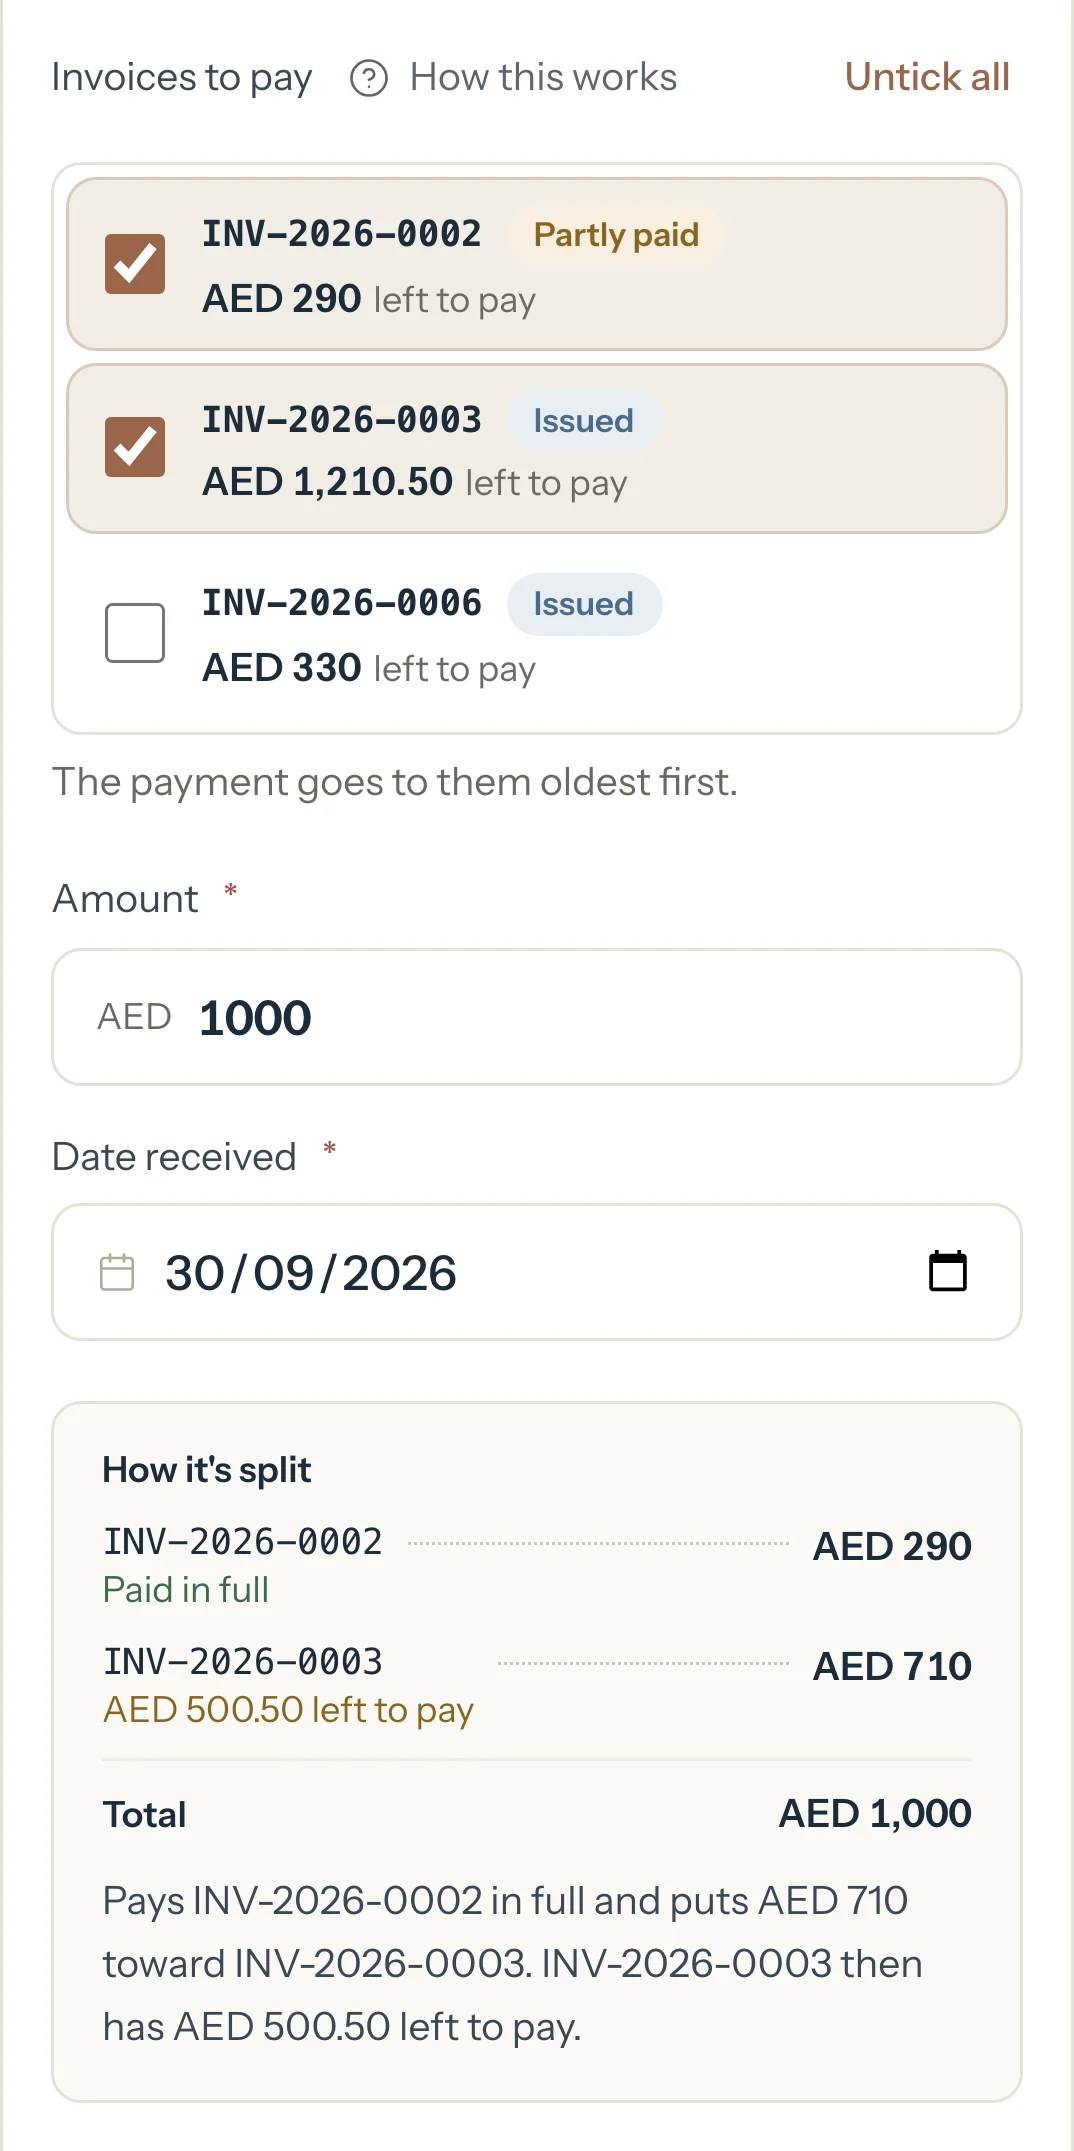
Untick any invoice this payment isn't for. Untick all clears every tick, and Tick all puts them back.
Check Amount. It follows the ticks: the total left to pay on the ticked invoices. If you received a different amount, type it. From then on, ticking no longer changes it.
Read How it's split. Each ticked invoice shows what it gets, oldest first: Paid in full, Pays what's left, what will be left to pay, or Not covered. Money beyond the ticked invoices shows on a No invoice row. The sentence under the box says the same in words.
The second invoice keeps AED 500.50 to pay.
In Date received, choose the day the money reached you. It can't be later than today.
Choose the Method: Cash, Bank transfer, Card, Cheque or Other.
Optional: In Notes, add the transfer reference.
Press Record payment.
An example
The Al Mansouri family has AED 290 left to pay on INV-2026-0002, AED 1,210.50 on INV-2026-0003 and AED 330 on INV-2026-0006. Huda sends one bank transfer of AED 1,000 for the first two. Untick INV-2026-0006 and type 1,000 in Amount. How it's split shows:
INV-2026-0002, Paid in full
AED 290
INV-2026-0003, AED 500.50 left to pay
AED 710
Total
AED 1,000
"Pays INV-2026-0002 in full and puts AED 710 toward INV-2026-0003. INV-2026-0003 then has AED 500.50 left to pay."
What happens next
Payments shows one line for the AED 1,000, with both invoice numbers.
INV-2026-0002 reads Paid. INV-2026-0003 reads Partly paid, and its Record payment is filled in with the AED 500.50 left.
On your dashboard, Paid goes up by AED 1,000 and Unpaid goes down by the same amount. The family's Balance due goes down by AED 1,000.
What parents see
In Billing, INV-2026-0002 shows Paid and INV-2026-0003 shows Partly paid with what's left to pay. Their Balance due is the figure you see on the family's page.
The invoice and its PDF show Total, Paid as of the day and Left to pay.
Nothing is sent to them when you record it. If you share INV-2026-0003 later, its message says what's left to pay.
Good to know
The oldest invoice by invoice date is paid first, whatever order you tick them in. Only the last one can stay partly paid.
If you record more than the ticked invoices need, the extra goes to the family's other invoices first, then counts as paid ahead. Money paid ahead counts toward the next invoice you save.
With none ticked, the payment goes to the oldest invoice first.
It stays one payment: one line in Payments, even though each invoice shows its part.
A payment can't be edited. If the amount, date or family is wrong, delete it and record it again. Deleting it removes it from every invoice it paid.
If you later cancel one of these invoices, the payment stays: its part goes to the family's other invoices first, then counts as paid ahead.
If something's not right
An invoice isn't in the list.
It may be a draft (save it first), already paid, cancelled, or on another family's or student's account. An adult learner's invoices are under their own name in From.
"That invoice is already paid, so it isn't listed."
Nothing is left to pay on it. Record the money on another invoice, or leave every invoice unticked to count it toward the oldest.
"These invoices just changed. Check them and try again."
One of them changed on another device, for example a payment was recorded or an invoice was cancelled. Check the list, then press Record payment again.
It says the most you can record is less than you typed.
The student has moved into a family since these invoices were made. Record the rest on the family.
Record money before you invoice, then link it to the invoice later.
For tutors. Updated October 2026.
Where to find it
On a phone
Billing, then Payments, then Record payment
On a computer
Payments, then Record payment
To link the money to an invoice later, open that invoice and press Match payments.
Steps
In From, choose the family, or the student who pays for their own sessions.
If invoices are listed, press Untick all so none is ticked.
The form says the payment goes to the oldest invoice first.
Type the Amount, choose the Date received and the Method, then press Record payment.
Later, to link it to one invoice, open that invoice and press Match payments.
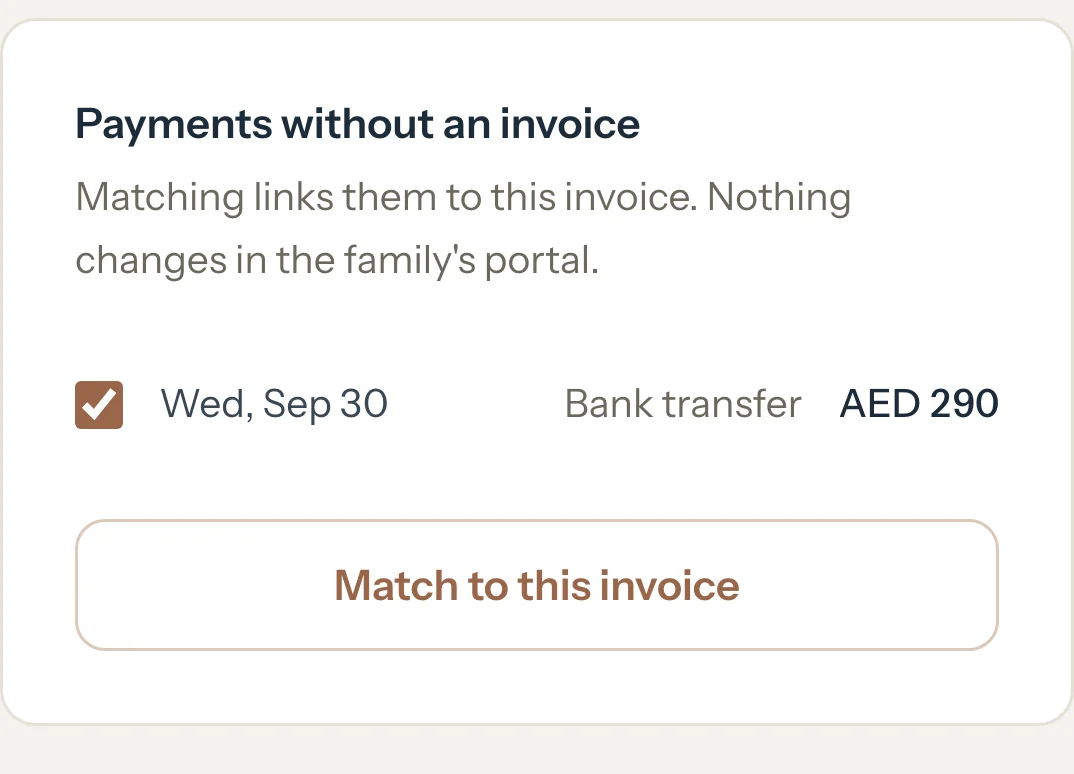
Payments without an invoice lists the family's payments that have no invoice. The ones that fit this invoice are already ticked.
Tick the payments that belong to this invoice and press Match to this invoice.
An example
Huda sends AED 500 before you've invoiced October, and you record it with nothing ticked. The Al Mansouri family still has AED 290 left on INV-2026-0002 and AED 1,210.50 on INV-2026-0003, so the AED 500 counts like this:
INV-2026-0002, now Paid
AED 290
INV-2026-0003, AED 1,000.50 left to pay
AED 210
Total
AED 500
What happens next
Payments lists the AED 500 with no invoice number.
INV-2026-0002 reads Paid. Its page says it includes AED 290 received without an invoice.
With the Detailed dashboard, To do lists INV-2026-0002 with a Match button until you match the payment.
What parents see
The same as you: INV-2026-0002 shows Paid in Billing, and their Balance due is AED 500 lower.
Matching the payments that are already ticked changes nothing they see.
Good to know
Money with no invoice always counts toward the oldest invoice by invoice date, so a newer invoice never takes money from one that already shows as paid.
Once every invoice is paid, the rest is paid ahead and counts toward the next invoice you save.
Matching only links the payment to the invoice. What the family owes in total stays the same.
If matching would take money from another invoice, the page says which one and what it will have left, before you press Match to this invoice.
If something's not right
Match payments isn't on the invoice.
It shows on an issued invoice when the family has a payment recorded without an invoice. Drafts, cancelled invoices and invoices marked paid don't offer it.
Nothing is ticked when Payments without an invoice opens.
That money already counts toward older invoices. You can still tick a payment; the page tells you what moves before you match it.
"A payment was just matched to another invoice. Check the list and try again."
It was matched on another device or page a moment ago. Look at the list again, then match what's still there.
Extra money counts toward the next invoice, and you see it before you save that invoice.
For tutors. Updated October 2026.
Where to find it
On a phone
Billing, then New invoice
On a computer
Invoices, then New invoice
Invoice now on a family's page starts the same new invoice with the family chosen.
Steps
Record the payment as usual. When it's more than the family's invoices need, the form says the extra counts as paid ahead.
When you next invoice the family, press New invoice, choose the family and tick the sessions.
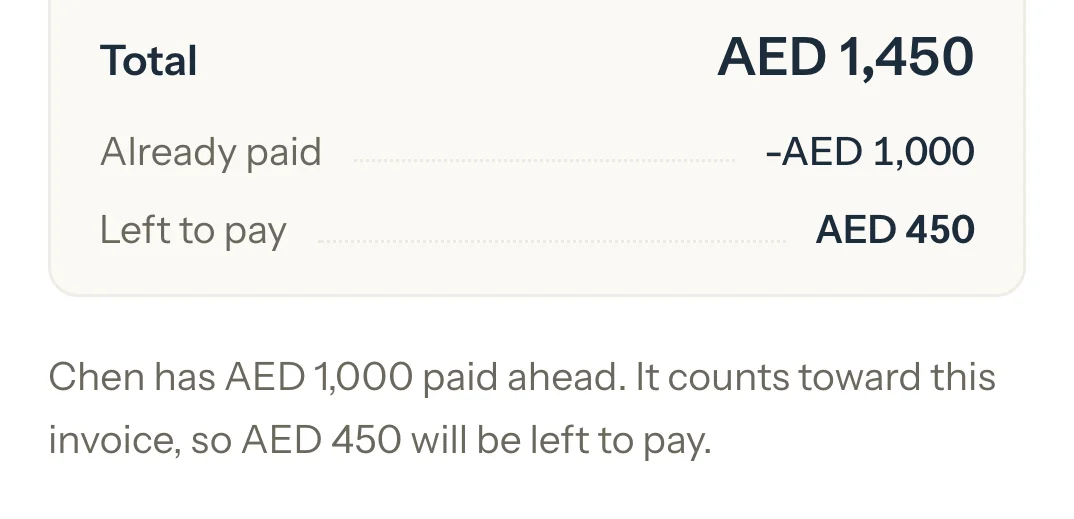
At Review, read the two rows under the total: Already paid and Left to pay.
The sentence under them says how much was paid ahead and what will be left.
Press Save.
The money paid ahead counts toward the invoice. If it covers the whole total, the invoice shows as paid.
An example
The Chen family has paid AED 1,000 ahead. You invoice Lucas's five Chemistry sessions, AED 1,450 in all:
Total
AED 1,450
Already paid
AED 1,000
Left to pay
AED 450
"Chen has AED 1,000 paid ahead. It counts toward this invoice, so AED 450 will be left to pay."
What happens next
On the Detailed dashboard, until an invoice uses it, Paid carries a line such as Plus AED 1,000 paid ahead. When the family has sessions to invoice, the To invoice list says how much is already paid.
The family's page shows it under Balance due. When they've paid more than they owe, the heading reads Credit balance.
Once you save the invoice, its page counts the money paid ahead as received toward it.
What parents see
In Billing, their balance has a Paid ahead line taken off what they owe.
The saved invoice shows Total, Paid as of the day and Left to pay, like any invoice with money toward it.
Good to know
On the Detailed dashboard, money paid ahead is never part of Paid: Paid is money toward invoices you've issued. On the Simple dashboard, Paid counts it up to what the family has earned.
A draft doesn't use money paid ahead. It counts once you save the invoice.
If you date the new invoice in the past, money the family already paid counts toward it first, and Review says so.
Each family's money stays with that family. Money one family paid ahead never pays another family's invoice.
If something's not right
Review doesn't show Already paid.
The family has no money paid ahead, or you're saving a draft, which doesn't use it.
A new invoice shows as paid, but the family hasn't paid it.
Money they paid earlier covers it. The invoice's Payments card shows how much of it was paid before.
A payment can't be edited: delete it and record it again.
For tutors. Updated October 2026.
Where to find it
On a phone
Billing, then Payments, then the bin on the payment
On a computer
Payments, then the bin on the payment's row
The page of each invoice it paid has the same bin, under Payments.
Steps
Find the payment in Payments, or on the page of an invoice it paid.
Press the bin on its row.
Delete this payment? says what will be deleted and what each invoice will have left to pay.
Press Delete payment, or Back to keep it.
If the money did come in, record it again with the right amount, date, family or method.
An example
Huda's AED 1,310 transfer paid what was left on INV-2026-0001 and AED 1,000 of INV-2026-0002. Deleting it, from either invoice or from Payments, deletes all of it:
INV-2026-0001, AED 310 left to pay again
AED 310
INV-2026-0002, AED 1,290 left to pay
AED 1,000
Deleted
AED 1,310
What happens next
Each invoice it paid shows that money as left to pay again, and an invoice it had paid in full no longer reads Paid.
On the Detailed dashboard, Paid goes down and Unpaid goes up by what it had paid on invoices. On the Simple dashboard they move by the whole amount, less any of it that was paid ahead. The family's Balance due goes up by the whole amount.
What parents see
In Billing, their balance goes up by the amount, and the invoices it paid show what's left again.
Nothing is sent to them.
Good to know
Nothing about a payment can be edited, not its amount, date, method or notes. Delete it and record it again.
A payment that paid several invoices is deleted whole, from every invoice it paid. The dialog names them.
Deleting can't be undone.
Cancelling an invoice never deletes a payment that also paid other invoices. Its part goes to the family's other invoices first, then counts as paid ahead.
If something's not right
The invoice's page has no bin next to the payment.
The invoice is cancelled. Delete the payment from Payments instead.
"Couldn't delete this payment. Try again."
The connection dropped or the page was out of date. Refresh it and press Delete payment again.
What Earned, Invoiced, To invoice, Paid and Unpaid mean on your dashboard, and the two sums that tie them together.
For tutors. Updated October 2026.
Where to find it
Dashboard
Insights, Explore and each family's page use the same words.
Steps
Start with Earned: the value of every session you've taught or charged for so far, less discounts on invoices you've issued.
Earned splits in two. Invoiced is the part on invoices you've saved. To invoice is the rest, sessions in drafts included.
Invoiced splits in two again. Paid is the money received toward those invoices. Unpaid is what's left to pay on them.
Read the line under Unpaid: how much of it is overdue, or Nothing overdue.
Read the bar under the figures. Paid, Not due yet, Overdue and To invoice sit side by side and add up to Earned.
An example
On a dashboard with AED 6,040.50 earned, AED 2,360 of the AED 4,190.50 invoiced is paid. Invoiced and To invoice add up to Earned:
Invoiced
AED 4,190.50
To invoice
AED 1,850
Earned
AED 6,040.50
What parents see
Their portal shows Balance due, split into Left to pay on invoices and Not invoiced yet, less any Paid ahead. It's the same figure you see on the family's page.
Good to know
Paid and Unpaid always add up to Invoiced. With the figures above, AED 2,360 paid and AED 1,830.50 unpaid make AED 4,190.50.
Overdue is part of Unpaid: the money left on invoices whose due date has passed. It's an amount, never the whole balance.
Paid ahead is money received beyond what your issued invoices need. On the Detailed dashboard it's never part of Paid, and it counts toward the next invoice. See Money paid ahead.
Left to pay is what's left on one invoice. Balance due, on a family's page, is all the family owes: its Unpaid and To invoice, less money paid ahead.
A past session still marked Scheduled isn't earned until you mark it. Cancelled sessions earn nothing; late cancellations and no-shows earn their booked length.
A discount counts once its invoice is issued. Until then, To invoice shows the sessions at their full value.
With the Simple dashboard, Paid and Unpaid also cover sessions you haven't invoiced.
If an invoice's sessions are now worth more than its total, a fifth part, To check, shows the difference. The To do card names the invoice: cancel it and invoice the sessions again.
The five figures, the bar under them, and the To invoice and Unpaid lists you work from each day.
For tutors. Updated October 2026.
Where to find it
Dashboard
Steps
Open Dashboard. The figures cover all time; the line under Earned says what you've earned this month.
Read the five figures and the bar under them. The money words explains each one and how they add up.
In Today, tap a session to mark it, change it or cancel it without opening the calendar.
In To invoice, press Invoice beside a family or student.
A new invoice opens for them with every session up to their latest one ticked.
In Unpaid, press Record payment when a family pays an invoice.
Record payment opens with that invoice ticked and what's left to pay filled in.
When the To do card shows, clear its rows. It lists the jobs no figure shows, such as past sessions you haven't marked.
Optional: Press See insights to look back over 30 days, 3 months or 12 months.
An example
On 30 September nothing is overdue, so the Unpaid list runs by due date, and it adds up to the Unpaid figure:
INV-2026-0002, Al Mansouri, due Oct 1
AED 290
INV-2026-0003, Al Mansouri, due Oct 12
AED 1,210.50
INV-2026-0006, Al Mansouri, due Oct 13
AED 330
Unpaid
AED 1,830.50
Good to know
Each list adds up to its figure: the To invoice list to To invoice, the Unpaid list to Unpaid.
The Unpaid list puts overdue invoices first, the most days overdue first, then the others by due date.
The To invoice list starts with the oldest session waiting. A row says when automatic invoicing will invoice it, or which draft already holds the sessions.
Match shows in place of Record payment when money received without an invoice can be linked to that invoice. See Money received without an invoice.
Families never see your dashboard.
Prefer three figures and one list? Switch to the Simple dashboard.
If something's not right
Earned looks too low.
Past sessions still marked Scheduled aren't earned yet. The To do card lists them: press Mark to open the oldest one.
A family isn't in the To invoice list.
All its earned sessions are on issued invoices, or its sessions haven't been marked yet.
In the demo, Sara's and Dana's sessions of 30 September are still Scheduled. If you haven't marked them by the next morning, the card has one row, with a Mark button:
2 past sessions not marked
Mark
"Oldest: Sara Al Mansouri on Wed, Sep 30. Not earned until marked."
Good to know
A row goes away once its job is done. Only the row about progress to note can be hidden, for the week.
Today's sessions stay in Today until the day is over. Only sessions from before today count as past.
On the Simple dashboard, the Match row doesn't show. The other rows are the same.
Rows come in this order: invoices covered by money received without an invoice, invoices whose sessions changed, sessions to mark, people to confirm, then report cards.
The report card rows show only while you use report cards.
If something's not right
A row says sessions aren't marked, but you taught them.
Press Mark and mark them completed. Until you do, they aren't in Earned or To invoice, and they can't go on an invoice.
An invoice reads Paid, but To do asks you to match it.
Money you recorded without an invoice already covers it. Match links that money to the invoice, so its page lists the payment.
Three figures, Earned, Paid and Unpaid, and one list of who owes you, for tutors who rarely send invoices.
For tutors. Updated October 2026.
Where to find it
On a phone
Settings (tap your initials), then Preferences, then the Dashboard card
On a computer
Settings, then Preferences, then the Dashboard card
Steps
On the Dashboard card, choose Simple.
It's saved as soon as you choose it. Choose Detailed to go back to the five figures.
Open Dashboard. You see three figures: Earned, Paid and Unpaid, with a bar of Paid, Not due yet and Overdue.
Read the Unpaid list: one row for each family or student who owes you anything, invoiced or not, the most overdue first.
When they pay, press Record payment on their row.
Record payment opens with them chosen and their Unpaid filled in. When you save, you come back to your dashboard.
An example
Paid AED 2,360 and Unpaid AED 3,680.50 make Earned, AED 6,040.50. The Unpaid list adds up to the Unpaid figure:
Al Mansouri
AED 1,980.50
Chen
AED 1,450
Dana Haddad
AED 250
Unpaid
AED 3,680.50
What parents see
Nothing changes for families. Each row's Unpaid is the Balance due they see in their portal.
Good to know
In Simple, Unpaid is everything you've earned and not been paid for, invoiced or not. In Detailed, Unpaid covers issued invoices only and the rest shows as To invoice.
Each row's Unpaid is that family's Balance due, the figure on its page.
Money a family paid beyond what it has earned shows under Paid as paid ahead. It never lowers another family's Unpaid.
Today and See insights stay as they are. To do leaves out Match rows, because matching changes none of the Simple figures.
Insights and the family pages keep the five figures. See The money words.
The choice is saved on your account, so every device you sign in on shows the same dashboard.
If something's not right
A row offers Open instead of Record payment.
That family or student is deactivated, or the money is from before a student moved into a family. Open their page: reactivate them first, or press Earlier invoices, billed directly and record the payment from that invoice.
"This payment counts toward sessions you haven't invoiced."
Nothing they owe is on an invoice yet. Record it anyway: it lowers their Unpaid, and it counts toward the next invoice you save.
Your figures over 30 days, 3 months or 12 months, with hours, attendance and how long families take to pay.
For tutors. Updated October 2026.
Where to find it
Dashboard, then See insights
Each family's page has the same figures for that family on its Stats tab.
Steps
On your dashboard, press See insights.
Choose a period: 30 days, 3 months or 12 months.
Insights opens on 3 months: this month and the two before it, from the 1st. 30 days is the last 30 days, today included. Dates follow your timezone.
Read the first row: the five money figures for the period. Earned shows how it changed against the period before.
A line such as + AED 750 from earlier links to older money that's still to invoice or unpaid.
Read the second row: Received, Hours, Attendance and, once three invoices have been paid within the period, Days to pay.
Look at the charts: Earned by month, Top students, Top families and Hours by subject.
Optional: Press See all students or See all families to open every row in Explore.
Good to know
Received counts the payments dated in the period. A payment can come months after its session, so Received and Earned rarely match.
Hours counts completed sessions only. Late cancellations and no-shows are charged but not taught, so they add no hours.
Attendance is the share of completed sessions among every session with an outcome: completed, cancelled, cancelled late or no-show. Sessions you haven't marked are left out.
Days to pay is the median number of days from an invoice's date to its payment.
Until you have about a month of sessions, the charts wait and say when to come back. The figures show from the first day.
Nothing new is saved. Insights reads the same sessions, invoices and payments as your dashboard.
If something's not right
Insights doesn't match my dashboard.
Your dashboard covers all time; Insights covers one period. The + AED ... from earlier lines show what's older and still open.
The charts don't show yet.
They need about a month of sessions. The card says how many weeks are left.
One table of your figures by family, student, subject, month or weekday, with saved views, a link and a CSV export.
For tutors. Updated October 2026.
Where to find it
Dashboard, then See insights, then the Explore tab
Steps
Open Insights and press the Explore tab.
In Group by, choose Family, Student, Subject, Month or Weekday.
Choose the Period, then what to Show: Earned, Hours or Sessions.
Optional: In Filters, keep only Completed sessions or only Late cancellations and no-shows, tick With a balance due, or pick one Subject.
On a phone, the filters fold behind the Filters button.
On a computer, press a column heading to sort the table by it. Press it again to turn the order round.
Optional: Press Save view and give the view a name.
It joins Saved views, next to the three that come with Tutello.
Press Copy link to keep this exact view, or Export CSV to open the table in a spreadsheet.
Good to know
Three views come ready: Balance due, Hours by subject, 3 months and Students by last session.
The link holds the whole view. Open it later and you see the same table with today's figures.
The CSV has every row, even when the page shows only the first ones.
A student whose family pays reads Family pays in the money columns. Their money sits on the family's row.
On the Family view, Next steps opens the family in the first row and offers Invoice now for it. Copy overdue list copies who's overdue as plain text; nothing is sent to anyone.
Only your saved views are stored. The figures are read fresh each time.
If something's not right
"Too many exports this hour. Try again later."
You've exported several times recently. Wait a while, then export again. Copy link works in the meantime.
A student shows Family pays instead of an amount.
Their sessions are invoiced to their family. Group by Family to see the money.
Parents see the schedule, shared notes, invoices, the balance and report cards; a student in a family sees their own schedule, notes and cards, never money.
For tutors. Updated October 2026.
Where to find it
Families, open the family, then the Portal access card
An adult learner's own page has a Portal access card for them.
Steps
Open the family's page and go to Portal access.
It has a row for each parent and each student, with whether they have access.
Invite each person with Invite by email, or with Create invite link to share on WhatsApp.
When they accept, their row reads Active. Someone found by their mobile waits until you confirm it's them.
Optional: To end someone's access, press Remove access on their row.
What parents see
A parent: the family's schedule, the notes you share, Balance due with Left to pay on invoices and Not invoiced yet, each issued invoice with its PDF, the payments you recorded, and the report cards you publish.
A student in a family: their schedule, the notes you share and, if you allow it, their own report cards. Never an amount, a rate, a balance or an invoice.
An adult learner who pays for themselves: their own schedule, notes, invoices, balance and report cards, and nobody else's.
Good to know
Nobody sees drafts, cancelled invoices, report cards you haven't published, or your private notes, and the schedule shows no prices.
The portal is read-only. Nobody can book, cancel or pay through it.
A saved invoice shows in the portal straight away. Nothing is emailed until you share it.
Their Balance due is the same figure as on the family's page, worked out the same way.
A parent whose children have two tutors on Tutello sees each tutor apart, never added together.
A student in a family can't open the money pages at all, even with their address.
If something's not right
A parent can't see an invoice.
It's a draft or cancelled, or their access is to another family. Save the draft and it shows.
The parent's email is on the family. If it isn't, add it with Edit on the family's page, or share an invite link instead.
Steps
Open the family's page and go to Portal access.
Each parent and each student has a row.
On the parent's row, press Invite by email.
The invite goes to the email on the family. The row reads Invited by email, and the link shows under it with Copy link and Share on WhatsApp.
Optional: Send the same link on WhatsApp with Share on WhatsApp, in case the email goes astray.
When the parent accepts, their row reads Active.
What parents see
An email from Tutello: Rania Khalil Tutoring invited you to their Tutello portal, with a link to accept and the day it expires.
The link opens their invite. They press Sign in to accept, sign in with Google, an email link or a password, and accept. If their account has no mobile yet, they're asked for it.
The family then shows in their portal: the schedule, the notes you share, the balance and the invoices.
Good to know
Whoever opens the link and accepts gets the access, whatever email they sign in with. Send it only to the parent.
The parent can also sign in with the invited email and accept it from their portal, without the link.
An invite works for 14 days. After that the row reads Not invited again, and you can invite them again.
Resend sends a new email with a new link. The old link stops working.
The link shows under the row only right after you invite. To get it again later, press Resend.
You can invite both parents at the same time. Each parent has their own invite, and inviting one never cancels the other's. Inviting the same parent again replaces their earlier invite.
To invite a student in the family, type their email in the box on their row and press Invite by email. They see their schedule, the notes you share and, when you allow it, their own report cards, never money.
If something's not right
The parent didn't get the email.
Ask them to look in spam. Or press Resend, and send the new link with Share on WhatsApp too.
You fixed the parent's email after inviting them.
Their row reads Not invited again. Press Invite by email to send the invite to the new address. The invite to the old address stops working.
"This family is deactivated. Reactivate it to send invites."
Press Edit on the family's page and reactivate the family, then invite them.
"This person has too many open invites from you. Wait for them to answer, or cancel one."
This email already has several invites from you waiting. Press Cancel invite on the ones you don't need, or wait for them to answer.
Create an invite link and share it on WhatsApp, for a parent with no email or one who lives on WhatsApp.
For tutors. Updated October 2026.
Where to find it
Families, open the family, then the Portal access card
Steps
Open the family's page and go to Portal access.
On the parent's row, press Create invite link. If you have their email, press Invite by email: it sends the email and gives you the link too.
The link appears under the row, with Copy link and Share on WhatsApp.
Press Share on WhatsApp.
WhatsApp opens with a message from your business and the link, addressed to the parent's mobile when it's on file.
Press send in WhatsApp.
When the parent opens the link and accepts, their row reads Active.
What parents see
A message from you: Hi, Rania Khalil Tutoring invites you to the Tutello parent portal to see your schedule and invoices, followed by the link.
The link opens their invite. They press Sign in to accept, sign in with Google, an email link or a password, and accept.
Good to know
Tutello sends no text messages and has no access to WhatsApp. It only opens WhatsApp with the message ready; you press send.
Whoever accepts the link gets the parent's access, so share it only with the parent.
An invite link works for 14 days. Until it's accepted, the row reads Invite link created with New link and Cancel invite.
New link makes a fresh link to share, and the previous link stops working.
Each parent gets their own link. Making a link for one parent never stops the other parent's link.
For a student, leave the email box empty and press Create invite link. Their message mentions only the schedule.
If something's not right
The parent says the link doesn't work.
It expired, was cancelled, or a newer link replaced it. If the row still reads Invite link created, press New link and share the new one. If it reads Not invited, press Create invite link, or Invite by email when the family has their email, and share that link.
WhatsApp asks who to send it to.
The family has no mobile on file for that parent. Pick the contact in WhatsApp, or add their mobile to the family first.
When a parent's mobile already has a Tutello account, your invite waits in their portal and you confirm it's them when they accept.
For tutors. Updated October 2026.
Where to find it
Families, open the family, then the Portal access card
An adult learner's page has the same By phone button for them.
Before you start
The parent already has a Tutello account, for example because another tutor invited them. A parent new to Tutello has none yet: invite them by email or share a link.
Steps
On the parent's row in Portal access, press By phone.
A box opens with the parent's mobile from the family filled in.
Check the number, or type another, and press Check.
If it finds their account, press Send invite.
The row reads Invited by phone. No email or text message is sent: the invite waits in their portal.
When they accept, a Review row shows on your dashboard's To do card, and their row reads Accepted, needs your confirmation.
Confirm it's them: check the email they signed in with, then press Confirm access.
Their row reads Active, and the family shows in their portal.
What parents see
In their portal, under Pending invites: Rania Khalil Tutoring sent you an invite. Only your business name shows, never the family's.
They press Accept. Their portal then says: Accepted. Waiting for Rania Khalil Tutoring to confirm it's you.
Nothing from the family shows until you confirm.
Good to know
Tutello only tells you whether it found an account. You see the email they signed in with once they accept, never before.
It finds an account only through a mobile a tutor saved for that parent on a family they've joined. A number the parent typed in for themselves isn't enough.
If the mobile is on Tutello but can't take an invite this way, it says so. Share an invite link instead: they still use their one account.
A phone invite has no link, so it has no Resend. Cancel invite takes it back.
Students in a family can't be invited by phone. Use their email or a link.
If something's not right
"No account uses this number. Share an invite link instead."
When a parent found by their mobile accepts your invite, or asks to join, check it's them before they see anything.
For tutors. Updated October 2026.
Where to find it
Dashboard, then Review on the To do card
The family's Portal access card shows the same request.
Steps
On your dashboard, find the To do row that says the parent accepted your invite, or asked to join from their portal. Press Review.
The family's page opens, or the student's for an adult learner. Its Portal access card has a row that reads Accepted, needs your confirmation.
Read Email they signed in with and Name they gave. They typed the name themselves, so it proves nothing.
Ask the parent which email they use, for example on WhatsApp, away from Tutello.
If it's the email shown, press Confirm access.
The row reads Active, and the family appears in their portal.
If it isn't, press Not this parent.
Nothing is shared. The row reads Not confirmed and offers the usual ways to invite the right person.
What parents see
While they wait, their portal says: Accepted. Waiting for Rania Khalil Tutoring to confirm it's you.
If you press Not this parent, their portal says you didn't confirm it's them, so they weren't added.
Good to know
Only invites that found an account by mobile wait for you: a By phone invite, a parent found when you added the family, and a parent who asked to join from their portal.
An email invite or an invite link gives access as soon as the parent accepts. Nobody needs your confirmation then.
A request a parent made from their portal opens with Tutello hasn't checked who this is. Check the email the same way.
Not this parent ends that one request only. You can still invite the right person.
When you added the family from the Check step, confirming fills in the family's empty contact details from the parent's account.
If the family is deactivated, the request keeps waiting until you reactivate the family and confirm it.
If something's not right
The name looks right but the email doesn't.
Press Not this parent. Anyone can type a name. The email they signed in with is what counts.
Why each parent's mobile holds one Tutello account, and what you see when a parent is already on Tutello.
For tutors. Updated October 2026.
Where to find it
Families, then Add family
Editing a family's mobile numbers gives the same answer.
Steps
In Add family, type the parent's mobile and press Check.
Tutello tells you whether this parent already uses Tutello. It never says which tutor or which family.
If they do, press Add family.
Your invite waits in their portal. Once they accept, confirm it's them.
If they don't, add the family's details as usual and invite them.
What parents see
One account for every tutor, tied to their mobile. In their portal, each tutor's schedule and billing stay separate.
Good to know
Each mobile number holds one parent account. A parent never needs a second account for a second tutor.
You learn whether they're on Tutello, and at most the name on their account. Never their email, their other tutors or their other families.
Sometimes the parent is on Tutello but can't be invited by mobile. Then add the family's details and share an invite link: they still use their one account.
Typing a mobile that's already on one of your own families says so, with a link to that family, such as Open Al Mansouri. When you're editing a family, the link reads Open.
When another tutor lists a parent's mobile as Parent 1, the parent may be asked in their portal if they want to join. That tutor sees nothing until the parent accepts, then confirms it's them, as you do.
Tutello sends no text messages, and nobody types a code.
Students' own phones, and adult learners', are not part of this.
If something's not right
A parent says their mobile already has a Tutello account.
They opened your invite with another account. They should sign in with the email they used before, then open your link again. If the number isn't theirs, they can email support@tutello.ae.
"Too many checks. Try again later."
You've checked a lot of numbers in a short time. Add the family's details instead: adding a family never depends on the check.
"Same mobile as the first parent. Leave it blank or enter the second parent's own mobile."
Each parent of a family needs their own mobile. Leave Parent 2's mobile empty if they share one.
Their own schedule, the notes you share and the report cards you publish for them.
Billing, with their Balance due split into Left to pay on invoices and Not invoiced yet, their invoices with PDFs, and the payments you recorded.
Nothing about any other student or family.
Good to know
Unlike a student in a family, they see money, but only their own.
With Auto-send on, their automatic invoices are emailed to the email they signed in with. Until they've joined, they aren't emailed.
Once they've joined, Share on their invoices can email them too.
Inviting again, or Resend, replaces the earlier link, and the old one stops working.
If they later move into a family, their access stays for the time they were billed directly: their row reads From when they were billed directly, with Remove access. To show them the family's schedule, invite them from the family's page.
If something's not right
"This student is in a family. Invite them from the family page."
Only a student billed directly gets their own access. Invite them on the family's Portal access card: they'll see their schedule, shared notes and, if you allow it, their own report cards, never money.
"This student is deactivated. Reactivate them to send invites."
Reactivate the student from their page, then invite them.
"This student hasn't joined the portal, so there was no email address."
Their automatic invoice wasn't emailed because they haven't accepted an invite yet. Invite them, and send this invoice with Share.
Resend an invite or make a new link, cancel an invite before it's accepted, or take someone's portal access away.
For tutors. Updated October 2026.
Where to find it
Families, open the family, then the Portal access card
An adult learner's page has the same card.
Steps
Open the family's page and find the person's row in Portal access.
To send an email invite again, press Resend.
They get a new email with a new link, and the old link stops working.
For an invite link, press New link and share it again.
The previous link stops working.
To take back an invite nobody has accepted yet, press Cancel invite.
Its link stops working, and the row reads Not invited.
To end someone's access, press Remove access on their row.
A box titled Remove portal access? says what happens.
Press Remove access in the box.
They lose access to this family's portal straight away.
What parents see
After Remove access, the family disappears from their portal. Nothing is emailed to them, and their account and any other families stay.
After Cancel invite, their link no longer opens the invite.
Good to know
Removing a parent also takes out the contact details their account filled in on the family, unless you've edited them.
Removing access deletes nothing else: the sessions, invoices and payments stay, and you can invite them again later.
Removing a parent also cancels their own waiting invites. The other parent's invite keeps working.
Each parent has their own invite, so both can be waiting at the same time. A new invite for one parent replaces only that parent's earlier invite. The other parent's stays as it is.
An invite sent By phone has no link, so it has no Resend. Cancel it and send it again if you need to.
An invite that isn't accepted within 14 days runs out, and the row reads Not invited again.
Deactivating a family doesn't remove anyone. People who joined keep seeing its history, but no new invites can go out until you reactivate it.
If something's not right
A parent says their link doesn't work.
It ran out, was cancelled, or a newer one replaced it. If the row still shows the invite, press Resend, or New link for a shared link, and send the new one. If it reads Not invited, invite them again with Invite by email or Create invite link.
The other parent's invite stopped working after you removed someone.
That happens when the account you removed matches neither parent's email or mobile, or when the invite was a link made before 7 October 2026. Invite the other parent again from their row.
You removed someone by mistake.
Invite them again. Once they accept, the family is back in their portal.
Choose Simple or Detailed report cards for every student, or for a few, and decide whether students see their own cards.
For tutors. Updated October 2026.
Where to find it
On a phone
Settings (tap your initials), then Preferences, then the Report cards card
On a computer
Settings, then Preferences, then the Report cards card
One student's own setting is on their page, under Progress.
Steps
On the Report cards card, choose Simple or Detailed.
The first time, Before you turn on report cards opens. Nothing is saved yet.
Optional: Press Copy a message for parents and send it to the parents yourself before their first card.
Press I understand.
Report cards are on for every student and Saved shows. Not now leaves them off.
Optional: Press Set up students to give each student a curriculum, a year and topics. You can also write cards without topics.
Optional: Turn off Students see their own cards if only parents should read them. A student you set on their own Progress tab keeps that setting.
Optional: To give one student another setting, open their page, press Progress, and choose Off, Simple or Detailed under Report cards for Sara.
It reads Only for Sara. Use my default puts them back on yours.
What parents see
Nothing, until you publish a card. Then it shows under Report cards in their portal, and nothing is sent to them.
A student in a family with their own portal login reads their own cards while Students see their own cards is on, unless you changed it for them with Show report cards in Sara's own portal on their Progress tab. A student who pays for themselves always does.
Good to know
Simple: once a month Tutello fills in attendance and the topics you covered, and you write two short lines. Detailed adds how each topic went, homework and test scores, noted after each session. Best for exam years.
To try them with a few students first, leave the card on Off and press Turn on for some students only. Everyone else stays Off.
While you use report cards, Report cards shows in the sidebar on a computer, and Students has a Report cards switch at the top on a phone. Each student's page reads Sessions, Progress and Details.
Choosing Off again asks first when some students have their own Simple or Detailed setting, or a card exists. Tick Turn them off too for those students, or Unpublish all published cards to take every card out of the portal. Otherwise published cards stay where they are.
Moving one student from Detailed to Simple keeps what you noted, hidden, and brings it back if you switch to Detailed again.
If something's not right
"Couldn't save. Try again."
The connection dropped and your choice went back. Choose again.
Give each student a curriculum and a year, so report cards print their level and Tutello can suggest the right topic list.
For tutors. Updated October 2026.
Where to find it
Students, then the student, then Details
Add student and a new family's student rows have the same fields.
Steps
Open the student's page and press Details.
Under Curriculum, choose the student's school system, or Other or not sure.
Under Year, choose their school year.
Before: Grade 10 shows under it when the grade you had typed reads differently.
Optional: For a British Year 10 to 13, choose the Exam (optional) and its Exam board, so Tutello suggests the right list.
Press Save changes.
Good to know
The level prints on each report card under the student's name, and the year decides which topic list Tutello suggests.
Grades you saved before levels existed show as Other or not sure with the same year. Tutello never guesses a curriculum, so choose it when you know it.
Adult or professional needs no year. University has its own years, from a foundation year to postgraduate.
A student marked 'Grade 13' gets a question on Students and on their Details: choose Year 13, British curriculum (A Level), University, or keep the words. Set all to University answers for everyone at once.
Each new school year, Students asks whether to move students up: ticked students move up one year when you press Save, and Not now hides the question until next year. A student in their last school year shows unticked. School years start on 1 April for CBSE and ICSE and on 20 August for the others.
Published report cards keep the level they were published with.
If something's not right
A student isn't in the move-up list.
Their level has no year to move from, as with Adult or professional. Set the new level on their Details.
Give each subject a topic list, from Tutello's suggestion, a template, a saved list or your own, so cards can show what you covered.
For tutors. Updated October 2026.
Where to find it
On a phone
Students, then Report cards at the top, then Set up
On a computer
Report cards, then Set up
One student's lists are on their page, under Progress, then Topics.
Steps
Press Set up on the student's row.
Set up Omar for report cards opens on the level.
Choose the Curriculum and Year, then press Next.
Check the subjects. Remove one with its cross, or type a new one in Add a subject, then press Next.
A subject Tutello knows by another name reads Matched to Mathematics lists.
Under Choose a starting point, keep the suggested list, or press Choose another list, Copy from another student, Paste a list or Start empty.
No topics for this subject is there too: that subject's cards then show sessions and your own words only.
Press Next and check the list. Tick off a topic to hide it, tap one to rename it, or type a new one in Add a topic.
Optional: Under Omar has covered everything up to:, choose the last topic done before you started noting progress.
Those topics read Covered before, so the first card doesn't look like a fresh start.
Press Next subject to do the same for the next subject, then Save on the last one.
Omar is set up for report cards. With more to do, Set up Omar next opens the next student.
Good to know
Students without topics still get cards, with their sessions and your own words. You don't have to set anyone up before their first card.
Set up several at once sets up students who share a year: their level once, then each subject's list, and each student keeps their own copy. Set up later keeps Report cards on Cards, and Set up stays one tap away.
On a list you changed, press Save as my list to use it again: it shows under Copy from another student when you set up someone else. Rename or delete your lists from Your saved topic lists on the Report cards card in Settings. Students who use one keep their own copy.
On a suggested list, Something wrong with this list? sends the list's name and what you write, nothing about the student. It shows with your ideas on What's new.
Later, under Progress, Topics shows each list with what was started, in sessions or on a published card. Use Edit topics to change it and Rename subject to rename it.
Choosing another list keeps the old one under Earlier years, so earlier cards still read.
Where the topic lists come from, on the Report cards card, names the sources of Tutello's lists.
If something's not right
There's no suggested list.
Tutello has none for that subject and year yet. Press Use a template, paste the school's list with Paste a list, or Start empty.
"Thanks. We'll check the list."
Your note was sent. Nothing changes on the student's list until you edit it.
The panel opens at Covered today, or Progress for a Detailed student.
Tap the topic you covered. The one from Last time and the next one not covered yet come first.
Other topic finds any topic on the list or adds one. Past paper practice, Homework help and Revision are there too.
For a Detailed student, choose How it went for each topic you tapped.
What these mean explains the four levels.
For a Detailed student, choose Done, Not done or None set under Homework.
Optional: For a Detailed student, press Add a test score to note a mark or a grade.
Press Save changes.
It goes into that month's card. Only you see it until you publish.
Good to know
Nothing is required. Leave a session empty and its card still counts it.
On the dashboard, a session that has ended asks What did you cover? One tap saves the topic and reads Covered: Poetry, with Undo. More opens the session.
A session that took place but still reads Scheduled asks you to press Mark completed, so it counts in the card.
Sessions of Detailed students with nothing noted wait under Progress to add, on the student's Progress tab and on Report cards. Fill in what you remember there and press Save progress.
All week, the dashboard's To do counts the Detailed sessions of the week before with no progress noted. Add progress opens them, and Hide for this week hides the row.
You can change progress on a session that's on an invoice. It never changes what the session costs.
How it went, homework and scores never show in the portal until you publish a card. Shared notes are separate: see Keep notes private or share them.
If something's not right
There's no progress in the session.
The student is on Off, the session hasn't happened yet, or it was cancelled or marked a no-show. Or the student is deactivated and set to Simple or Detailed on their own page: reactivate them to note progress.
See every student's card for a month in one list, then check them one after another and publish the ready ones together.
For tutors. Updated October 2026.
Where to find it
On a phone
Students, then Report cards at the top, then Cards
On a computer
Report cards, then Cards
From the 1st, the dashboard's To do says how many of last month's cards are ready to check. Check opens them.
Steps
Open Report cards and press Cards.
It shows last month. Use Previous month and Next month to move.
Read the list. Each family's students sit together, then students who pay for themselves under Independent.
Each row shows the level, the card type, the sessions and the state: Draft, Ready, Published, Skipped or To update.
Press Start checking.
The first card opens under Checking September cards: 1 of 4.
Read the card, write your lines, then press Ready, next card.
It's marked Ready and the next card opens. Publish now publishes this one straight away.
Press Back to list when you're done.
The list reads 4 cards are ready.
Press Publish 4 ready cards, then Publish 4 cards.
Each family sees their own cards in the portal. Nothing is sent: share them from each card.
What parents see
Each card under Report cards in their portal once it's published, with a New dot until they open it. Nothing reaches them before that.
Good to know
Use the filters To check, Ready, Published, Skipped and All to narrow the list. To open one card, tap its row on a phone, or press Check or Open on a computer.
Students on Off with no cards, and students with no sessions that month, aren't listed.
Previous and Next move between cards without marking anything.
A card with a warning stays unpublished when you publish the ready ones, so you can look at it. A card held back only because it mentions another student shows Mentions Omar and Publish anyway on its row.
Tutello fills in the sessions and topics; you write a few lines, check the preview, and publish the card to the family's portal.
For tutors. Updated October 2026.
Where to find it
On a phone
Students, then Report cards at the top, then the student's row
On a computer
Report cards, then Check on the student's row
A student's page has their cards under Progress, each with Open.
Steps
Open the card.
Notices at the top say what needs a look first. Most have a button that fixes it.
On a Simple card, write Going well and To work on. On a Detailed card, write From Rania or a Going well line for a subject.
It saves as you type: Draft saved.
On a Simple card, check What we covered. Untick any topic you don't want on the card, or press Add a topic.
On a Detailed card, each subject lists its Topics this month: choose each topic's level. From your sessions shows what you noted.
Optional: Check Next month (suggested). Press Change to pick another topic, or Hide.
Press Preview to see the card as the family will, on a phone, as a PDF and as a picture.
Preview. Only you can see this. stays at the top.
Press Back to editing to change something, or Publish.
Read who will see it, then press Publish.
The card is in their portal. Nothing is sent: Share opens so you can send it yourself.
What parents see
The card under Report cards in their portal, with a New dot until they open it.
Your words, the topics, the sessions and, on Detailed, each topic's level, homework and test scores. Tutello adds no amount or fee.
A student with their own portal login sees it too, if you allow it: Students see their own cards in Settings, or their own switch on their Progress tab.
Good to know
Tutello writes nothing on a card by itself: only labels, facts from your sessions, and your words.
Add an idea for home and Add anything else add two more lines to a Simple card.
Turn off Show missed and cancelled sessions on the card to show only the sessions that took place.
Every topic under What we covered counts in the topics covered so far, whether a session named it or you ticked it, even if you set up the list later. Next month (suggested) moves past it, and once the card is published it stays counted on later cards and on the student's Progress tab. A topic hidden on the list never counts.
Who will see it lists each parent and the student, and who has a portal login. Invite to the portal sits under anyone who hasn't.
More holds Change card type (for this card only), the month's skip, Delete draft and Open student page.
On a Detailed card, Progress over time shows from the student's third card, and Session by session lists each session with its shared notes.
A school mock from an earlier month shows as Latest mock under the subject's exam. Press Hide to leave it off this card. A mock you hid or corrected on its own month's card stays that way on later cards.
Edit on a test score from a session changes how this card prints its name, result and note. Its type stays the one on the session: change it there.
If something's not right
"Write Going well and To work on first."
A Simple card needs both lines before it can be published.
Going well and To work on are the same as last month's.
Change them so they're about this month. A card can't repeat last month's lines.
A warning says your words mention another student.
Check you're on the right card. It's a warning only: you can still publish.
A warning says the card mentions money.
The student can read this card in their own portal. Take the amount out, or publish if it's fine.
A notice says a session is still marked Scheduled.
Press Open and mark the session completed or cancelled, so it counts.
Change a published card and publish the update, look back at earlier versions, or take a card out of the portal or delete it.
For tutors. Updated October 2026.
Where to find it
On a phone
Students, then Report cards at the top, then the card's row
On a computer
Report cards, then Open on the card's row
Every card of a student is also on their page, under Progress.
Steps
Open the published card and change what you need.
Changes not published. says the family still sees the version from the day you published it.
Press Publish update, then Publish update again in Publish the update?.
The family sees the new version, marked Updated with today's date. Nothing is sent: share it again if you want them to look.
Optional: Under History, press a version to read it as it was published.
Older versions are read only.
Optional: To take the card out of the portal, press Unpublish, then Unpublish in Unpublish this report card?.
It disappears from their portal straight away. You can publish it again later.
Optional: To delete it, unpublish it first, then press More, then Delete (Delete draft on a card never published), and confirm.
A deleted card goes with every version and its history, and leaves your data export. This can't be undone.
What parents see
An update replaces the card in their portal, marked Updated with its date. Earlier versions are never shown to them.
An unpublished or deleted card is gone from their portal. A card they open after it was taken down says the business has taken it down.
Good to know
To update shows on a published card in Cards once something on it has changed, such as a session added, cancelled or given a topic. The dashboard's To do counts these too.
The family keeps reading what you published until you publish an update. Only Session by session on a Detailed card follows your session notes: a note you change shows at once, and one you make Private leaves the card.
Deleting a draft removes only your words. Sessions and progress notes stay, and a new draft builds itself again.
Copies already downloaded or forwarded, such as a PDF sent on WhatsApp, can't be called back.
A card published before its student moved to another family, or started paying for themselves, reaches nobody any more. It stays in your list, and you can't update or share it.
Send a published card yourself, as a portal link on WhatsApp, a PDF or a picture, with the message and the picture in English or Arabic.
For tutors. Updated October 2026.
Where to find it
A published card, then Share
Share opens by itself right after you publish.
Steps
Open the published card and press Share.
If there's more than one reader, choose who it's for.
A line under it says whether they have a portal login, and when they last opened the portal.
Optional: Turn on Message in Arabic to send the message, and the picture's labels, in Arabic.
Your own words stay as you wrote them.
Press the first button.
It's Send on WhatsApp with the portal link for someone who opened the portal lately, or the PDF for everyone else.
Optional: Or use a button under it: the PDF, the picture (Share as image on a phone, Save as image on a computer), Send portal link when the PDF or the picture comes first, or Copy message.
What parents see
Your message, then the portal link, the PDF or the picture. The message never has marks or comments: those are in the card.
The link opens the card in their portal once they're signed in.
Good to know
Someone who opened their portal, or joined it, in the last 60 days gets the portal link first. Everyone else gets the PDF first. Send portal link shows only for someone with a portal login.
On a phone, Share PDF and Share as image open your phone's share sheet. On a computer they read Download PDF and Save as image and save the file.
When you share to a parent and a brother's or sister's card for the same month went up in the last 7 days and hasn't been shared, Share Sara's card in the same message puts both in one message, with one link that opens both.
The PDF always prints its labels in English. A card with Arabic in it can't be a PDF: the picture comes first instead. See If a report card PDF won't download.
If the card changed after you published it, the dialog says which version the reader sees, such as Sara sees the version from 2 Nov. Publish the update first if you want them to see the new one.
If something's not right
"Couldn't make the PDF. Try again."
The connection dropped. Press the button again, or send the picture.
WhatsApp opens without the parent chosen.
Their mobile isn't on the family's record. Pick the chat in WhatsApp, or add the number on the family's page.
Skip a month's card when there's little to say, or make a card for the dates you choose, such as a mock exam term.
For tutors. Updated October 2026.
Where to find it
On a phone
Students, then Report cards at the top, then Cards
On a computer
Report cards, then Cards
An open card has the same skip under More.
Steps
To skip a month, press More on the student's row, then Skip September.
Optional: Tick Add September's sessions to October's card if next month's card should cover both months.
Press Skip September.
There's no September card for them, nobody is told, and it leaves your To do list.
Optional: To skip several students at once, press Select, tick them, then Skip selected.
For a card covering dates you choose, press New report.
Choose the Student, then Dates I choose under Covers, and set From, To and a Title.
Card type starts on the student's own setting.
Press Create draft.
The card opens, ready to write and publish like any other.
Good to know
You can undo a skip until the 1st of the month after next: press Undo on the student's row, or on the card.
A card for dates you choose can cover a year at most, ends today or earlier, and needs a title. It sits beside the month's cards and never replaces them.
New report with A month makes a month's card for a student whose cards come only when you ask: see Choose how often cards are made.
A student's own Progress tab has New report too, opening on that student.
If something's not right
"Choose dates that end today or earlier, with From before To."
A card can't cover days still to come. Move To to today or earlier.
What each one changes, and why the currency can't change once a session is marked or an invoice or payment exists.
For tutors. Updated October 2026.
Where to find it
On a phone
Settings (tap your initials), then Profile
On a computer
Settings, then Profile
Steps
In Your name, type your own name.
If you're also a parent on Tutello, the same name shows in your parent portal.
Leave Same as my name ticked, or untick it and type your Business name.
Families see the business name in their portal and on every invoice.
Choose your Currency. Every amount in Tutello uses it.
Choose your Timezone.
Press Save changes.
Good to know
Your timezone decides when a day starts: session times, invoice dates, when an invoice becomes overdue, Insights periods and automatic invoicing.
There are 15 currencies: AED, the other Gulf currencies, EGP, USD, GBP, EUR, INR, PKR, PHP, CAD and AUD.
Changing the currency never converts amounts. That's why it locks once there's money in your account: AED 1,470 would simply turn into USD 1,470.
Your sign-in email isn't changed here. To change it, email support@tutello.ae.
Your default hourly rate and cancellation window are on Preferences.
If something's not right
The currency won't change.
A session has been marked completed, cancelled late or a no-show, an invoice has been made (even one you later cancelled or deleted), or a payment has been recorded, so amounts already exist in this currency. If it was set wrong by mistake, email support@tutello.ae.
Sign in with a password as well as Google or an email link, change or remove it, and reset it when you forget it.
For tutors. Updated October 2026.
Where to find it
On a phone
Settings (tap your initials), then Profile, then Sign-in and security
On a computer
Settings, then Profile, then Sign-in and security
Parents and students have the same card on their portal's Profile page.
Steps
In Sign-in and security, press Set a password, or Change password if you have one.
If you're changing it, type your Current password.
Type the new password. The rules under it tick as you go: long enough, not a common password, and doesn't include the first part of your email.
Press Set password or Change password.
Changing it signs out your other devices. Tutello emails you either way, so you'd know if it wasn't you.
Optional: To stop using a password, press Remove, type your current password, then press Remove password.
You sign in with Google or an email link from then on. You're signed out on every device, this one included.
Good to know
The Email link is Always on. Removing your password never locks you out.
Google reads Linked once you've signed in with Google using this same email.
Sign out everywhere signs you out here at once, and on your other devices within a few minutes.
Resetting a forgotten password signs you out on every device too.
If something's not right
I forgot my password.
On the sign-in page press Sign in with a password, then Forgot password?. Type your email and press Send reset link. The link works once and expires soon, so use it straight away.
"For your security, sign in again to make this change."
You signed in a while ago. Press Sign in again, then make the change.
"Password sign-in is paused after too many wrong tries. Reset your password to turn it back on."
Reset it from Forgot your password? on the card or Forgot password? on the sign-in page. Google and the email link still work meanwhile.
Every record in your account as CSV files you can open in a spreadsheet, on every plan and after it ends.
For tutors. Updated October 2026.
Where to find it
On a phone
Settings (tap your initials), then Profile, then Legal & your data
On a computer
Settings, then Profile, then Legal & your data
Steps
In Legal & your data, press Download all my data.
Read the note: the file holds personal details about your families, so keep it somewhere safe.
Press Download.
Tutello prepares a ZIP file and your browser saves it.
Open the ZIP. Each CSV file opens in Excel, Numbers or Google Sheets.
Good to know
You get your families, students, sessions, invoices, invoice lines, payments, weekly schedules, portal access and saved Insights views.
It works on every plan, during your trial and after your trial or plan ends.
Deleted invoices are in the invoices file with the day you deleted them, so every invoice number is accounted for.
Session times are in your own timezone.
Report cards come as files of their own: every card with your words, each published version, the topic lists, the progress noted on sessions and test scores. Each student's level is in the students file.
For one table of figures rather than everything, use Export CSV in Explore.
If something's not right
"You've requested several exports recently. Try again in an hour."
Thirty days free with no card, then Founding Lifetime, a yearly or a monthly plan, each with every feature.
For tutors. Updated October 2026.
Where to find it
On a phone
Settings (tap your initials), then Billing
On a computer
Settings, then Billing
Steps
Open the Billing tab.
It shows two plans: Monthly, and Founding Lifetime while founding spots remain, or the Annual membership after that.
Press Choose Monthly, Choose Founding Lifetime or Choose Annual membership.
Stripe's secure payment page opens. Pay there, and you come back to Tutello.
Optional: Later, to change your card or get receipts, press Manage billing.
Good to know
The trial lasts 30 days from the day you sign up. You don't need a card to start.
In the trial's last week, a banner says when it ends, and Tutello emails you a week before and a day before.
Every plan has every feature. Only the price and how often you pay change.
Founding Lifetime is paid once, for the first 500 tutors, and includes every feature added later. During the trial, your dashboard shows how many spots are left.
In the UAE, prices show in AED: AED 299.99 once or a year, AED 39.99 a month. Elsewhere they're $79 and $9.99.
If a card payment fails, a banner asks you to update your card. You keep full access while you do.
If something's not right
My trial ended before I chose a plan.
Nothing is lost. Your account is read-only until you choose a plan here. See When your trial ends.
Which emails reach you, which reach the families you invite, and what sends each one.
For tutors. Updated October 2026.
Steps
To see whether an invoice was emailed, open the invoice.
Emails you sent lists the emails you sent from Share. Automatic email says what happened to an automatic one.
Optional: If one didn't go through, send it again from Share, or share the PDF on WhatsApp.
What parents see
A portal invite, when you press Invite by email or Resend. An invite by phone or an invite link sends no email.
An invoice with its PDF, when you email it from Share, or when Auto-send issues an automatic invoice. It comes from your business name via Tutello, and replies go to your own email.
Their own sign-in and password emails, the same as yours.
No reminders: Tutello never chases a payment or an invite for you.
No email when the Portal Terms change either. Before their portal opens, they press Accept and continue once.
Good to know
Sign in to Tutello: the link you ask for on the sign-in page.
Confirm your email for Tutello: when you sign up with an email and a password. The link works once and soon expires.
Reset your Tutello password: when you ask for a reset. That link soon expires too.
A short security notice when a password is added, changed or removed, when you're signed out everywhere, or when password sign-in is turned off after many wrong passwords.
Free trial reminders: a week before your trial ends and the day before. None once you've chosen a plan.
Someone tried to create a Tutello account with this email: when a sign-up uses your address.
Tutello never sends text messages or WhatsApp messages. WhatsApp only opens on your phone with the message ready, and you press send.
When the Terms of Service change, there's no email. A banner in the app asks you to Accept them, and until you do, you can look but not change anything.
If something's not right
You didn't get the sign-in email.
Look in spam, then ask for a new one. You can also sign in with Google.
A parent didn't get the invite email.
Ask them to look in spam. Or press Resend, and send the new link on WhatsApp too.
"This family has no email address on file."
An automatic invoice couldn't be emailed. Add Parent 1's or Parent 2's email with Edit on the family's page, and send this one with Share.
A new invoice lists only marked sessions that no invoice has yet, so check the session's status and whether an invoice already holds it.
For tutors. Updated October 2026.
Where to find it
On a phone
Billing, then New invoice
On a computer
Invoices, then New invoice
To check one session, open it on your Calendar or from the family's page.
Steps
Under Sessions to invoice, look for the session under its student's name.
Late cancellations and no-shows are listed, but start unticked. Tick the ones you want to charge.
If it isn't listed, open the session on your Calendar and read its status.
If it's still Scheduled, choose Completed and press Save changes.
It's listed the next time you open New invoice.
If the line under Total says it's on an invoice, press that invoice's number.
That invoice opens. A session can be on one invoice only, and a draft counts.
Optional: To move it onto your new invoice, cancel that invoice, then invoice its sessions again.
Good to know
New invoice lists completed sessions, late cancellations and no-shows that aren't on an invoice yet. Sessions still Scheduled, cancelled ones and upcoming ones aren't listed.
A draft holds its sessions too. Open it from Invoices, then Draft, and press Save to issue it, or cancel it to free them.
On a family's or student's list of sessions, each row says To invoice or names the invoice it's on.
A student you made independent keeps their earlier sessions with the family. Invoice those from the family.
If something's not right
"Nothing to invoice."
None of their sessions is marked and off every invoice. Press Go to calendar and mark the sessions that took place.
The session reads Cancelled.
A session cancelled in good time, or with its fee waived, is never charged. If it did take place, press Reopen, then mark it Completed.
A session can be marked completed or a no-show from an hour before it starts, so nobody is charged for a session that hasn't happened.
For tutors. Updated October 2026.
Where to find it
Calendar, then the session
Or tap it under Today on your dashboard.
Steps
Open the session and check its date and time.
It can be marked from an hour before that start time.
Optional: If it took place on another day or at another time, change the date and time to when it happened.
Choose Completed and press Save changes.
The session counts in Earned.
If the student didn't come, press Mark no-show instead, then Mark no-show again to confirm.
Good to know
Cancelling has no such wait: an upcoming session can be cancelled at any time. Cancel a session says when it's charged.
A completed session can't be moved to a start more than an hour away either.
A past session you haven't marked reads Not marked under Today, and the To do card counts them. Mark opens the oldest.
If something's not right
"This session hasn't started yet. Mark it completed once it starts."
Its start is more than an hour away. Come back to it then, or correct its date and time if they're wrong.
"This session hasn't started yet. Mark it a no-show once it starts."
The same rule applies to a no-show. If they've told you they won't come, cancel the session instead.
"This session hasn't started yet."
This line under Completed & paid follows the same rule. It can be chosen from an hour before the start.
The session reads Cancelled, Cancelled late or No-show.
Press Reopen first. The session goes back to Scheduled, and then you can mark it. With no Reopen, the session is on an invoice: see If you can't change a session.
Every session time looks a few hours off.
Check Timezone under Settings, then Profile. Tutello reads every session time in that timezone.
An invoice turns Paid by itself once the money recorded toward it covers its total, so record what's left or match money that came in without an invoice.
For tutors. Updated October 2026.
Where to find it
On a phone
Billing, then Invoices, then the invoice
On a computer
Invoices, then the invoice
Steps
Open the invoice and look under its sheet.
Once any money counts toward it, Payments says how much is received and what's left to pay.
If the family paid and you haven't recorded it yet, press Record payment.
It opens with this invoice ticked and what's left to pay in Amount.
Check the Amount and the Date received, then press Record payment.
What happens next
Once the money covers the total, the invoice reads Paid and stops offering Record payment.
On the Detailed dashboard, Paid goes up and Unpaid goes down by what the payment puts toward invoices.
What parents see
In Billing, the invoice reads Paid once you've recorded the money. Until then it reads Unpaid, Partly paid or Overdue.
Good to know
An invoice can't be marked paid by hand while money is missing. Record the payment, and it turns Paid by itself.
Money recorded without an invoice counts toward the family's oldest invoice first, by invoice date.
To record the money as you create an invoice, switch on Paid when you review it.
Overdue only means the due date has passed with something left to pay. Recording the rest clears it.
If something's not right
It reads Partly paid.
Less than its total counts toward it. Record the rest when it comes in. If you agreed to take less, cancel the invoice, keep the payment, and invoice the sessions again with a discount.
The payment went to another invoice.
With no invoice ticked, money pays the oldest invoice first; with several ticked, the oldest of those. Delete the payment and record it again with only this invoice ticked.
You recorded the money without an invoice, and an older invoice took it.
Press Match payments on this invoice, tick the payment and press Match to this invoice.
"Paid with money already recorded without an invoice. Match payments links it here."
It already reads Paid: there's nothing more to record. Matching only links that payment to this invoice.
It's a draft.
A draft can't be paid. Press Save to issue it, then record the payment.
It totals AED 0 and still reads Issued.
There's nothing to collect: press Mark as paid. If a line says its sessions are now worth more, cancel it and invoice them again.
Balance due adds what's unpaid on invoices and what's still to invoice, less money paid ahead, so check each part on the family's page.
For tutors. Updated October 2026.
Where to find it
Families, then the family
An adult learner's balance is on their own page, under Students.
Steps
Open the family's page and read the line under Balance due.
It splits the balance into what's unpaid on invoices, what's still to invoice, and any money paid ahead.
If part of it is to invoice, press Invoice now to see which sessions.
Balance due counts a session as soon as you mark it, before any invoice.
On your dashboard, look for a To do row about past sessions not marked, and press Mark.
A session counts only once it's marked.
In Payments, check each payment from the family is there once, under the right family.
An example
On 30 September the Al Mansouri family's page reads AED 1,980.50, more than their invoices ask for. The line under it says why:
Unpaid on their invoices
AED 1,830.50
Omar's session on 29 Sep, to invoice
AED 150
Balance due
AED 1,980.50
"AED 1,830.50 unpaid + AED 150 to invoice"
What happens next
When you invoice Omar's session, the AED 150 moves from To invoice to Unpaid. Balance due stays AED 1,980.50 until money comes in.
Each payment you record lowers Balance due by its amount. Once a family has paid more than everything it owes, Balance due becomes Credit balance.
What parents see
Their portal shows the same Balance due, split into Left to pay on invoices and Not invoiced yet, less any Paid ahead. A fix on your side shows there too.
Good to know
Late cancellations and no-shows count at their booked length unless you waive the fee. Cancelled sessions count nothing.
Each session keeps the rate it had when you added it. A new hourly rate never changes it: give that session its own price instead.
A discount counts once its invoice is issued. Sessions on a draft count at full value.
On the Detailed dashboard, Unpaid covers invoices only, so it can be lower than a family's Balance due. On the Simple dashboard, each family's Unpaid is its Balance due, never below 0.
If something's not right
A payment isn't taken off.
It may be recorded under another family or student. Delete it and record it again under the right one.
Your dashboard's Unpaid says some money is marked paid but not recorded.
An invoice was marked paid before its payment was recorded, so it still counts in Unpaid. Open it, press Mark unpaid, then record the payment.
The family's page shows Credit balance.
They've paid more than everything they owe. The extra counts toward their next invoice.
Each mobile holds one parent account, so the parent keeps one account for every tutor.
Until they accept, you only learn that an account exists, never its email, its other tutors or its families.
A phone invite has no link to resend. Cancel invite takes it back.
If something's not right
"No account uses this number. Share an invite link instead."
Tutello can't invite this number by phone. Press Create invite link or Invite by email instead. A parent who already has an account signs in to it to accept.
It says the parent is already on Tutello, and to share an invite link instead.
Their account can't take an invite by phone. Share an invite link: once they open it signed in, it joins the account they have.
"This mobile number already has a Tutello account. Sign in with the email you used for it."
The parent opened your link signed in with another email. They press Sign in with another email, sign in with the email they used before, and the link opens again. If the number isn't theirs, they can email support@tutello.ae.
"Couldn't check that number. Try again."
The answer didn't come through, or you've looked up many numbers in a short while. Try again later, or share an invite link.
It says the student has sessions or invoices, so they can't be deleted.
Anything that names them keeps them: a session of any status, an invoice, cancelled ones too, a payment, portal access or a report card. Deactivate them instead. To delete a student added twice by mistake anyway, cancel their invoices, delete their sessions and payments, delete the cancelled invoices, press Remove access and delete their report cards, then try again.
"Only a cancelled invoice can be deleted. Cancel it first."
Press Cancel invoice first. Its sessions go back to To invoice.
It says the invoice still has a session or a payment on it.
Something was linked to it a moment ago, maybe on another device. Wait a minute and try again. If it keeps happening, email support@tutello.ae.
There's no Delete in your list of invoices.
It's there on a computer only, on cancelled invoices. On a phone, open the cancelled invoice and press Delete invoice.
After several wrong tries, password sign-in pauses, so sign in with Google or an email link and reset your password to turn it back on.
For tutors. Updated October 2026.
Where to find it
The sign-in page
Once you're in, Settings, then Profile, then Sign-in and security says whether it's paused.
Steps
On the sign-in page, press Continue with Google, or Use an email link instead and then Send sign-in link.
Google and the email link are never paused.
To turn password sign-in back on, press Sign in with a password, then Forgot password?.
Type your email and press Send reset link.
An email with a reset link arrives. The link works once and expires soon.
Open the link, type a new password and press Set new password.
Password sign-in works again, and you're signed out on every device.
Good to know
While it's paused, even the right password is refused.
The sign-in page gives the same answer for a wrong password and a pause, so nobody can learn which.
A reset always turns it back on.
Parents and students sign in on the same page, so the same applies to them.
If something's not right
"Wrong email or password. Try again or use an email link."
The email or the password is wrong, or password sign-in is paused. Make sure the email is the one you signed up with, or sign in with Google or an email link.
"Too many attempts. Try again later or use another way to sign in."
This page has seen several wrong tries. Use Google or an email link now, or reset your password.
"Password sign-in is paused after too many wrong tries. Reset your password to turn it back on."
Your Sign-in and security card says this. Press Forgot your password? there and follow the email.
"Someone recently entered wrong passwords for this account. You can still sign in."
Wrong passwords were typed from somewhere else. Your own sign-in still works. If it wasn't you, change your password.
Only invoices issued with Auto-send on are emailed by themselves; the invoice's page says whether it went, and Share sends it by hand.
For tutors. Updated October 2026.
Where to find it
On a phone
Billing, then Invoices, then the invoice
On a computer
Invoices, then the invoice
The Automatic email box under the sheet says what happened.
Steps
Open the invoice and read Automatic email.
It says Emailed, with who and when, or why it wasn't.
If there's no Automatic email box and the invoice reads Draft, press Save to issue it.
Auto-send was off, so the invoice waited for you. Saving it emails nothing.
Press Share, then Email to followed by the family's address, and Send email. Or share the PDF on WhatsApp.
Optional: To have the next one emailed by itself, switch on Auto-send in the family's Invoice settings.
Good to know
Only invoices the daily run issues with Auto-send on are emailed by themselves. An invoice you save yourself goes out only when you press Send email in Share.
The email goes to the family's own email addresses, never to a student in the family.
The PDF goes with it. When a name has characters the PDF can't show, the email goes without it.
If something's not right
"This family has no email address on file."
Add the parent's email with Edit on the family's page, then send this one with Share.
"This student hasn't joined the portal, so there was no email address."
An adult learner's invoice goes to the email they use for their portal. Invite them to the portal, and send this one with Share.
"It will be emailed in the next daily run."
It's queued and goes out with the next run. There's nothing to do.
It reads Email failed.
The email didn't go through. Tutello tries again in the next daily run, a few times at most. If the box says to send it with Share, do that.
It reads Email not confirmed.
Tutello couldn't confirm it went out, so it won't send it again. Ask the family, and if it didn't arrive, send it with Share.
It reads Emailed, but the family didn't get it.
It went to the addresses it names. Ask them to look in their spam folder, or send it again with Share.
A name or address in Arabic or another script can't be drawn in the PDF, so use Print or save as PDF, which keeps every character.
For tutors. Updated October 2026.
Where to find it
On a phone
Billing, then Invoices, then the invoice, then Share
On a computer
Invoices, then the invoice
Steps
Open the invoice.
On a computer, Print or save as PDF takes the place of PDF when the PDF can't be made.
On a phone, press Share, then Print or save as PDF. On a computer, press Print or save as PDF.
Your browser's print window opens with the invoice sheet only.
Choose to save it as a PDF, or print it on paper.
Optional: Send the file on WhatsApp or by email yourself.
Good to know
Tutello's PDF can draw Latin letters, accents such as é, and dashes and quote marks. Arabic, other scripts and emoji are the ones it can't.
It reads your business name, address and phone, the family's and parent's names, and the students' names on the invoice.
Parents see the same choice: where the PDF can't be made, their portal offers printing instead.
An email you send from Share then goes without the PDF, and says so before you send it.
If something's not right
"This invoice has characters the PDF can't show. Use Print or save as PDF instead."
Print it as in the steps above. If you'd rather have Tutello's PDF, write those names in Latin letters: your business name under Settings, the others on the family's or student's page.
"Too many PDF downloads. Try again in a few minutes. You can still copy the message."
Wait a little, then press Retry PDF. Copy message works meanwhile.
"Couldn't prepare the PDF. You can still copy the message."
A card with Arabic or another script in it can't be a PDF, so send it as a picture or as a portal link instead.
For tutors. Updated October 2026.
Where to find it
The published card, then Share
Steps
Open the card and press Share.
It says This card has Arabic in it. Use Save as image. and the picture comes first.
On a phone, press Share as image. On a computer, press Save as image.
Send the picture on WhatsApp or by email yourself.
Optional: Or press Send portal link for a parent with a portal login.
What parents see
No Download PDF on that card in their portal. Save as image comes first, and on a computer Print works too.
If the card changes after they opened it and its PDF can't be made, Download PDF says Couldn't make the PDF. Use Save as image. It says it in Arabic when they're reading the card in Arabic.
Good to know
The PDF draws Latin letters, accents such as é, and dashes and quote marks. Arabic, other scripts and emoji are what it can't draw.
It reads every word the PDF would print: the student's name, your words, topic names, test names and, on a Detailed card, the shared notes of each session.
Message in Arabic never stops the PDF: the PDF keeps its labels in English, and the picture follows the language you choose.
Before publishing, Preview shows it too, in the same words: its Picture tab shows what you can send.
If something's not right
"This card has Arabic in it. Use Save as image."
Send the picture or the portal link. If you'd rather have the PDF, write those words in Latin letters and publish an update. This card has characters the PDF can't show yet. means something else stops it, such as an emoji or a symbol like π.
"Sara's card has Arabic in it. Use Save as image."
Two cards are going in one message, and the line names the one that can't be a PDF. If it's Sara's, turn off Share Sara's card in the same message to send this card's PDF on its own, or send the picture. These cards have Arabic in them. means both can't.
"Too many PDF downloads. Try again in a few minutes."
Wait a little, then try again. The picture and the portal link work meanwhile.
"Couldn't make the PDF. Try again."
The connection dropped. Press the PDF button again.
Check the card is published, the parent has a portal login for that family, and the student hasn't moved since the card went up.
For tutors. Updated October 2026.
Where to find it
Report cards, then the card
Steps
Open the card. Its chip must read Published with a date.
Draft and Ready cards aren't in the portal yet. Publish it.
Read the list beside the card: Who can see it, or Who will see it while nobody can.
Each parent shows Has a portal login, when they joined, or No portal login yet.
Optional: Under someone with no login, press Invite to the portal.
Optional: For a student's own login, open their page, press Progress, and turn on Show report cards in Sara's own portal.
Optional: Once they can see it, press Share and send them the portal link.
Good to know
Parents see only the cards of the family their portal access is for. A student's own login sees only their own cards.
A card published before the student moved to another family, or started paying for themselves, reaches nobody any more. Make a new card for them where they are now.
Setting a student to Off doesn't hide cards you've published. Unpublish them to take them down.
A parent with children at several tutors sees each tutor's cards under that tutor's name, or only one tutor's if they chose one at the top of the portal.
Report cards appears in the portal's menu only once a card is there to read.
If something's not right
The list says Students see their own cards is off for Sara.
Turn on Show report cards in Sara's own portal on the student's Progress tab, or, if Sara has no setting of her own, Students see their own cards in Settings.
The card says nobody sees it now because the student moved.
It can't be updated or shared. Make a new card with New report.
The parent says the card was taken down.
The card was unpublished. Open it and publish it again.
Your currency locks after your first completed session, invoice or payment, because changing it would relabel amounts without converting them.
For tutors. Updated October 2026.
Where to find it
On a phone
Settings (tap your initials), then Profile
On a computer
Settings, then Profile
Steps
Open Settings, then Profile, and find Currency.
The line under it reads "Locked after your first completed session, invoice or payment."
If your account has none of these yet, choose the right currency and press Save changes.
If it has, and the currency was set wrong by mistake, email support@tutello.ae with the currency you need.
Good to know
Amounts are kept as plain numbers. Changing the currency would turn AED 1,470 into USD 1,470, not its value in dollars, so it locks once there's money in your account.
Scheduled and cancelled sessions don't lock it. A completed session, a late cancellation or a no-show does, and so does any invoice or payment, even an invoice you've since deleted.
You choose your currency when you set up your business. Families see it on every invoice and in their portal.
A parent whose tutors use different currencies sees each tutor's amounts apart, never added together.
If something's not right
Saving shows a line under Currency saying it can't be changed.
Your account already has a completed session, an invoice or a payment in this currency. If it was set wrong, email support@tutello.ae.
Open the link your tutor sent, sign in, accept, and your portal opens with your child's schedule and billing.
For parents. Updated October 2026.
Where to find it
The invite link your tutor sent you by email or WhatsApp
Already signed in? An invite sent to your email also waits on your portal's Home, under Pending invites.
Steps
Open the invite link.
It shows your tutor's business name and what you'll see as a parent: the schedule, billing and shared notes.
Press Sign in to accept.
The sign-in page opens.
Press Continue with Google, or type your Email, press Send sign-in link and open the link in the email.
You come back to the invite, signed in.
The first time, choose your country and type Your mobile number.
Each mobile number can have only one Tutello account.
Press Accept invitation.
Your portal opens.
Good to know
Accepting means you agree to the Portal Terms and the Privacy Policy.
Already use Tutello with another tutor? Sign in with the same email, so both tutors are in one account.
An invite link works once, for two weeks. Keep it to yourself: whoever is signed in when it's accepted gets the access.
Already signed in on this phone? The invite skips sign-in, so check it's your own account before you accept.
If your tutor found you by your mobile number, your portal says you're waiting for them to confirm it's you. You see their schedule and billing once they do.
Not for you? Press Decline. Nothing is shared.
If something's not right
"This invite link is no longer valid"
It was already used, declined or cancelled, or it's more than two weeks old. Ask your tutor for a new one.
"This mobile number already has a Tutello account. Sign in with the email you used for it."
Press Sign in with another email and sign in with the email that account uses. You come back to the invite. If you share this phone with someone in your family, type your own mobile number instead. Not your account? Email support@tutello.ae.
"Enter a phone number with a country code, e.g. +971 50 123 4567"
Choose your country in the list first, then type the rest of the number.
"This family is no longer active. Ask your tutor."
Your tutor has made this family inactive. The same link works again once they make it active, if it's less than two weeks old.
Sign in on tutello.ae/login with Google, an email link or a password, using the email you accepted your invite with.
For parents. Updated October 2026.
Where to find it
tutello.ae/login, or Sign in on tutello.ae
Before you start
You've accepted your tutor's invite. The first time, always start from the invite link.
Steps
Open tutello.ae/login.
It's the same page for tutors, parents and students. Tutello knows which you are from your email.
Press Continue with Google if your account uses your Google email.
Or type your Email and press Send sign-in link, then open the link in the email on this phone or computer.
The link signs you in where you open it.
Optional: If you've set a password, press Sign in with a password instead, type your Email and Password, and press Sign in.
Good to know
Use the email your account has. Every tutor you're with is in that one account.
To sign in with a password next time, set one in your portal's Profile, under Sign-in and security.
Forgot it? Press Forgot password? on the password form, or use an email link instead.
If something's not right
"That sign-in link has expired or was already used. Request a new one below."
Each link works once and not for long. Type your email and press Send sign-in link again.
"Wrong email or password. Try again or use an email link."
Check both, or press Use an email link instead. After several wrong tries password sign-in pauses: use an email link, or reset your password from Forgot password?.
"That Google account can't sign in here. Use an email link instead."
That Google account isn't the email your account uses. Type your email and press Send sign-in link.
"No portal access"
This email has no access yet, or your tutor removed it. Sign out and sign in with the email you accepted with, or ask your tutor for a new invite.
Tutello asks me to set up my account as a tutor.
That email has no invite, so it opened a tutor account. Sign out, open your tutor's invite link and sign in from there with the email they have for you. Email support@tutello.ae to remove the extra account.
Why your portal asks you to accept its terms, and what you agree to in plain words.
For parents. Updated October 2026.
Where to find it
When you accept an invite, and on Before you continue if the terms change
Steps
Accept your tutor's invite.
Accepting means you agree to the Portal Terms and the Privacy Policy. You accept them once.
If the Portal Terms change in a way that matters, your portal opens on Before you continue. Press Portal Terms to read them.
Nothing in your portal shows until you answer.
Press Accept and continue.
Your portal opens.
Optional: Not ready? Under Not ready to accept?, press Sign out.
Nothing is recorded, and the same screen shows next time you sign in.
Good to know
The portal is read-only. You see what your tutor records, and you can't book, move or cancel a session in it.
A parent sees the family's schedule, shared notes, invoices, payments, balance and report cards. A student who pays for their own sessions sees the same for themselves. A student in a family sees only the schedule, shared notes and, when their tutor allows it, their own report cards.
Tutello is free for you and never takes a payment from you. You pay your tutor the way you agreed with them.
Your tutor decides what's recorded. If something is wrong, ask them first, then support@tutello.ae.
Your invite is personal. Don't forward it or share your sign-in.
Each mobile number holds one parent account. A tutor who types your number learns that it's already on Tutello and at most your name, never your email or your other tutors.
Each tutor's information stays separate and is never combined.
Students see the same screen when the terms change.
Your mobile number holds one Tutello account, and you use that same account for every tutor.
For parents. Updated October 2026.
Where to find it
Your mobile number, the first time you accept an invite
Steps
The first time you accept an invite, type Your mobile number.
Each mobile number can have only one Tutello account.
When another tutor invites you, sign in with the same email and accept.
Their schedule and billing join the same portal, kept apart from your first tutor's.
Good to know
You're asked for your mobile once. After that, accepting an invite never asks again.
Tutello ties your number to your account only when a family you join lists it as a parent's number.
A tutor who types your number learns that it's already on Tutello, and at most your name. Never your email or your other tutors.
Tutello sends no text messages and never asks you for a code.
A student can give the same mobile as a parent.
To change your mobile, email support@tutello.ae.
If something's not right
"This mobile number already has a Tutello account. Sign in with the email you used for it."
If you saw this on an invite link, press Sign in with another email and sign in with the email you used before: the link opens again. If you saw it on an invite in your portal, ask your tutor to send the invite to that email. If you share this phone with someone in your family, type your own mobile number instead.
I don't remember which email I used.
Email support@tutello.ae from an address you use. Support can look into who holds the number.
My number is held by an account that isn't mine.
Email support@tutello.ae. You're told nothing about that account, and it gets nothing from your invite.
Your own sessions and the notes your tutor shares with you, on your phone or computer.
For students. Updated October 2026.
Where to find it
Your portal's Home and Schedule
Steps
Open the invite link your tutor sent you.
It shows what you'll see as a student: your schedule and the notes your tutor shares.
Press Sign in to accept and sign in.
You come back to the invite.
The first time, type Your mobile number.
Press Accept invitation.
Your portal opens on Home, where Next session says when your next session is.
Optional: Press Add to calendar to save that session in your calendar.
Further down Home, read the notes your tutor shares after a session.
Press Schedule to see all your sessions, coming and past.
Good to know
You see your own sessions only, never a brother's or sister's.
Only notes your tutor chooses to share show here. Their private notes never do.
Your portal has Home and Schedule, Report cards once your tutor publishes one you can see, and your Profile under your initials. See Read your report cards.
Times are in your tutor's time zone.
The portal is read-only. To move or cancel a session, ask your tutor.
Choose light or dark in your Profile, under Appearance.
If something's not right
"This invite link is no longer valid"
It was already used or cancelled, or it's too old. Ask your tutor for a new one.
A session is missing or at the wrong time.
Your tutor keeps the schedule. Ask them to correct it.
Start from your tutor's invite link with the email they invited, or ask them to send the invite again.
For students. Updated October 2026.
Where to find it
The invite link your tutor sent, then tutello.ae/login every time after
Steps
Find the invite your tutor sent you, by email or in a message, and open its link.
Press Sign in to accept.
Press Continue with Google, or type your Email and press Send sign-in link, then open the link in the email.
You come back to the invite, signed in.
Press Accept invitation.
Your portal opens. Next time, sign in on tutello.ae/login with the same email.
Good to know
Use the same email every time. Your portal belongs to the email you accepted the invite with.
A sign-in link from the email works once and not for long. Ask for a new one if it's old.
An invite link works for two weeks, and only once.
If something's not right
"This invite link is no longer valid"
It was already used or cancelled, or it's more than two weeks old. Ask your tutor for a new one.
"That sign-in link has expired or was already used. Request a new one below."
Type your email and press Send sign-in link again, then open the newest email.
The sign-in email doesn't arrive.
Look in your junk or spam folder. If the address was wrong, press Use a different email and type it again.
"No portal access"
This email has no portal yet. Sign out, then sign in with the email you accepted the invite with, or open the invite link again.
Tutello asks me to set up my account as a tutor.
You signed in with an email that has no invite. Sign out, open your tutor's invite link and sign in from there. Email support@tutello.ae to remove the extra account.